Posted on

Crochet Bag Guide | Styles, Yarn, Handles & Lining

Crochet bag guide with handmade tote bags, purses, yarn, handles and lining materials

Crochet Bag Guide

Crochet Bag Guide: Styles, Yarn, Stitches, Handles & Lining

A crochet bag can be soft and relaxed, firm and structured, tiny enough for essentials or large
enough for shopping and beach days. The best result comes from matching the bag style with the right yarn,
stitch texture, construction method and finishing details.

This guide explains the practical choices behind crochet totes, purses, crossbody bags, market bags,
drawstring pouches and granny-square styles. If you are still learning the basic stitches or getting used
to hook and yarn tension, start with our
Crochet for Beginners guide first, then come back here when you are ready to
turn those skills into a wearable project.

What makes a crochet bag work well

  • Choose a yarn that suits how much structure and stretch you want.
  • Use a stitch pattern dense enough for the bag’s purpose.
  • Plan the base, sides and opening before deciding on handles or straps.
  • Add lining or internal support when you want a more polished, stable finish.
  • Reinforce handles and attachment points because they carry most of the load.

Bag Styles

Popular Crochet Bag Styles to Explore

The bag books in this collection cover everything from crossbody purses and clutches to totes, market
bags and small drawstring pouches. The construction choices change depending on what the bag needs to do.

Crochet Tote Bag

A tote usually needs a roomy body, a stable opening and handles that can carry weight without stretching
too much.

Crossbody Bag

Crossbody styles benefit from a firmer fabric, a secure closure and a strap that keeps its length during use.

Market or Beach Bag

These can be more open and flexible. Mesh or lacy stitch patterns make the bag lighter, while stronger
yarn helps control excessive stretching.

Clutch or Small Purse

Smaller bags are a good place to experiment with texture, color, decorative closures, tassels and
interesting handles.

Drawstring Pouch

A drawstring creates both the closure and part of the design. The top edge needs enough structure to
open and close smoothly.

Granny Square Bag

Motifs can be joined into totes, purses and shoulder bags. The final shape depends on how many squares
are used and how they are arranged.
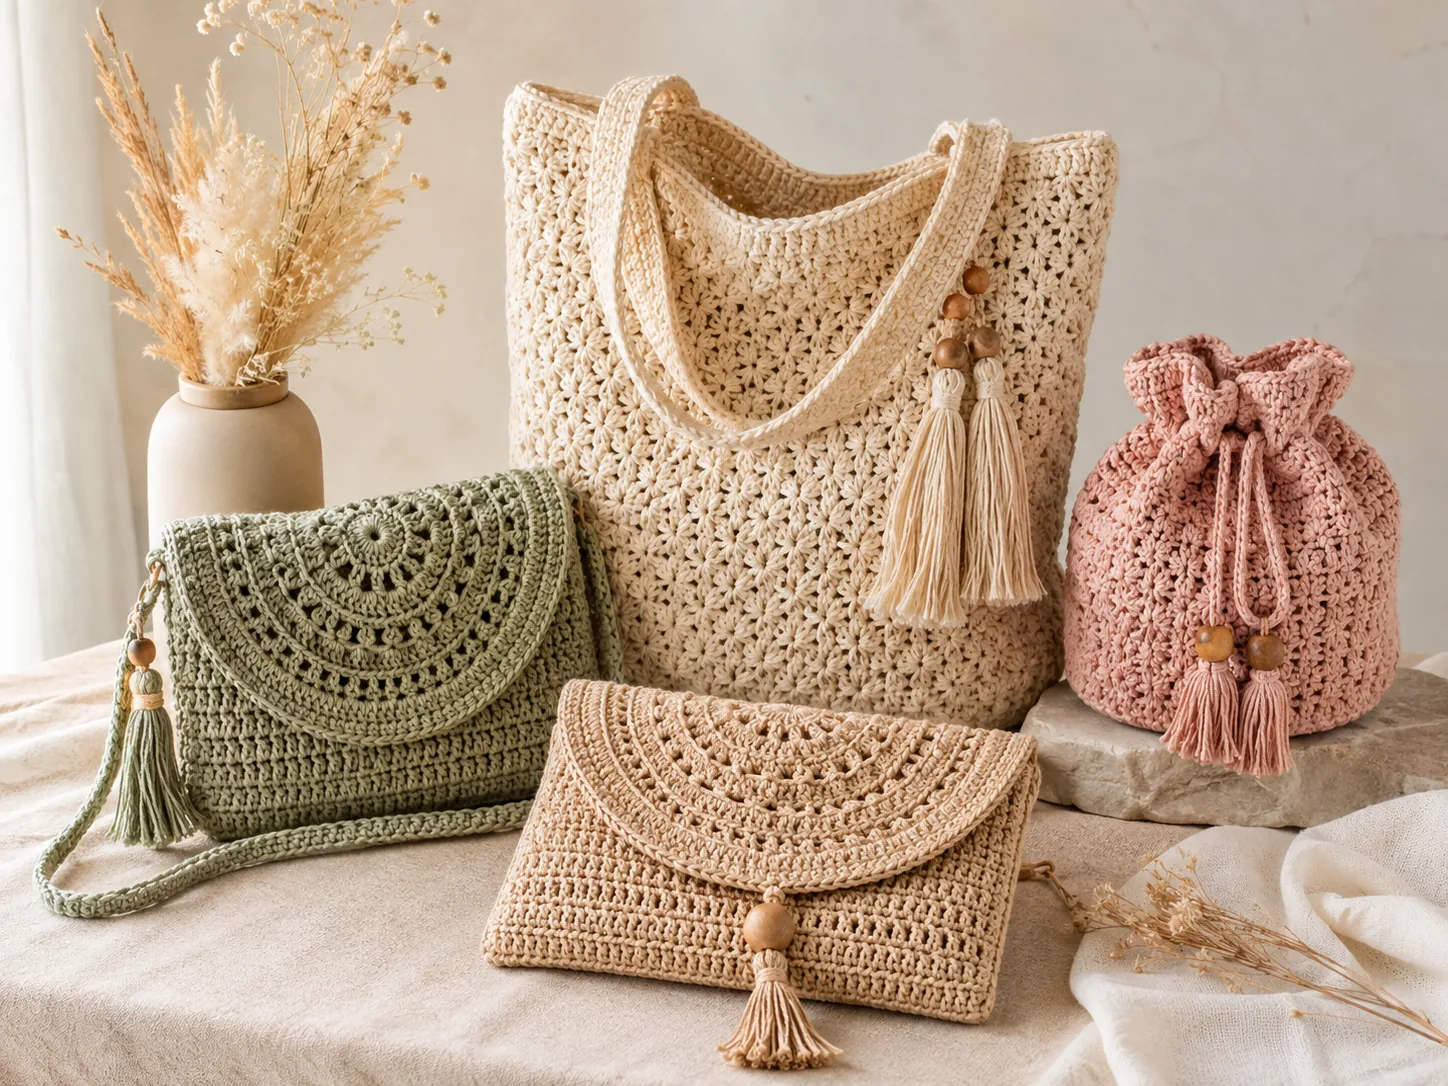
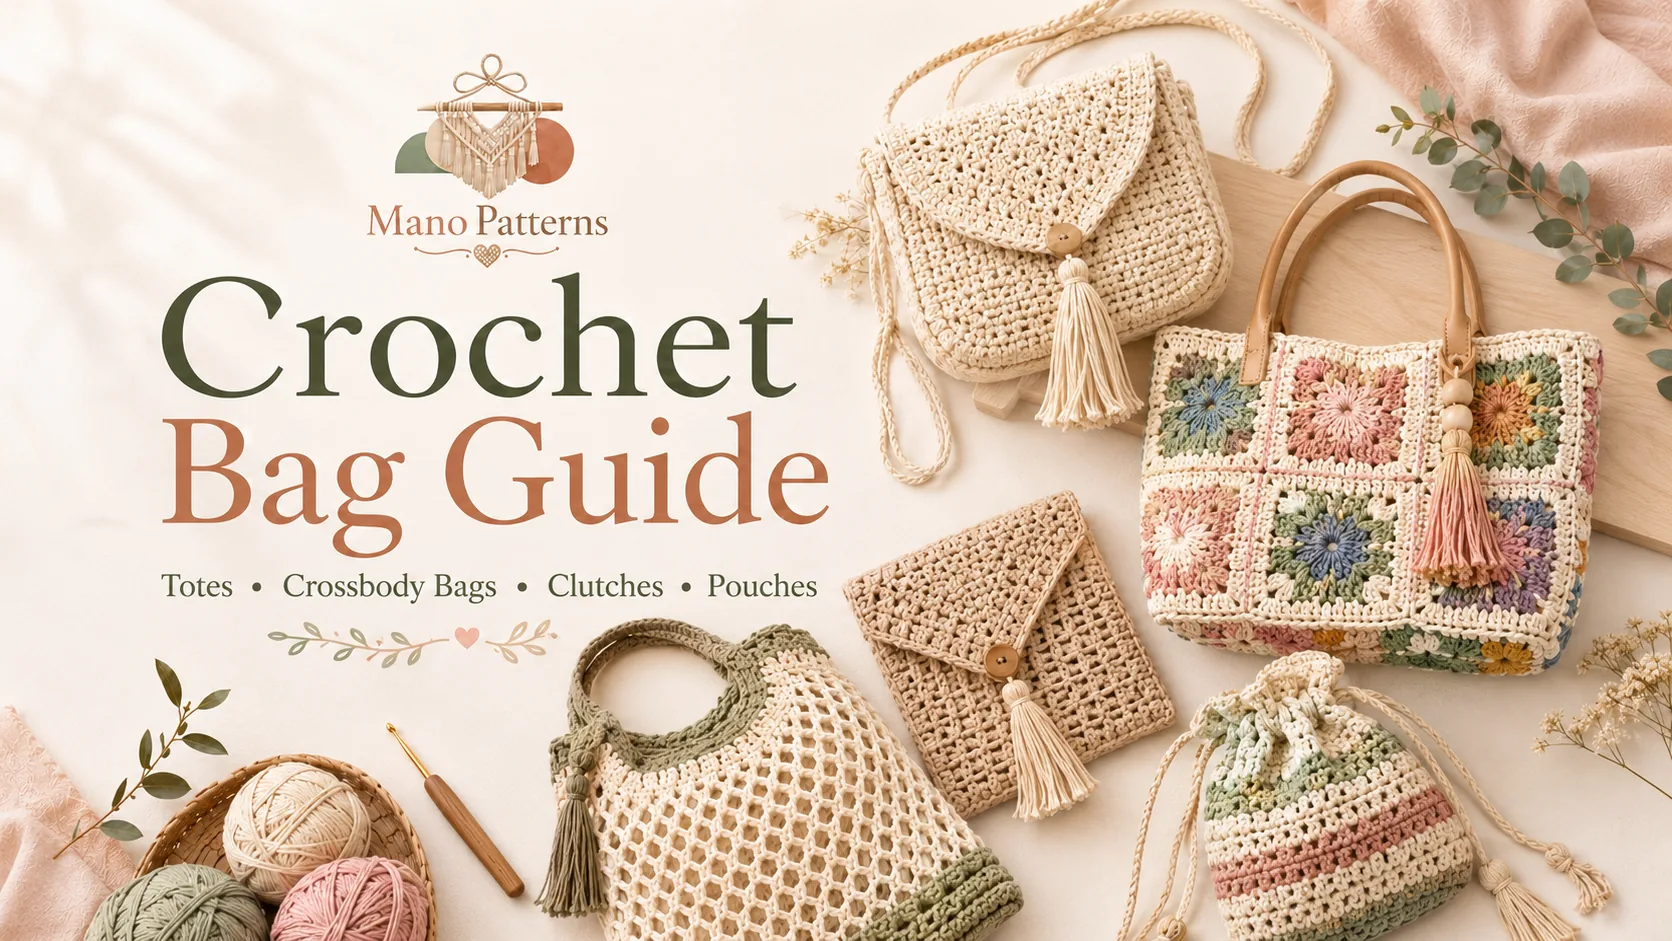
Handmade tote, crossbody, clutch and drawstring bag styles in cream, sage and blush tones

Choose the bag shape first, then match the yarn, stitch and finishing method to it.

You can browse the growing
Crochet Guides, Tutorials & Patterns hub
whenever you want to move between beginner skills and more project-focused guides.

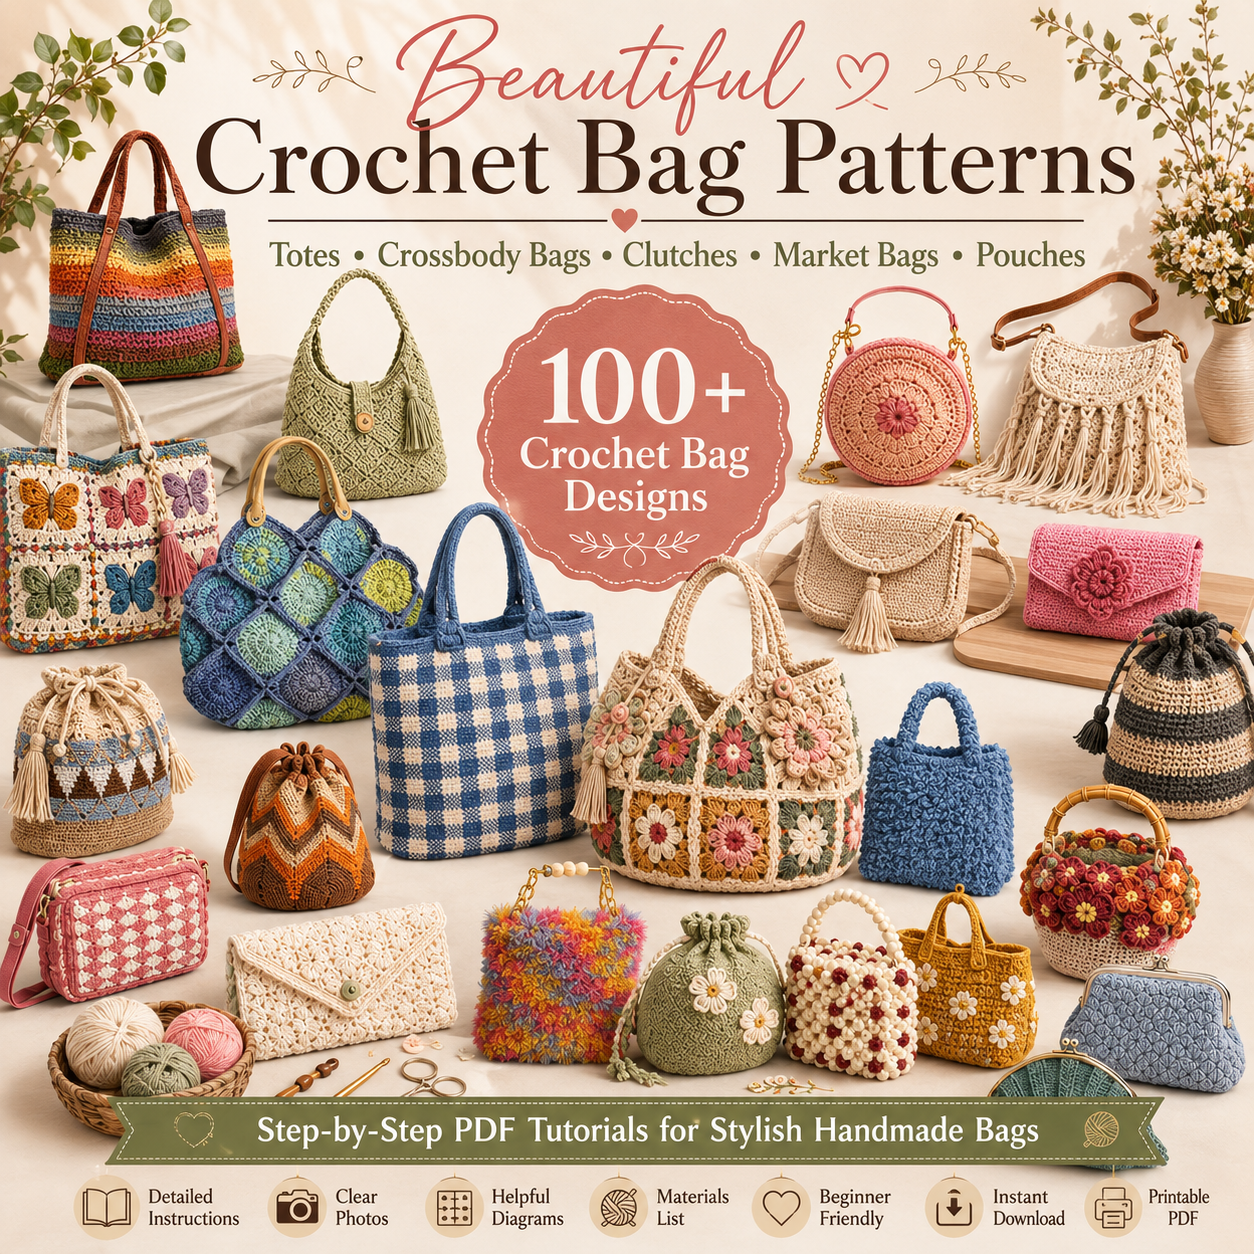
100+ Crochet Bag Patterns

Find a Bag You Want to Make

Explore 100+ crochet bag patterns for totes, purses, market bags, shoulder bags and more.

BROWSE 100+ BAG PATTERNS →

100 plus crochet bag patterns collection with totes purses and handmade bags

Materials

Best Yarn Choices for a Crochet Bag

Yarn affects far more than color. It changes stretch, weight, durability, stitch definition and how much
support a finished bag may need.

Cotton and cotton blends

Cotton is popular for bags because it shows stitch texture clearly and usually creates a more stable
fabric than very elastic yarns. It works especially well for totes, market bags and summer styles.

Nylon and strong synthetics

Some bag designs use nylon for extra durability and a firmer finish. This can be useful for structured
purses or straps that need to resist wear.

Wool and acrylic

These can create softer, cozier bags, but the amount of stretch depends on the yarn and stitch pattern.
A lining can help control movement.

Raffia, cord and specialty yarns

Firmer materials can give summer bags and structured totes a crisp shape, but they may feel stiffer in
the hands while crocheting.

Think about use, not just appearance: a bag carrying a phone, wallet and keys needs different
strength from a light decorative pouch.
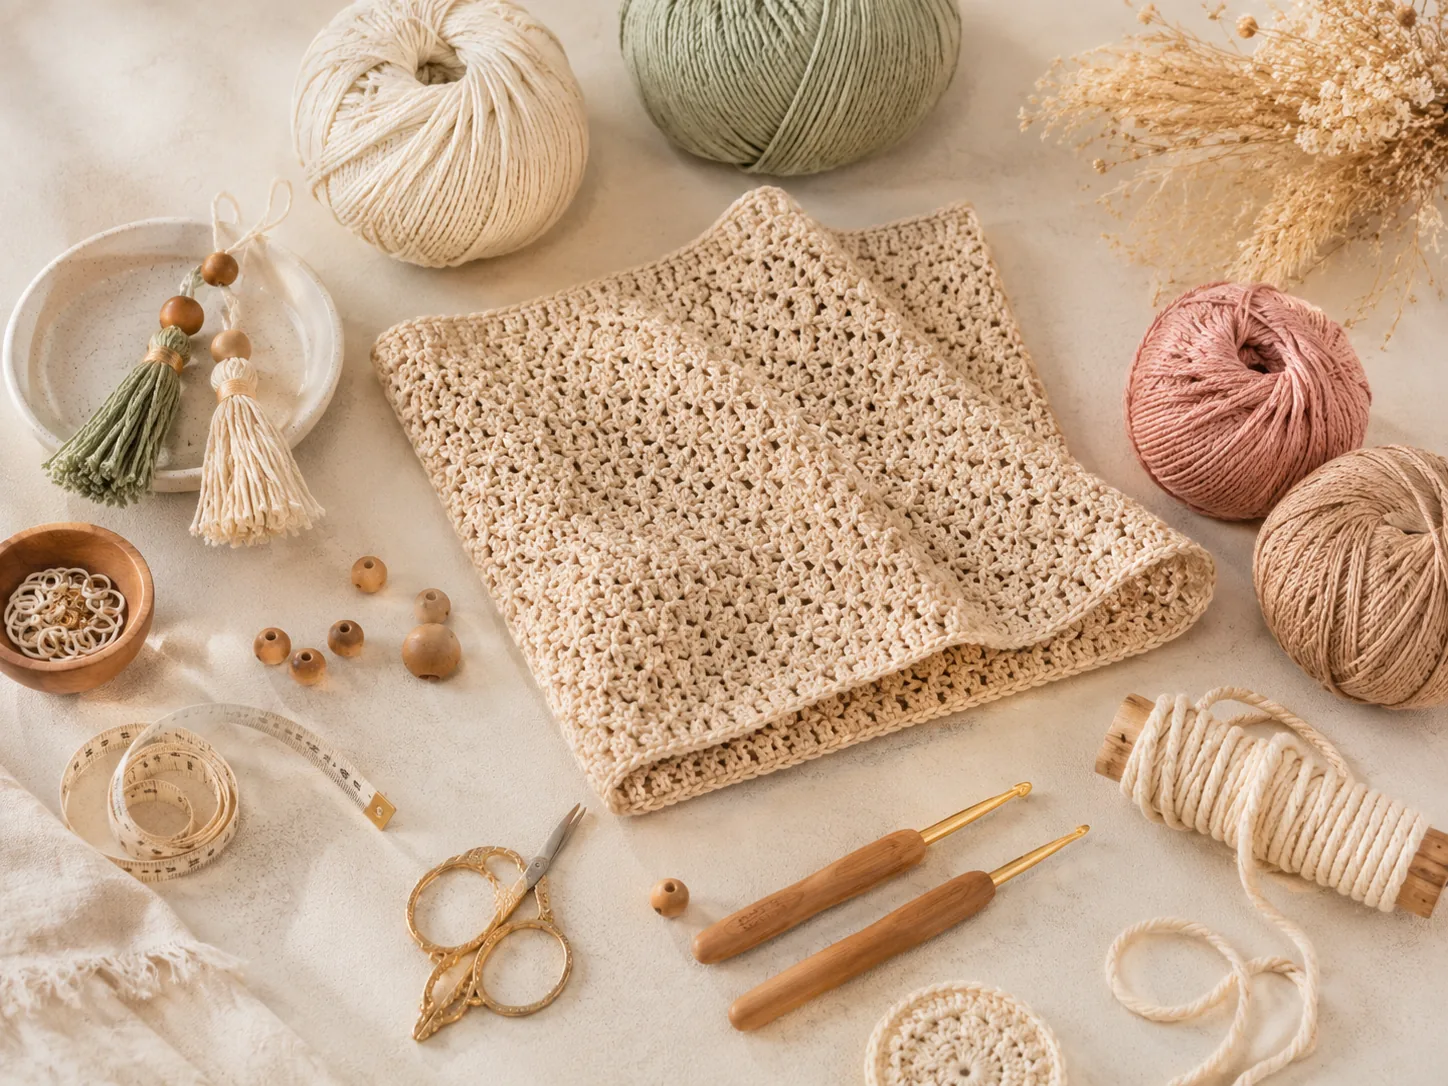
Yarn, crochet hooks, beads, tassels, measuring tape and bag-making materials on a neutral workspace

Bag yarn should be chosen for strength, stretch and structure as well as color.

If you are unsure how yarn weight and hook size work together, the yarn section in our
beginner crochet guide explains the basics before you start a larger bag project.

Fabric & Texture

Crochet Stitches That Work Well for Bags

The stitch pattern controls how dense, flexible and stretchy the bag fabric becomes.

Single Crochet

A dense basic stitch that works well when you want a firmer fabric and fewer gaps.

Half Double Crochet

Slightly taller and softer than single crochet while still creating a relatively solid fabric.

Double Crochet

Faster to build and more flexible, but it naturally creates more openness and may stretch more in a bag.

Mesh & Lace

Useful for market and beach bags when airflow and lightness matter more than keeping tiny items contained.

Textured Stitches

Raised or patterned stitches add visual interest but can use more yarn and create extra weight.

Granny Squares

Joined motifs combine color and structure. Seams and joins should be strong because they become part
of the bag’s load-bearing fabric.

Test the fabric before committing

Crochet a small swatch and pull it gently in several directions. A stitch that looks perfect lying flat may
behave very differently once the bag is carrying weight.

Construction

How Crochet Bags Are Commonly Constructed

There is no single construction method. Some bags are worked in one piece, while others use separate
panels, motifs or a shaped base that are joined later.

Flat Panels

Front and back panels can be crocheted separately and joined at the sides and base. This method makes
it easy to control the bag dimensions.

Base + Sides

A rectangular, oval or round base can be built first, then the body is worked upward from its edge.

Continuous Rounds

Working in rounds reduces seaming and is common for totes, bucket bags and market bags.

Joined Motifs

Granny squares or other motifs can be assembled into the final shape. Planning the layout first helps
avoid awkward seams or mismatched edges.
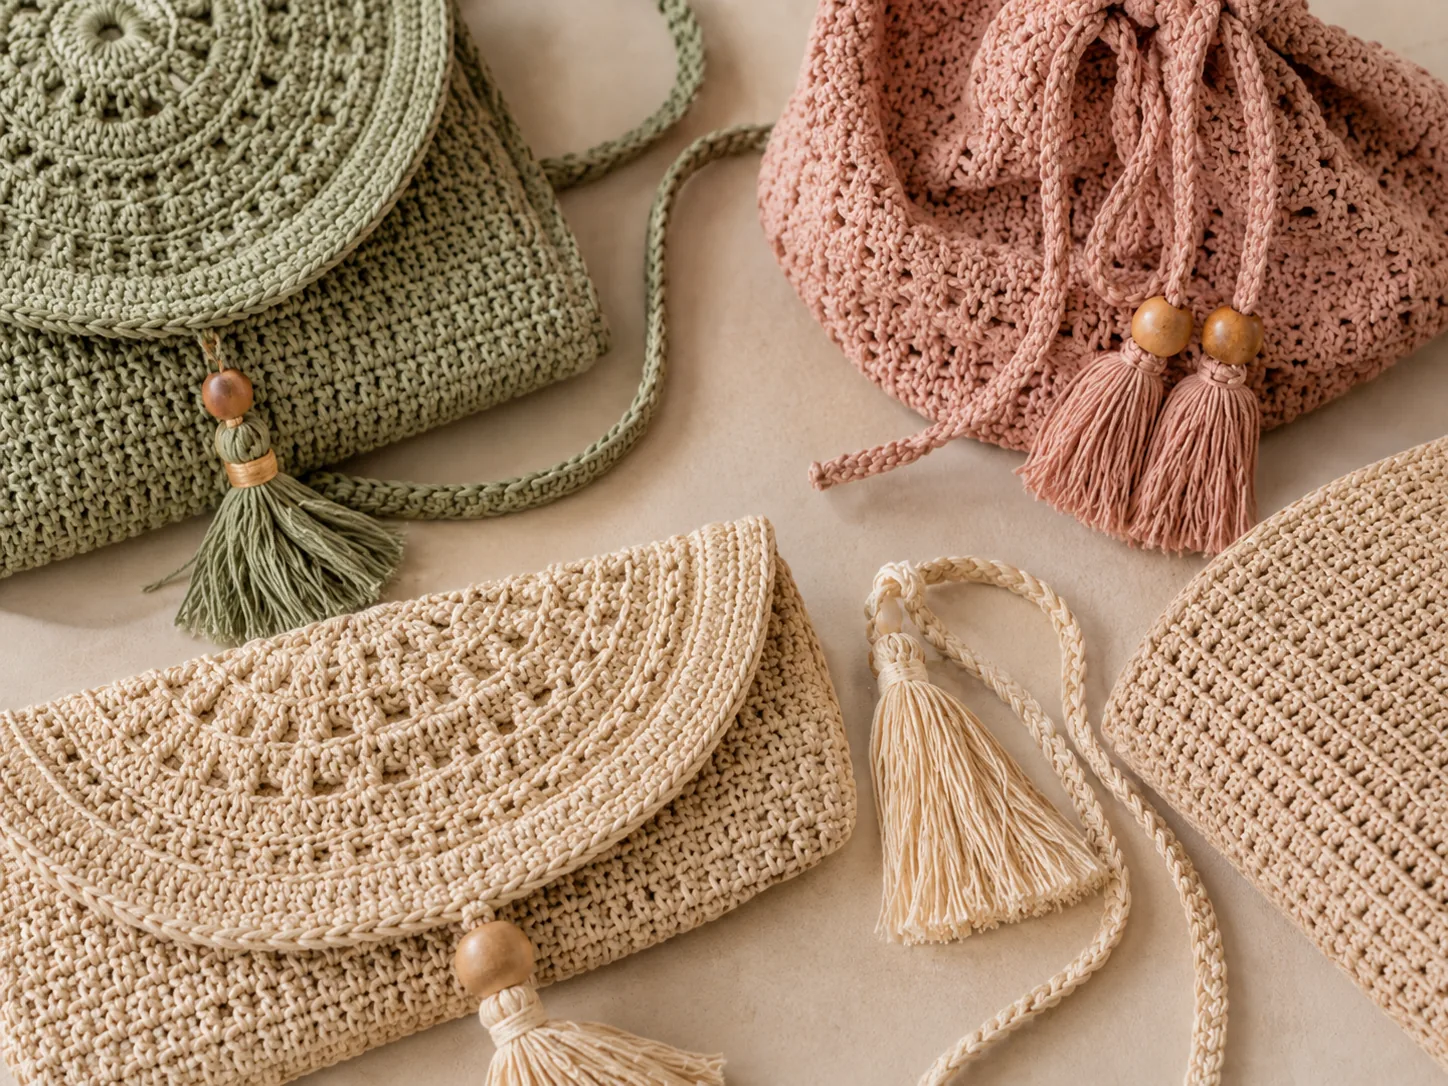
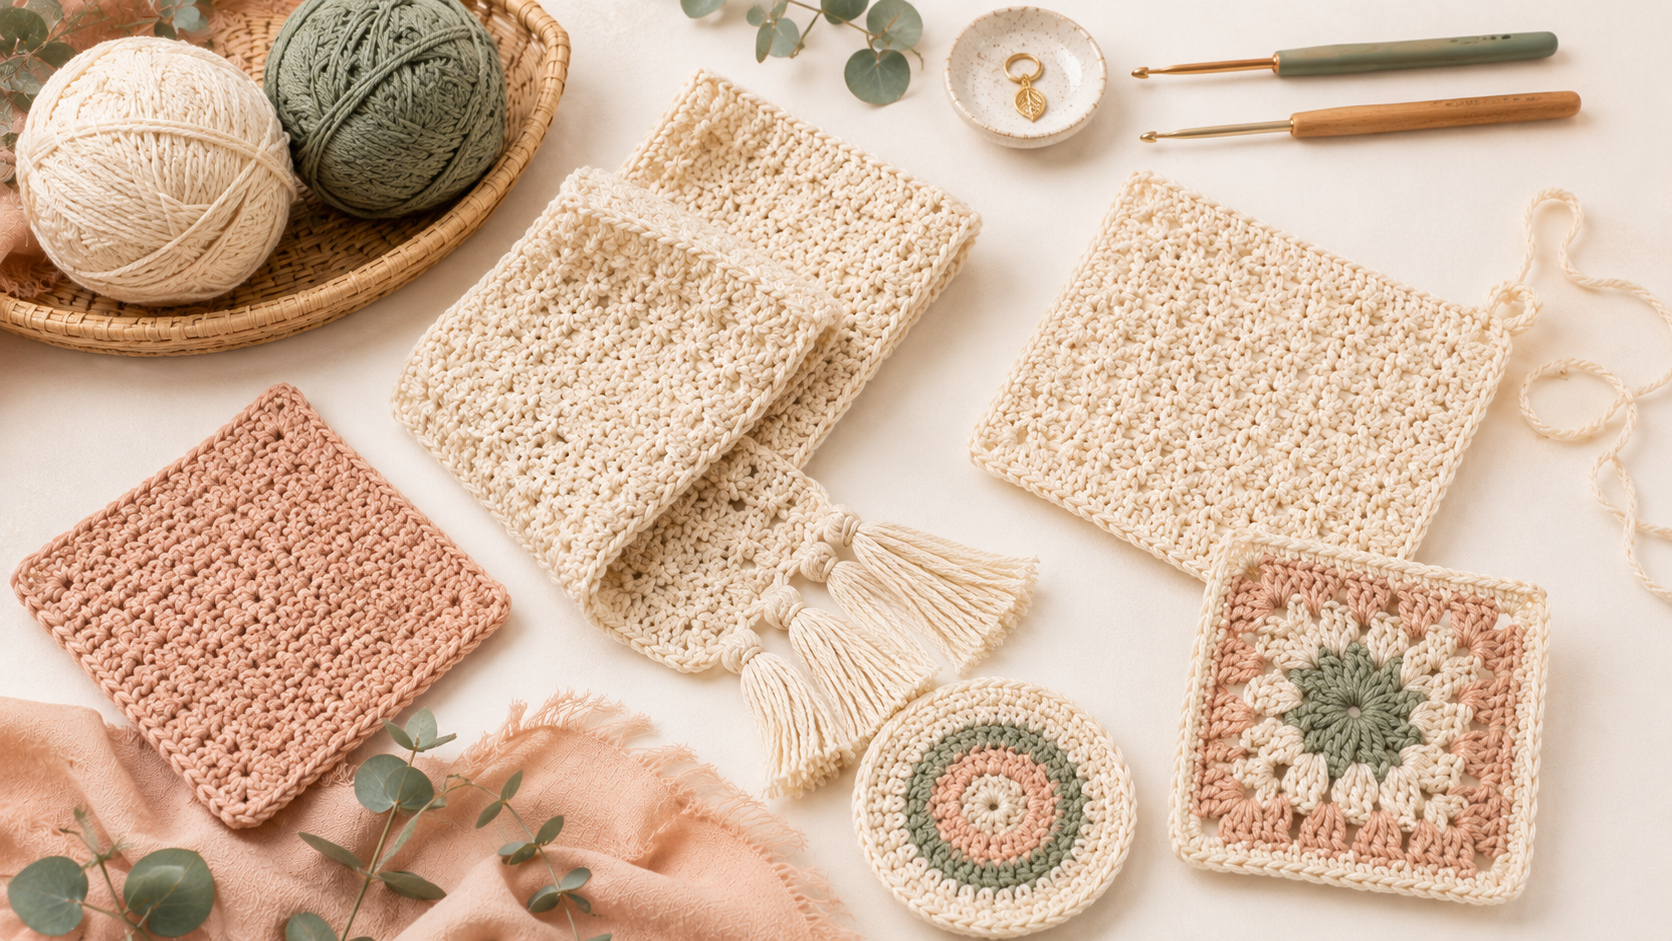
Crocheted bag panels and accessories showing different construction textures and shapes

Construction method affects the bag shape, seams, stability and finishing work.
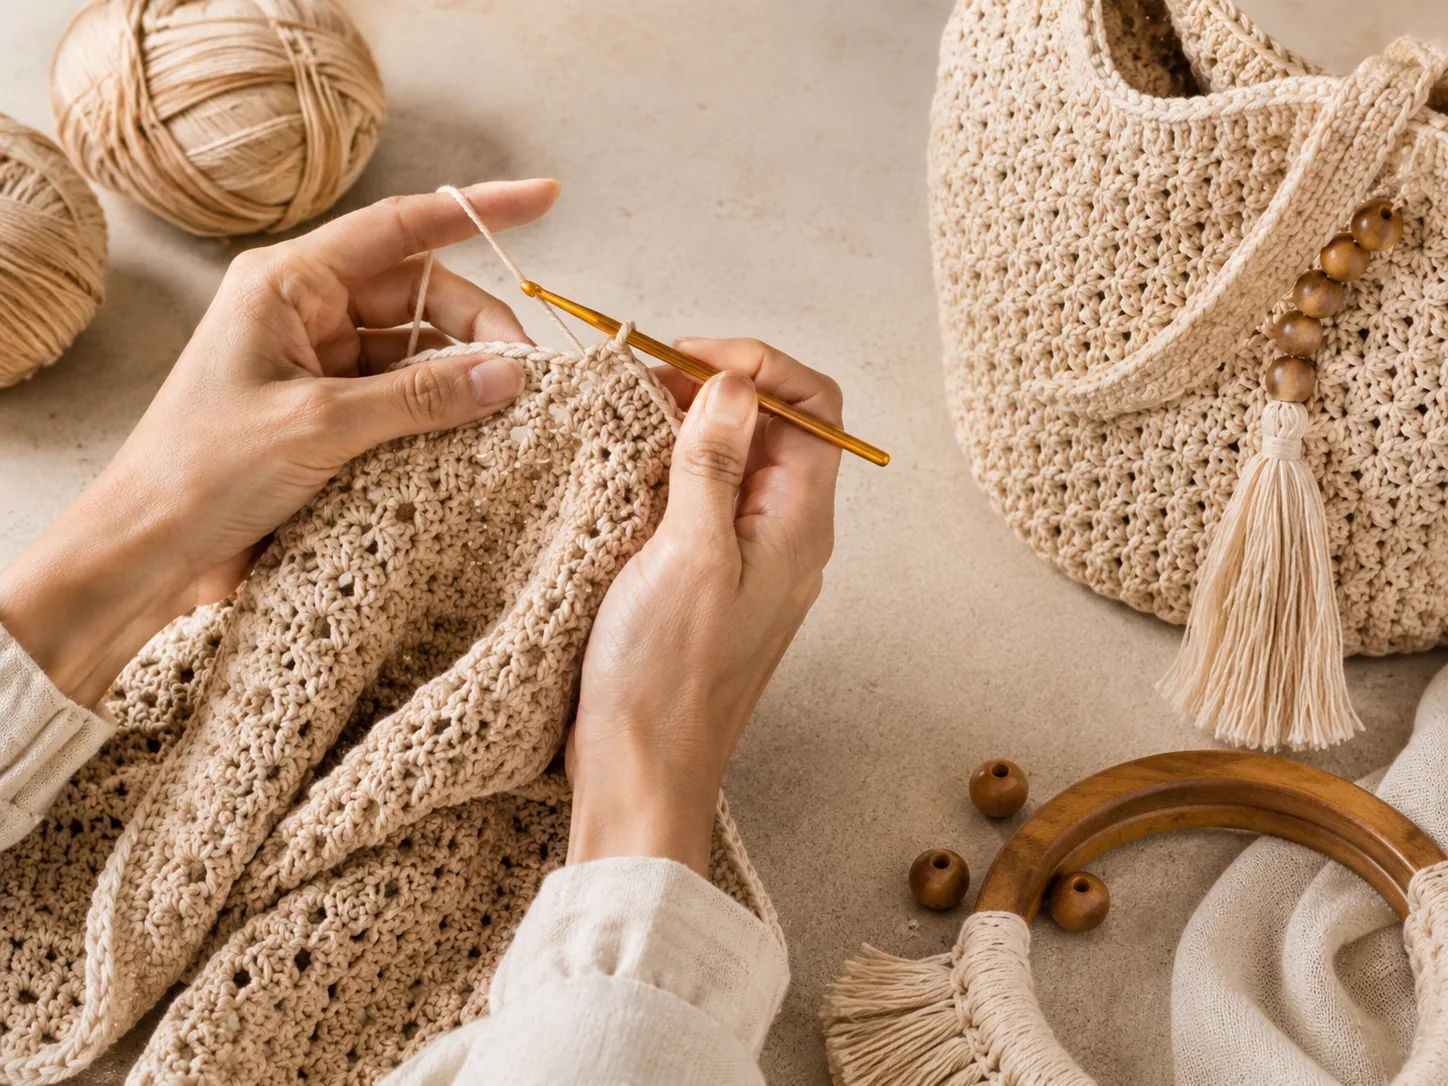
Hands crocheting a bag panel beside yarn, wooden handles, beads and a finished tote

Working slowly through the body, joins and handle areas helps keep the finished bag even and strong.

Crochet Bag Pattern Collection

Ready to Start Your Next Bag?

Choose from 100+ bag designs and find a style that fits your next project.


SEE THE BAG COLLECTION →

Crochet bag pattern bundle with tote purse and shoulder bag designs

Handles & Straps

How to Keep Crochet Bag Handles from Stretching

Handles often receive more stress than any other part of the bag, so this is where reinforcement matters most.

Crocheted handles

Keep them relatively dense and avoid very stretchy stitch patterns. Shorter handles usually show less
elongation than long shoulder straps.

Purchased handles

Wooden, bamboo, metal, leather-look and other ready-made handles can give the bag more structure and
change the overall style.

Reinforce attachment points: whether the handle is crocheted or purchased, spread the load
across several stitches instead of attaching it to a tiny area.

Finishing

Should You Line a Crochet Bag?

Not every crochet bag needs a lining, but lining can make a soft handmade bag feel dramatically more stable
and practical.

What lining can do

It helps keep small items from poking through open stitches, reduces stretching, hides the inside seams
and gives pockets or closures a stable surface.

Extra support

Structured bags may also use a firmer insert in the bottom. Some published bag projects suggest materials
such as felt, canvas or plastic canvas to increase stability.
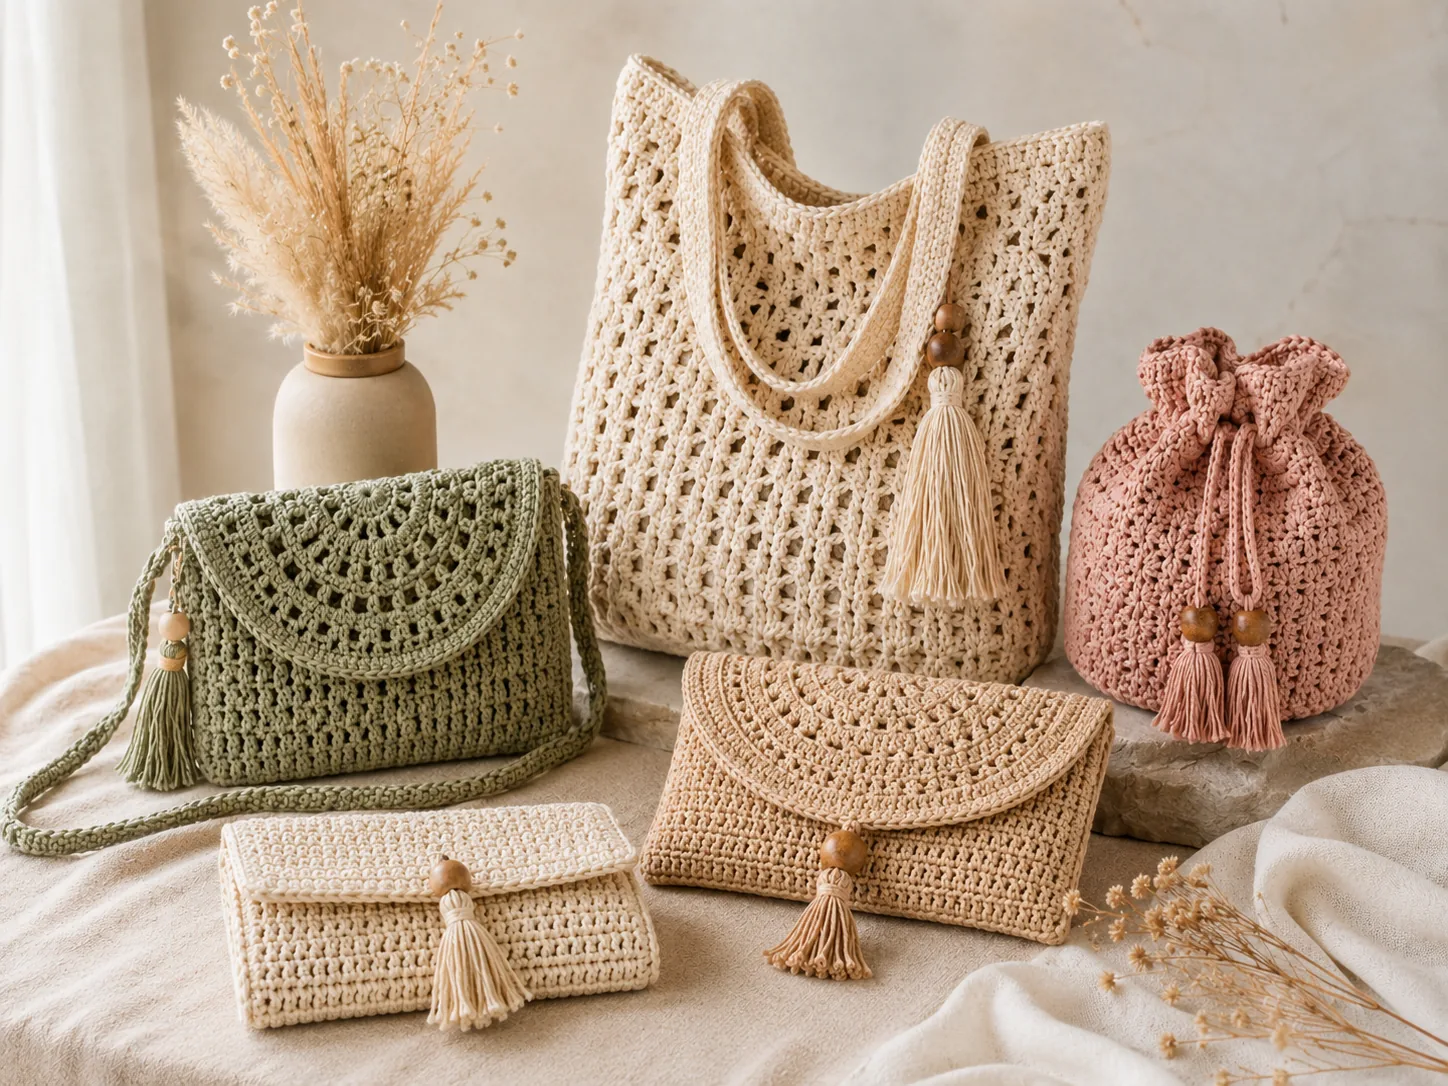
Finished handmade bags showing handles, straps, drawstrings, tassels and structured shapes

Lining, reinforced bases and secure handles can turn a soft crochet piece into a practical everyday bag.

Closures & Details

Closures and Finishing Details for Crochet Bags

Drawstrings

Simple and flexible for pouches, bucket bags and casual styles.

Buttons

Useful for flaps and smaller bags when you want a lightweight closure.

Zippers

Provide a secure opening and usually work best when attached to a stable lining or reinforced edge.

Magnetic Snaps

Give totes and purses a neat closure without changing the exterior appearance too much.

Tassels & Charms

Decorative additions can change a simple base design without changing the bag construction.

Edging

A firm border around the opening can make the top edge look cleaner and resist stretching.

More Crochet Bag Ideas

Explore the Full 100+ Bag Collection

Totes, purses, market bags, clutches and more — all together in one digital collection.


EXPLORE 100+ BAG PATTERNS →

Digital crochet bag pattern collection with many handmade bag styles

Troubleshooting

Common Crochet Bag Problems and How to Prevent Them

The bag stretches too much

Use a denser stitch, firmer yarn, tighter gauge, lining or internal support depending on the design.

The handles keep getting longer

Use less-stretchy construction, reinforce the strap or switch to purchased handles for more stability.

The base sags

A denser base, lining or removable structural insert can help distribute the weight more evenly.

The opening curls or collapses

Add a firmer final round, edging, lining support or hardware depending on the style.

Crochet Bag FAQ

Common Questions About Crochet Bags

What yarn is best for a crochet bag?

It depends on the style, but stable yarns such as cotton, cotton blends, nylon, cord or raffia are
popular when the bag needs durability and structure.

What is the easiest crochet bag for a beginner?

A simple rectangular tote or small pouch using a basic dense stitch is easier than a highly shaped bag
with complex hardware. If basic stitches still feel unfamiliar, review the
Crochet for Beginners guide before starting.

Do crochet bags need lining?

No, but lining can reduce stretch, stop small items from slipping through the stitches and give the bag
a cleaner interior finish.

Can you make a crochet bag with granny squares?

Yes. Joined granny squares can form totes, shoulder bags and purses. Strong joins and a planned layout
are important because the seams become part of the structure.

How do you make a crochet bag more sturdy?

Use a firmer yarn, dense stitch pattern, strong seams, reinforced handles and—when appropriate—a lining
or base insert.

800+ Crochet Patterns

Want More Than Bags?

Explore the full crochet collection with bags, blankets, granny squares, tops, baby projects and more.
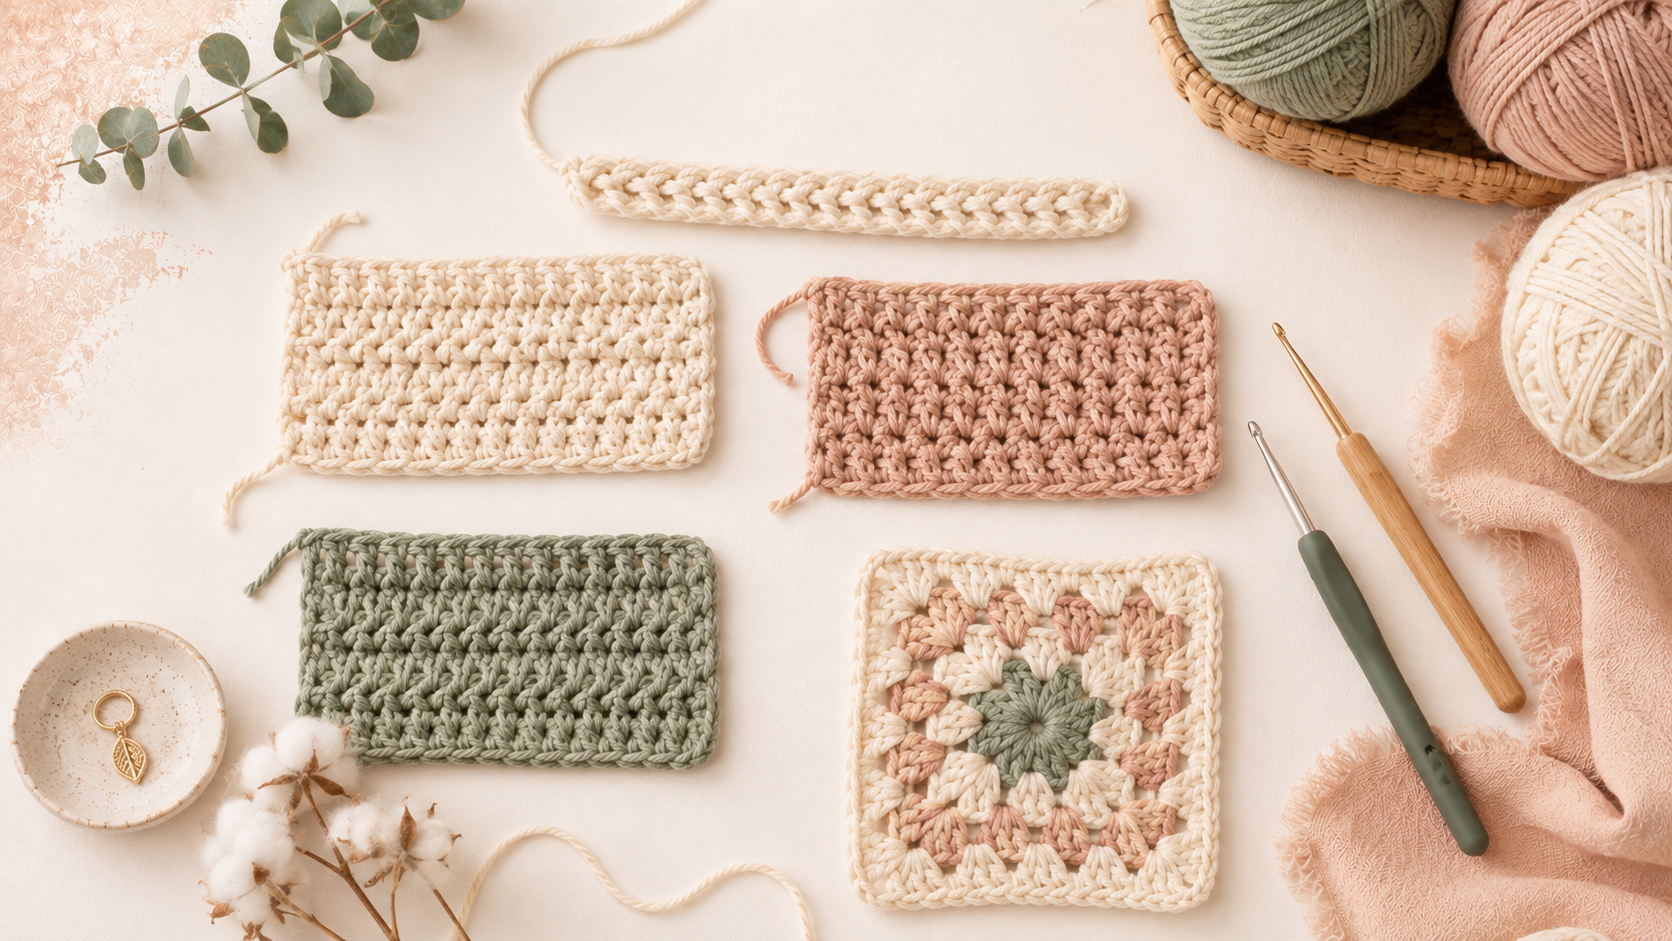
EXPLORE 800+ CROCHET PATTERNS →

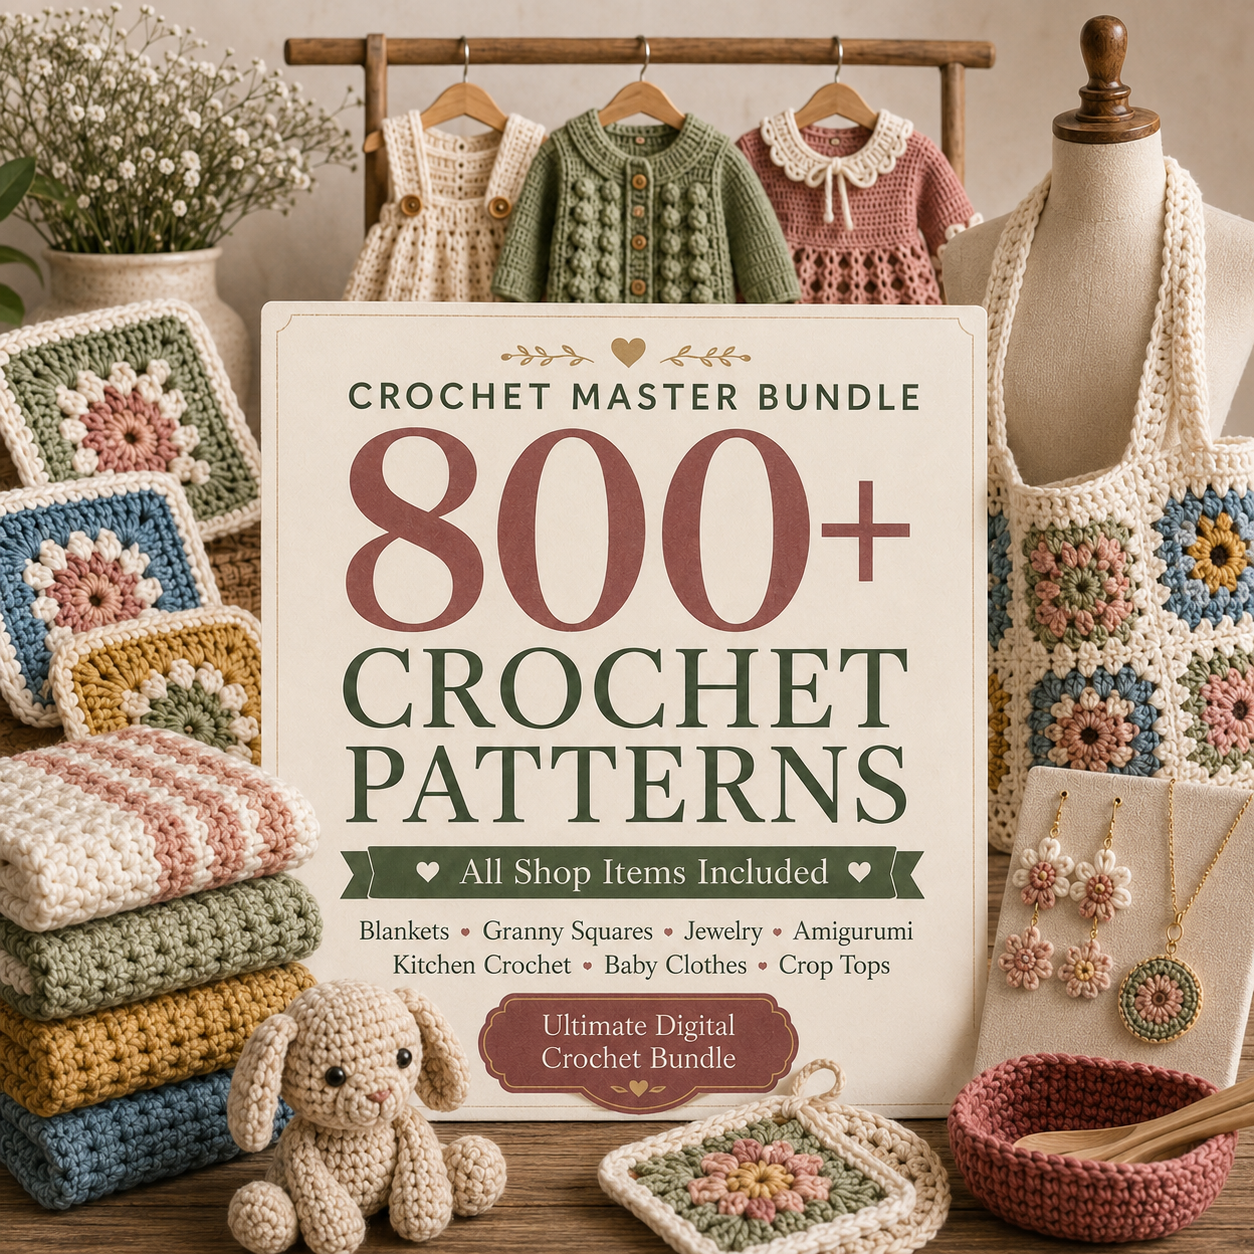
800 plus crochet patterns master collection with bags blankets granny squares and more

Posted on

Crochet for Beginners: Hooks, Yarn, Basic Stitches & First Projects

Crochet for beginners guide with yarn crochet hooks and simple handmade crochet projects

Crochet for Beginners

Crochet for Beginners: Hooks, Yarn, Basic Stitches & First Projects

Learning crochet for beginners does not require dozens of stitches or a huge collection
of tools. A crochet hook, suitable yarn and a few basic movements are enough to begin making useful
projects and understanding simple crochet patterns.

This beginner guide walks through the supplies you actually need, how yarn and hook size work together,
the first stitches worth learning, tension, pattern abbreviations, gauge and a few good first-project ideas.
The goal is to give you a clear foundation without making crochet feel more complicated than it is.

Start simple

  • Choose a smooth, medium-weight yarn that makes each stitch easy to see.
  • Use the hook size suggested for the yarn or pattern instead of guessing.
  • Learn the chain, slip stitch, single crochet, half double crochet and double crochet first.
  • Practice even tension before worrying about speed.
  • Begin with a small project or practice swatch so mistakes are easy to fix.

Getting Started

What You Need to Start Crochet for Beginners

Crochet can be started with very little equipment. The beginner lessons in the crochet books in this
collection repeatedly come back to the same essentials: yarn, a crochet hook and a tapestry or yarn needle.

Crochet Hook

Hooks come in different diameters. A pattern normally tells you which size to start with, and you may
adjust slightly when gauge requires it.

Yarn

Yarn varies in thickness, fibre and texture. For practice, a smooth medium or worsted-weight yarn is
easier to see and handle than very fine, fuzzy or novelty yarn.

Tapestry Needle

A blunt yarn needle is useful for weaving in loose ends and finishing projects neatly.

Helpful Extras

Scissors, stitch markers and a tape measure are inexpensive extras that become useful as soon as you
move from practice swatches to full projects.

Beginner-friendly choice: a smooth, light-colored yarn makes it much easier to see the top
loops of each stitch than black, fuzzy or highly textured yarn.
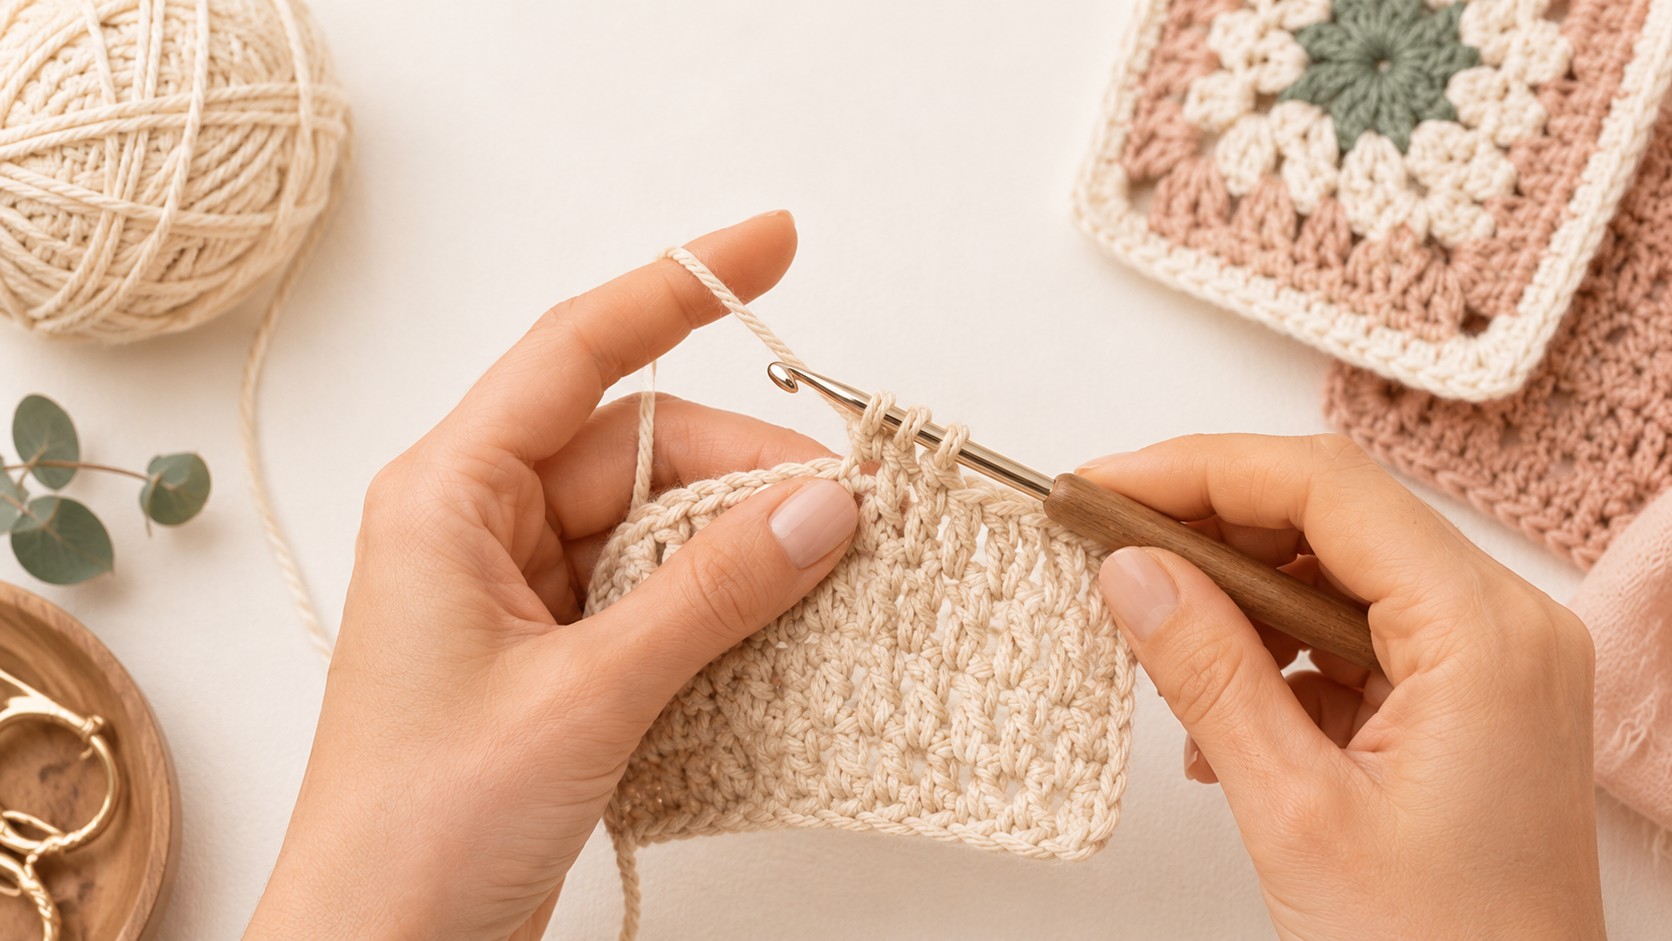
Crochet yarn, hooks and beginner stitch samples arranged on a soft neutral workspace

You only need a few basic tools to begin learning crochet.

Yarn & Hook

How to Choose Crochet Yarn and Hook Size

Yarn and hook size work together. The combination affects stitch size, fabric density, drape and the
final measurements of a project.

Read the yarn label

Yarn labels commonly tell you the yarn weight, fibre content, amount in the ball or skein and care
instructions. Many also provide a suggested crochet hook range.

Follow the pattern first

When you are using a pattern, begin with its recommended yarn category and hook size. If your stitches
do not match the required gauge, the hook size can be adjusted.

The Craft Yarn Council maintains a standardized yarn-weight system that groups yarn from very fine to jumbo
and gives common hook-size ranges. These ranges are useful as guidance, but the gauge written in the pattern
remains more important for a specific project.

See the Craft Yarn Council yarn weight standards →

Technique

Holding the Hook, Yarn and Finding Comfortable Tension

There is no single perfect hand position. What matters is that the hook moves comfortably and the yarn
feeds at a steady tension.

Beginners often crochet too tightly because they are concentrating on controlling every loop. Very tight
stitches make it difficult to insert the hook and can make the hands tire quickly. If the work feels stiff
and the hook is difficult to move, deliberately relax your yarn hand and make a short practice chain again.

If your stitches are too tight

Relax your grip, avoid pulling each loop firmly against the hook and practice making several chains
with the loops resting naturally on the hook shaft.

If your stitches are too loose

Add a little more control with the yarn hand and make sure the working yarn is not feeding freely
without resistance.

Hands practicing crochet tension while working a simple cream crochet swatch

Aim for comfortable, repeatable tension rather than pulling every stitch tight.

First Skills

Start with a Slip Knot and Foundation Chain

The chain is one of the first crochet skills most beginners learn and it forms the starting foundation
for many projects worked in rows.

Slip knot

Make an adjustable loop in the yarn and place it on the hook. Tighten it enough to sit securely while
still allowing the loop to slide along the hook.

Foundation chain

Yarn over the hook and draw the yarn through the loop already on the hook. Repeat to build a chain.
Try to keep each chain close to the same size.

Do not make the starting chain too tight

A very tight foundation chain can make the first row difficult and may pull the lower edge of the project
inward. Smooth, relaxed chain stitches are easier to work into.

Basic Crochet Stitches

5 Crochet Stitches Beginners Should Learn First

These stitches and movements appear constantly in beginner crochet projects. Learning them gives you
enough vocabulary to start reading many simple patterns.

1. Chain — ch

Creates a foundation, spacing between stitches and turning chains.

2. Slip Stitch — sl st

Used for joining, moving across stitches and creating very low-profile crochet.

3. Single Crochet — sc

A short, dense stitch that is excellent for practicing consistent stitch placement.

4. Half Double Crochet — hdc

Taller than single crochet and useful when you want a little more height without a very open fabric.

5. Double Crochet — dc

A taller stitch used throughout blankets, garments, granny squares and many other crochet projects.

Important: These abbreviations use U.S. crochet terminology. U.K. terminology uses different
names for several of the same stitch structures.
Beginner crochet stitch samples and simple crochet pieces in cream, blush and sage yarn

Practice basic stitches in small samples before using them in a larger project.

Pattern Reading

U.S. vs U.K. Crochet Terms: Check Before You Start

A pattern written in U.S. terminology can use the same stitch name differently from a U.K. pattern.
Checking the terminology before crocheting prevents major mistakes.

U.S. single crochet

Called double crochet in U.K. terminology.

U.S. half double crochet

Called half treble in U.K. terminology.

U.S. double crochet

Called treble in U.K. terminology.

Slip stitch

The stitch itself is the same, although the abbreviation may appear as sl st or ss.

The Craft Yarn Council publishes a crochet abbreviation reference that also shows common U.S. and U.K.
terminology differences.

Check standardized crochet abbreviations →

Keep Your Edges Straight

Counting Crochet Stitches and Turning Rows

Accidentally adding or losing stitches is one of the most common reasons a beginner rectangle starts
getting wider or narrower.

Count the stitches

Count the top loops across the row occasionally instead of waiting until the piece has changed shape.
Stitch markers can help identify the first and last stitch.

Know whether the turning chain counts

Patterns do not all treat turning chains the same way. Read the pattern notes instead of assuming the
turning chain is automatically a stitch.

A habit that saves time

Stop every few rows, spread the work flat and look at the overall shape. Catching an accidental increase
or decrease early is much easier than undoing a large section later.

Sizing

What Crochet Gauge Means and When It Matters

Gauge describes how many stitches and rows fit into a measured area. It is especially important for
garments, fitted accessories and projects where the final dimensions matter.

Two people can use the same yarn and hook but produce different-sized stitches because their tension is
different. That is why a pattern may tell you to change hook size until your swatch matches its stated gauge.

Make a gauge swatch

Crochet a sample larger than the measurement area, let the stitches relax, then measure the center of the
swatch. If the stitch count is not close to the pattern gauge, adjust the hook size and test again.

Do not skip finishing tests on fitted projects: some yarns relax, grow or change after
washing or blocking. Testing the swatch can show you what the finished fabric is likely to do.

Beginner Crochet Projects

Easy Things to Crochet for Beginners

A good first project repeats a small number of stitches and lets you practice without complicated shaping.

Practice Swatches

Small squares let you learn a stitch, count rows and experiment with tension without pressure.

Simple Scarf

A rectangle worked back and forth is useful for practicing row edges and consistent stitch counts.

Dishcloth or Washcloth

A small square project gives useful practice while producing something practical.

Basic Granny Square

A classic next step when you are ready to learn working in rounds, corners and repeated stitch groups.

Ready for a useful project with more structure? Our
Crochet Bag Guide explains yarn, stitch density, handles, lining and construction for totes, purses and market bags.

800+ Crochet Patterns

Explore the Full 800+ Crochet Patterns Master Bundle

When you are ready to move from practice stitches into real projects, the complete crochet collection
brings together blankets, granny squares, crochet jewelry, bags, baby projects, tops, kitchen crochet
and more in one large digital library.

800+ Patterns
Multiple Crochet Categories
Digital PDF Collection


GET THE FULL 800+ CROCHET BUNDLE →

800 plus crochet patterns master bundle with blankets granny squares jewelry bags baby projects and tops

Troubleshooting

Common Beginner Crochet Problems

My hook will not fit into the stitches

Your tension may be too tight. Relax the working yarn and avoid pulling loops hard against the hook.

My rows keep getting narrower

You may be missing the first or last stitch. Count the row and mark the edge stitches if needed.

My rows keep getting wider

You may be working twice into an edge stitch or treating a turning chain as an extra stitch.

My project is the wrong size

Check your yarn, hook and gauge. Small differences repeated across many stitches can change the final size.

Crochet for Beginners FAQ

Beginner Crochet Questions

What is the easiest crochet stitch for a beginner?

Start with the chain, then practice single crochet. Once those movements feel comfortable, move to
half double crochet and double crochet.

What yarn is easiest for learning crochet?

A smooth, light-colored medium-weight yarn is usually easier to see and control than very dark, fuzzy,
slippery or extremely fine yarn.

How long does it take to learn crochet?

The basic movements can be learned quickly, but consistent tension and comfortable stitch placement
improve through repetition. Short, regular practice sessions are more useful than trying to master
everything at once.

Do I need to learn every crochet stitch before using patterns?

No. Learn the common basics first and add new stitches as individual projects require them. Most
patterns define unusual stitches or include a special-stitch section.

Should beginners use U.S. or U.K. crochet terminology?

Either is fine. The important thing is to identify which terminology a pattern uses before you begin,
because several stitch names are different.

Ready for More?

Build Your Crochet Project Library

Use the basic stitches from this guide as your foundation, then explore a large variety of crochet
projects across blankets, granny squares, accessories, bags, clothing and home projects.


GET THE FULL 800+ CROCHET BUNDLE →

Large digital crochet pattern collection with multiple project categories

Posted on

Macrame Necklace Patterns: Styles, Knots, Cord, Beads & Closures

Macrame necklace patterns with handmade knotted gemstone necklaces, cord and beads

Macramé Necklaces

Macrame Necklace Patterns: Styles, Knots, Cord, Beads & Closures

A macrame necklace can be as simple as a narrow knotted cord with one focal bead,
or as detailed as a micro-macramé piece built from fine cord, seed beads, crystals and repeated
double half hitch patterns. The structure you choose changes the amount of cord, the knots you need,
the type of beads that will fit and the best way to finish the necklace.

This guide explains the main necklace styles, useful macramé knots, cord choices, bead and focal-piece
considerations, tools, closures and finishing decisions so you can understand a pattern before you start.

Quick necklace checklist

  • Choose the necklace style and closure before cutting all of your cord.
  • Test bead holes with the exact cord you plan to use.
  • Secure the work to a board so repeated knots stay aligned.
  • Check the necklace length and focal placement before permanently finishing the ends.
Start With the Design

Common Macrame Necklace Styles

The jewelry books in this collection include everything from square-knot charm necklaces and seed-bead
spirals to chokers, pendants, openwork designs, asymmetrical necklaces and advanced micro-macramé pieces.

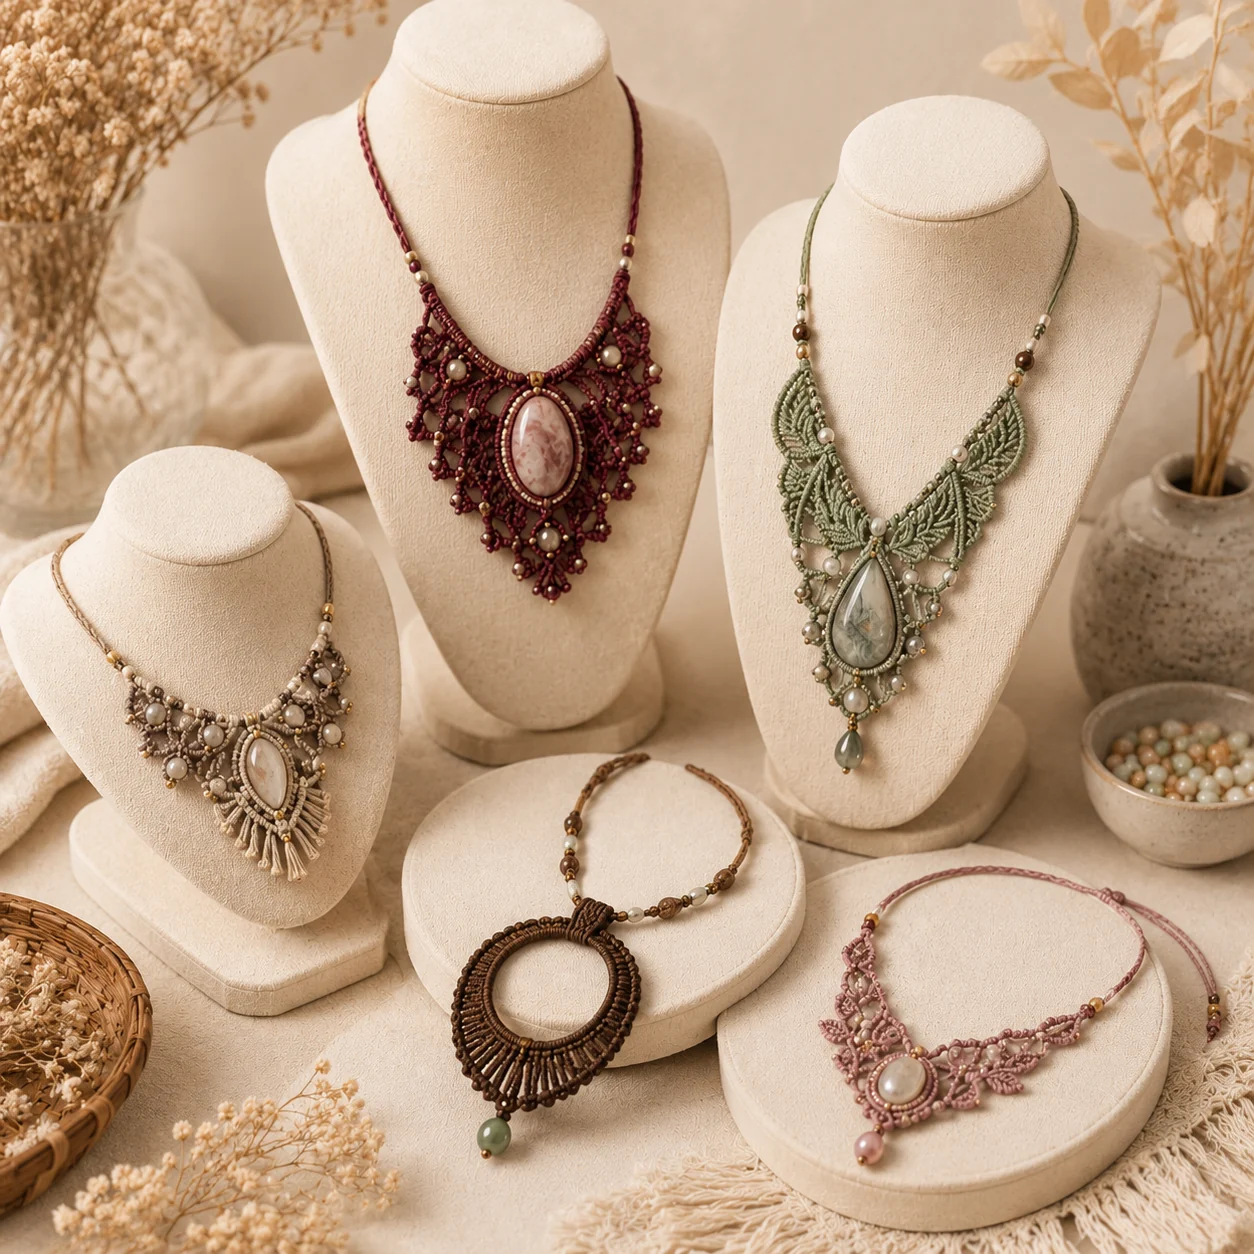
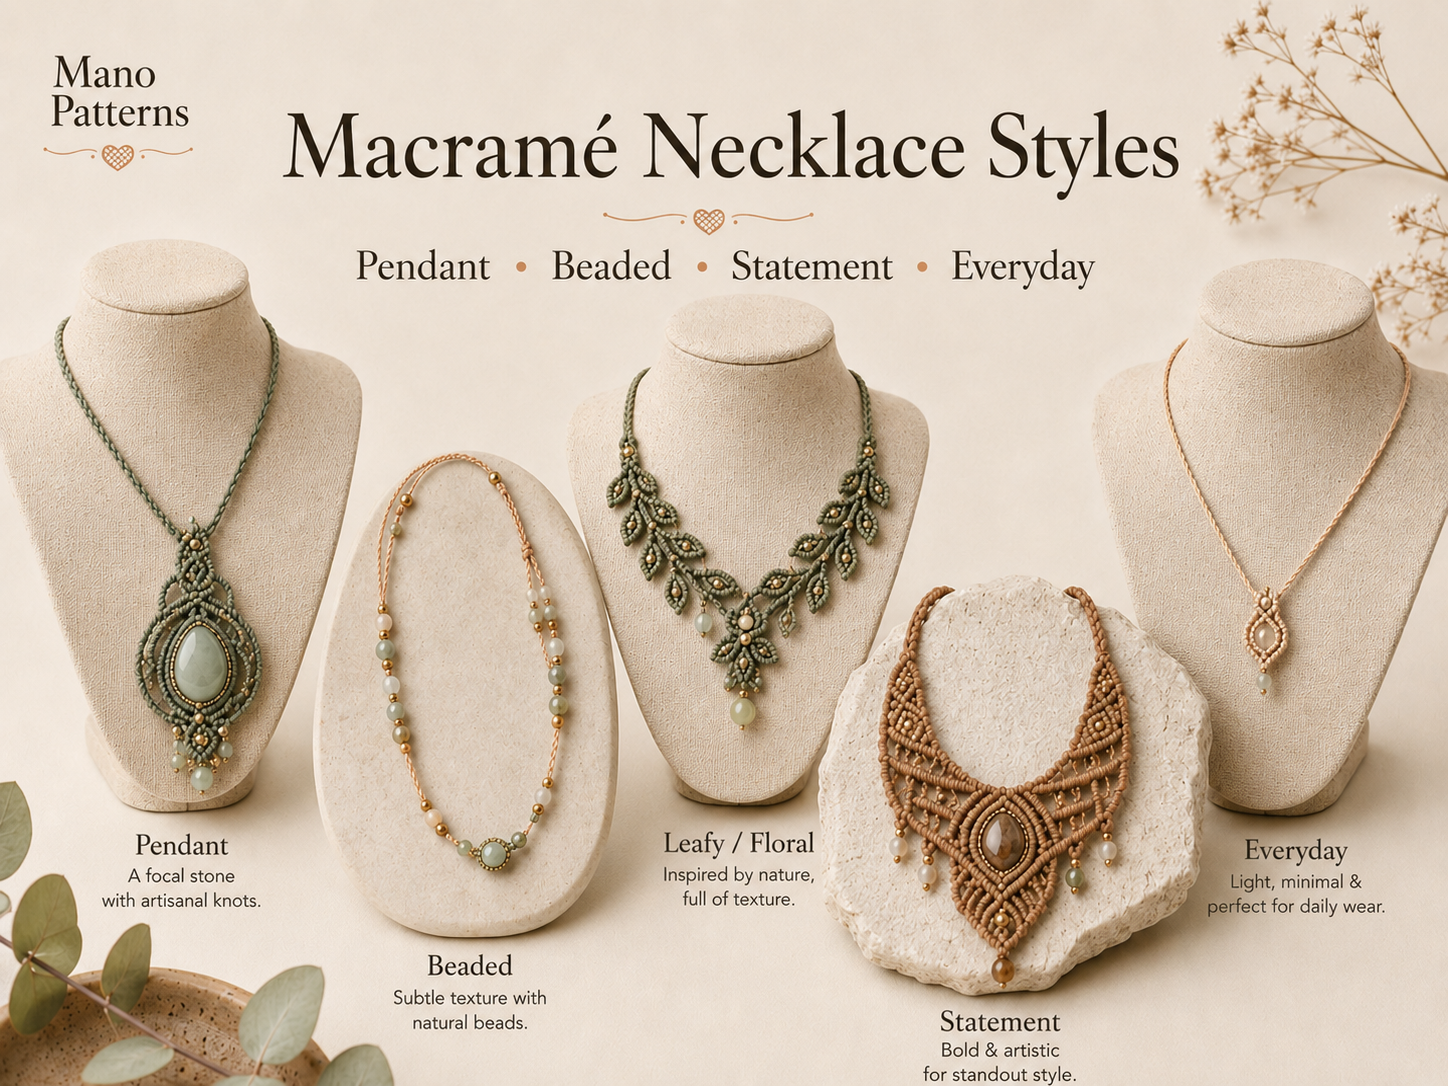
Macrame necklace styles with knotted gemstone pendants and beaded necklace designs

Knotted Cord & Charm Necklaces

A simpler necklace can use repeated square knots or other basic knot sequences with a charm, bead or
small pendant as the focal point.

Beaded & Spiral Necklaces

Beads can be incorporated into repeated knot sections, while half-knot spirals create a naturally
twisted cord structure.

Chokers & Openwork Designs

Wider choker-style pieces use more cords and repeated knot patterns to create a lace-like or structured
section around the neck.

Micro-Macramé & Focal Necklaces

Fine cord, seed beads, cabochons, carved beads and other focal pieces can be combined with detailed
double half hitch and square-knot work.

Necklaces + Bracelets + Earrings

Get the Full 200+ Macramé Jewelry Patterns Bundle

Explore a large jewelry collection with necklaces, chokers, pendants, bracelets, earrings,
beaded projects and detailed micro-macramé designs.

200+ Patterns
Multiple Necklace Styles
Beginner to Detailed

GET THE FULL 200+ PATTERNS BUNDLE →

200 plus macrame jewelry patterns bundle with necklaces bracelets earrings and beaded projects

Technique

Useful Knots for Macrame Necklaces

Necklace patterns often combine a few core knots in different directions rather than relying on a large
number of completely different techniques.

Square Knot

Square knots can build flat sections, cords, decorative bands and repeated structures around filler cords.

Half-Knot Spiral

Repeating the same half of the square knot creates a spiral effect that works well in necklace cords and
decorative sections.

Double Half Hitch

Double half hitch knots are especially useful for lines, curves, borders and detailed micro-macramé motifs.

Lark’s Head

Lark’s head and reverse lark’s head knots are practical for attaching cords to a holding cord, ring or
another part of a jewelry structure.

Tension matters: the knot-holder cord should stay firm while the working cord forms the knot.
Uneven tension is one of the fastest ways to make a necklace edge or motif drift out of shape.
Materials

Choosing Cord, Beads & Tools

Jewelry-scale macramé uses much finer materials than wall hangings or plant hangers, especially when beads
and detailed motifs are involved.

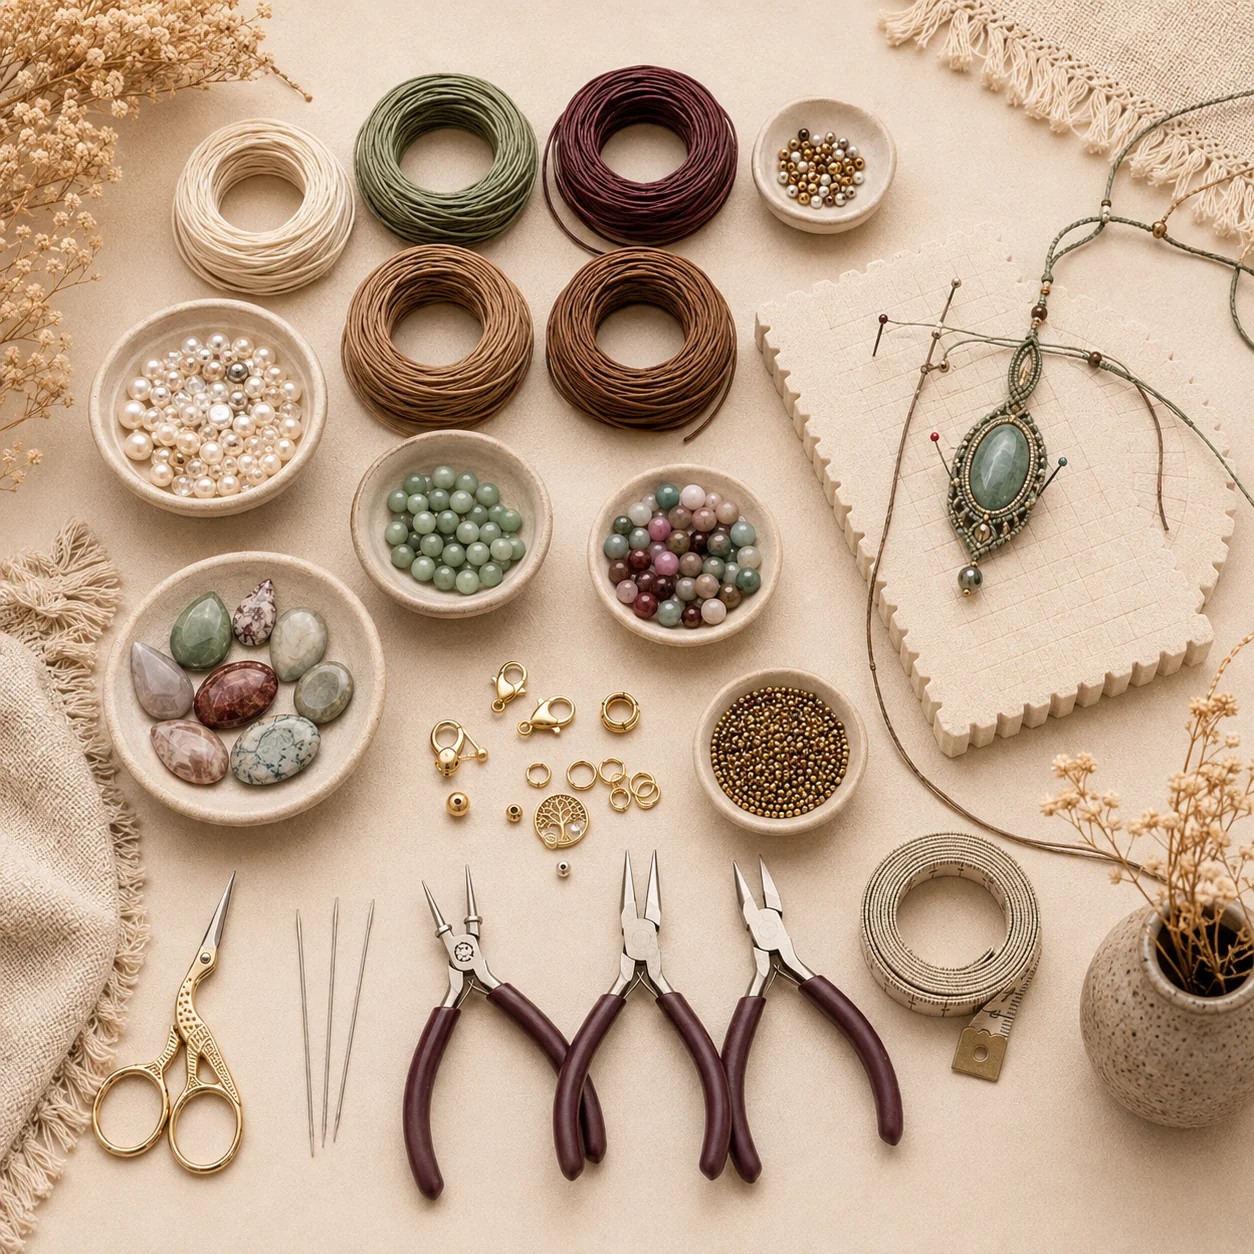
Macrame necklace materials with fine cord beads measuring tape scissors and jewelry tools

Fine waxed and nylon cords

The jewelry sources use fine waxed thread and nylon micro-macramé cords because they hold small knots
clearly and work with beads. Fine jewelry threads in the books are commonly around the sub-1mm range.

Natural fibers

Cotton, linen, hemp and other natural fibers can also be used. They create a softer handmade look, but
their ends are normally secured differently from meltable synthetic cords.

Always test the bead hole

Semiprecious stones and pearls can have surprisingly small or rough holes. Check the actual bead with your
chosen cord before planning an entire beaded section.

A practical workspace includes a macramé board or other pinnable surface, pins, scissors and a tape measure.
Detailed jewelry work may also use needles, pliers, crimping tools or reaming tools depending on the findings.
Focal Pieces

Using Beads, Cabochons & Pendants

The focal element often determines how the rest of the necklace should be constructed.

Seed Beads

Small seed beads add color and sparkle between knots, especially in micro-macramé. The cord still needs
to pass comfortably through every bead used in the design.

Large Focal Beads

Carved beads, lampwork beads and other larger focal pieces can become the center of a necklace, with knot
work used to frame or support them.

Cabochons

Cabochons and cameos can be mounted and framed with beads and knotting to create a more substantial
centerpiece.

Asymmetrical Elements

Not every necklace has to mirror perfectly from side to side. Some jewelry designs deliberately combine
knots, beads and findings in an asymmetrical arrangement.

Finishing

Macrame Necklace Closures & Findings

Choose the finishing method early because the closure changes the usable necklace length and the way the
final cords must be secured.

Macrame necklace closures and finishing options with sliding knots clasps connectors and pendant attachments

Sliding Closure

A knotted sliding closure is used in many macramé necklaces and bracelets because it allows the wearer
to adjust the length when putting the piece on or taking it off.

Button Fastener

Buttons can serve as decorative focal pieces or as fasteners when paired with a correctly sized loop.

Metal Clasps & Rings

Jewelry findings such as clasps, rings and crimps can create a more conventional necklace finish when the
pattern is designed around them.

Securing Cord Ends

Synthetic cords may be carefully heat-sealed when appropriate, while natural fibers are commonly sewn or
otherwise secured so the final knotting does not unravel.

Workflow

How to Approach a Macrame Necklace Pattern

A little preparation makes detailed necklace work much easier to control.

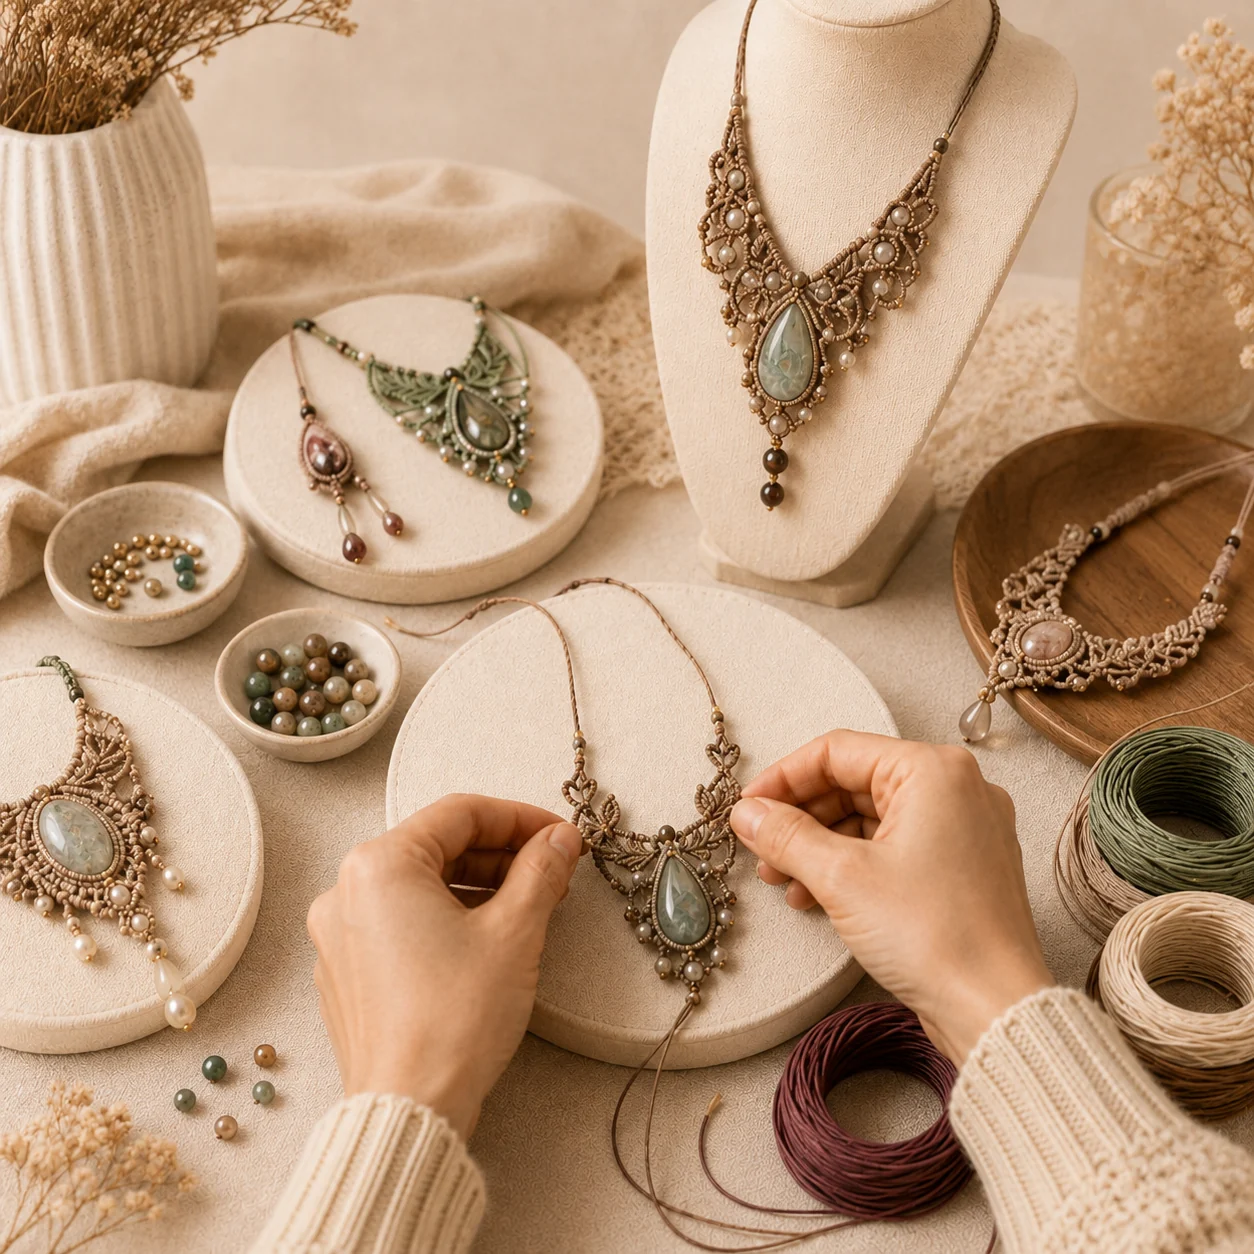
Hands making a detailed macrame necklace with gemstone focal piece cord beads and knotting board
1. Read the full pattern first
Note the knots, cord type, beads, focal pieces and finishing method before cutting.
2. Prepare more cord than the finished necklace length
Knotting consumes a substantial amount of cord, so use the lengths provided by the pattern rather than
measuring only the final necklace size.
3. Mount the work securely
Use pins or tape on a suitable board so the holding cords remain stable as you knot.
4. Build repeated sections consistently
Compare the direction and tension of each repeat before moving too far ahead.
5. Check focal placement
Lay the necklace naturally before finishing so pendants, cabochons or bead clusters sit where intended.
6. Test the closure before trimming
Make sure the necklace can be put on, removed and adjusted correctly before permanently securing the ends.

Explore More Jewelry Designs

Choose From 200+ Macramé Jewelry Patterns

Find necklace, choker, pendant, bracelet, earring and beaded micro-macramé projects in one collection.

GET THE FULL 200+ PATTERNS BUNDLE →

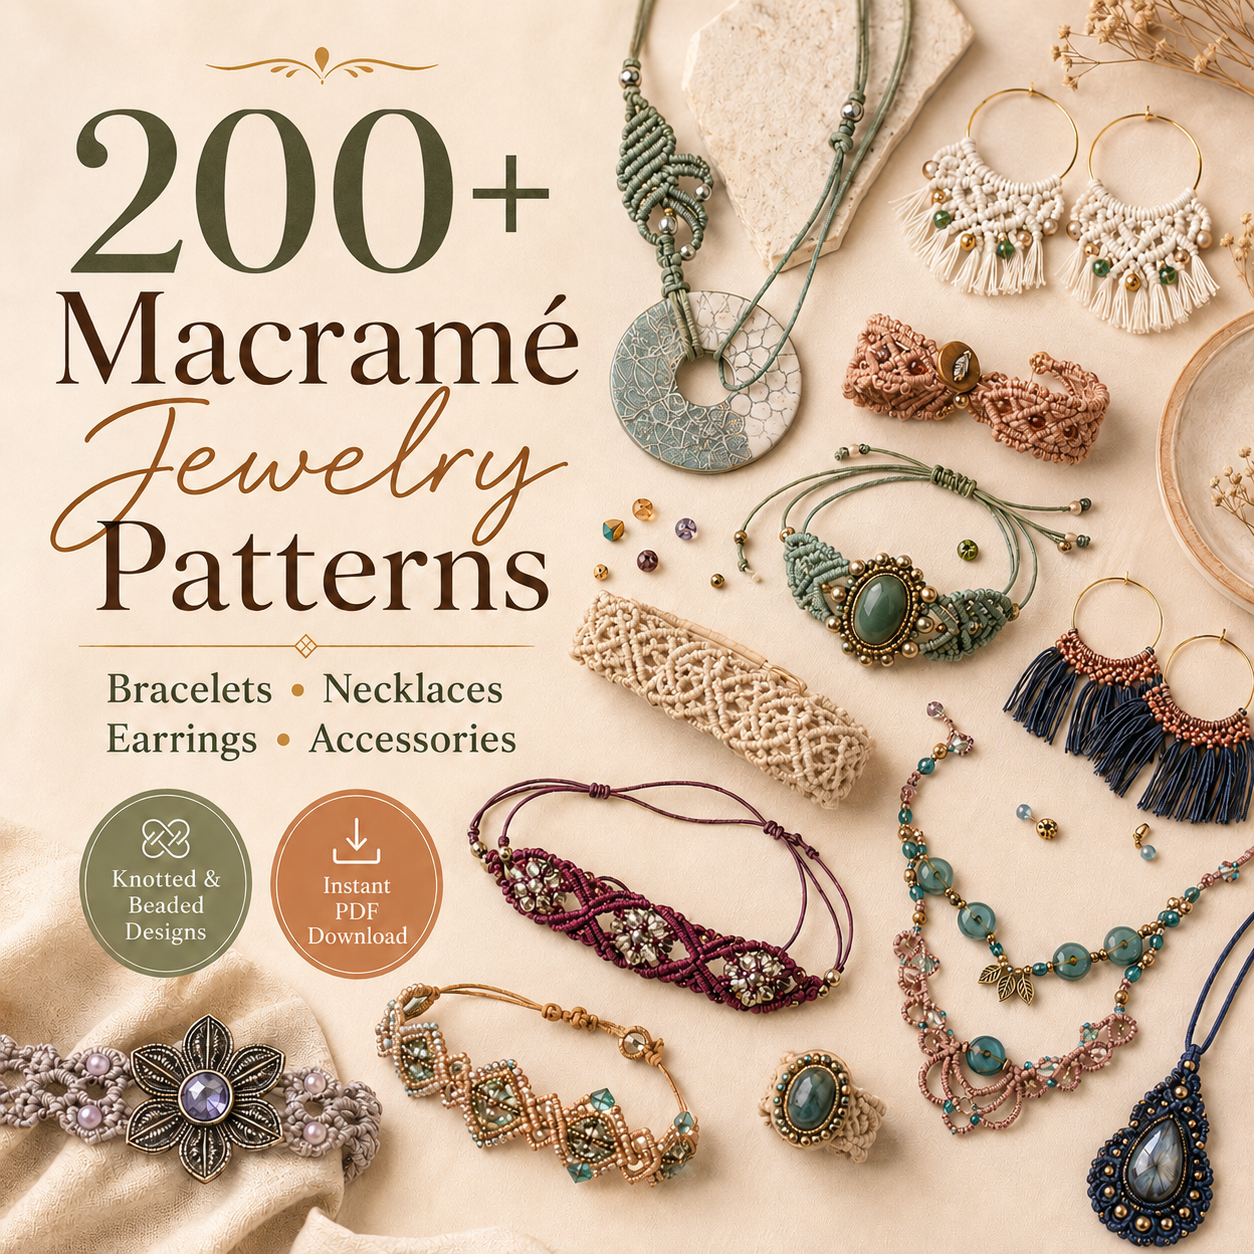
200 plus macrame jewelry pattern collection

Troubleshooting

Common Macrame Necklace Problems

The necklace twists unevenly

Check whether the knot sequence is meant to spiral and whether the same working side is being repeated
consistently.

The focal piece sits off-center

Compare the knotting and cord length on both sides before permanently finishing the necklace.

Beads will not slide onto the cord

The bead holes are too small for the chosen cord or multiple strands. Test compatibility before starting.

The sliding closure will not move

Make sure finishing stitches or melted ends have not accidentally caught the internal cords that need to
slide through the closure.

Quick Answers

Macrame Necklace FAQ

What cord is best for a macrame necklace?

It depends on the design. Fine waxed or nylon cord is useful for detailed jewelry and beads, while
natural fibers such as cotton, linen or hemp create a softer look.

Which knots are most useful for macrame necklaces?

Square knots, half-knot spirals, double half hitches and lark’s head variations appear repeatedly in
jewelry-scale macramé.

Can beginners make a macrame necklace?

Yes. Start with a simpler square-knot or charm-style necklace before moving into wide chokers, cabochon
framing or detailed micro-macramé.

Can I add gemstone beads to a macrame necklace?

Yes, but check the bead holes carefully. Some semiprecious beads have small or rough holes that may not
suit the chosen cord.

How do adjustable macrame necklace closures work?

A separate cord can be knotted around two overlapping necklace cords so those internal cords remain free
to slide and adjust the finished length.

Continue Learning

Related Macramé Guides

Use these guides to build the skills around your next jewelry project.

Posted on

Macrame Bracelet Patterns: Styles, Knots, Cord & Closures

Macrame bracelet patterns with handmade knotted bracelets, cords, beads and closures

Macramé Bracelets

Macrame Bracelet Patterns: Styles, Knots, Cord & Closures

Macrame bracelet patterns are a practical way to move from practicing individual knots
to making a finished piece you can actually wear. A bracelet is small enough for beginners to manage,
but it still teaches important skills such as measuring, keeping tension even, placing beads and choosing
a secure closure.

This guide explains the main bracelet styles, useful knots, cord choices, sizing and finishing options.
It is designed to help you understand what makes one bracelet pattern different from another so you can
choose projects that match your current skill level.

Quick bracelet checklist

  • Choose the closure before deciding the final bracelet length.
  • Keep repeated knots the same size so the band stays straight.
  • Check that beads fit the actual cord before you start knotting.
  • Test the bracelet around the wrist before trimming or sealing the ends.

Start With the Style

Common Macrame Bracelet Styles

Bracelet patterns can use the same basic knots and still look completely different depending on width,
cord, beads and the way the piece closes.

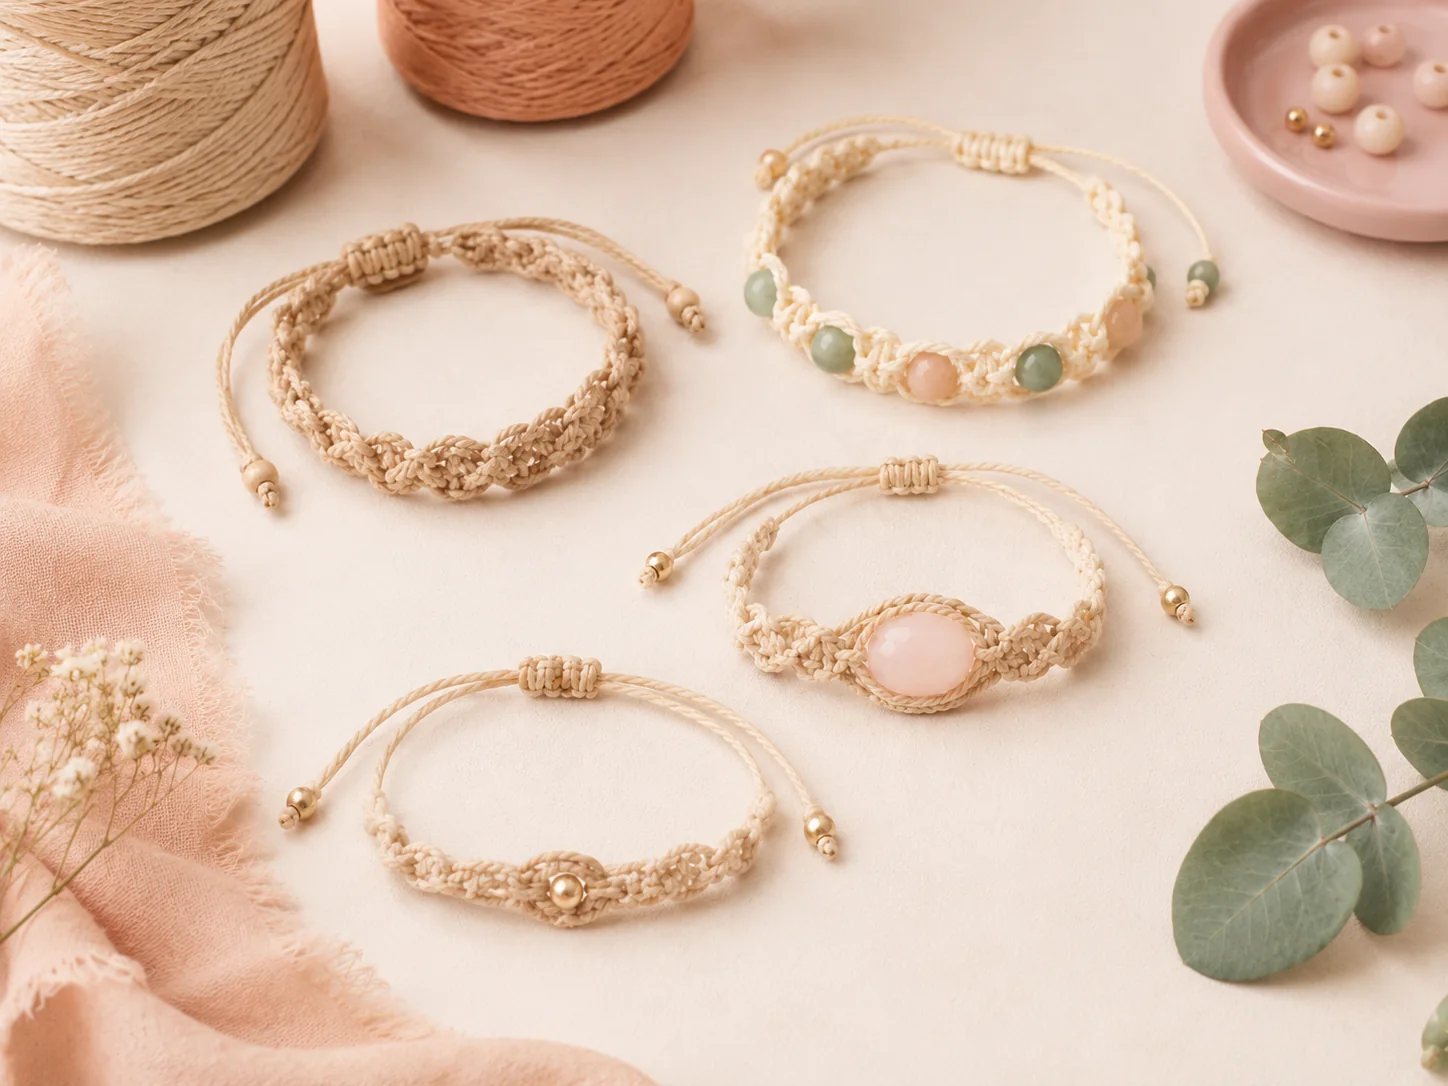
Macrame bracelet patterns showing adjustable knotted beaded and gemstone bracelet styles

Simple Knotted Bands

Narrow bands built from repeated square knots or half-knot spirals are among the easiest bracelet
structures to understand and customize.

Beaded Bracelets

Beads can be placed between knot sections, threaded onto filler cords or used as the central focal
point of the bracelet.

Gemstone & Focal Bracelets

Larger stones, decorative links or focal beads need balanced knotting on both sides so the centerpiece
stays centered on the wrist.

Micro-Macramé Bracelets

Fine cord allows more detailed motifs and curves, but small knots make uneven tension much easier to see.

Bracelets + Necklaces + Earrings

Get the Full 200+ Macramé Jewelry Patterns Bundle

Explore a large collection of bracelet, necklace, earring, pendant and beaded jewelry projects.
Start with a simpler bracelet and keep the more detailed designs for later.

200+ Patterns
Many Bracelet Styles
Beginner to Detailed

GET THE FULL 200+ PATTERNS BUNDLE →

200 plus macrame jewelry patterns bundle with bracelets necklaces earrings and accessories

Technique

Best Knots for Macrame Bracelets

You do not need dozens of knots. A small group of reliable techniques can create many different bracelet
textures and structures.

Square Knot

Useful for flat bracelet bands. Repeating complete square knots produces a balanced, relatively straight
structure when tension stays even.

Half-Knot Spiral

Repeating the same half of a square knot creates a natural twist, making it useful when you want a
spiral bracelet rather than a flat band.

Half Hitch & Double Half Hitch

Hitch-based knots are useful for diagonal lines, curves, borders and more detailed micro-macramé motifs.

Overhand & Finishing Knots

Simple knots are often used near beads, cord ends and closures where you need a compact way to secure
part of the bracelet.

If your bracelet is twisting unexpectedly: check whether you are repeating the same half-knot
instead of alternating sides to complete full square knots.


Beginner Technique Guide
Macrame for Beginners: 7 Essential Knots to Learn First

Materials

Choosing Cord for a Macrame Bracelet

Bracelet cord needs to be comfortable against the skin, strong enough for repeated wear and suitable for
the size of your knots and beads.

Fine synthetic jewelry cord

C-Lon and similar nylon cords are commonly used for detailed micro-macramé jewelry because they allow
small, precise knots and work well with many beads.

Cotton, hemp & other fibers

Softer natural cords can work well for casual bracelets and larger knot structures. The exact diameter
changes how bulky the finished band feels.

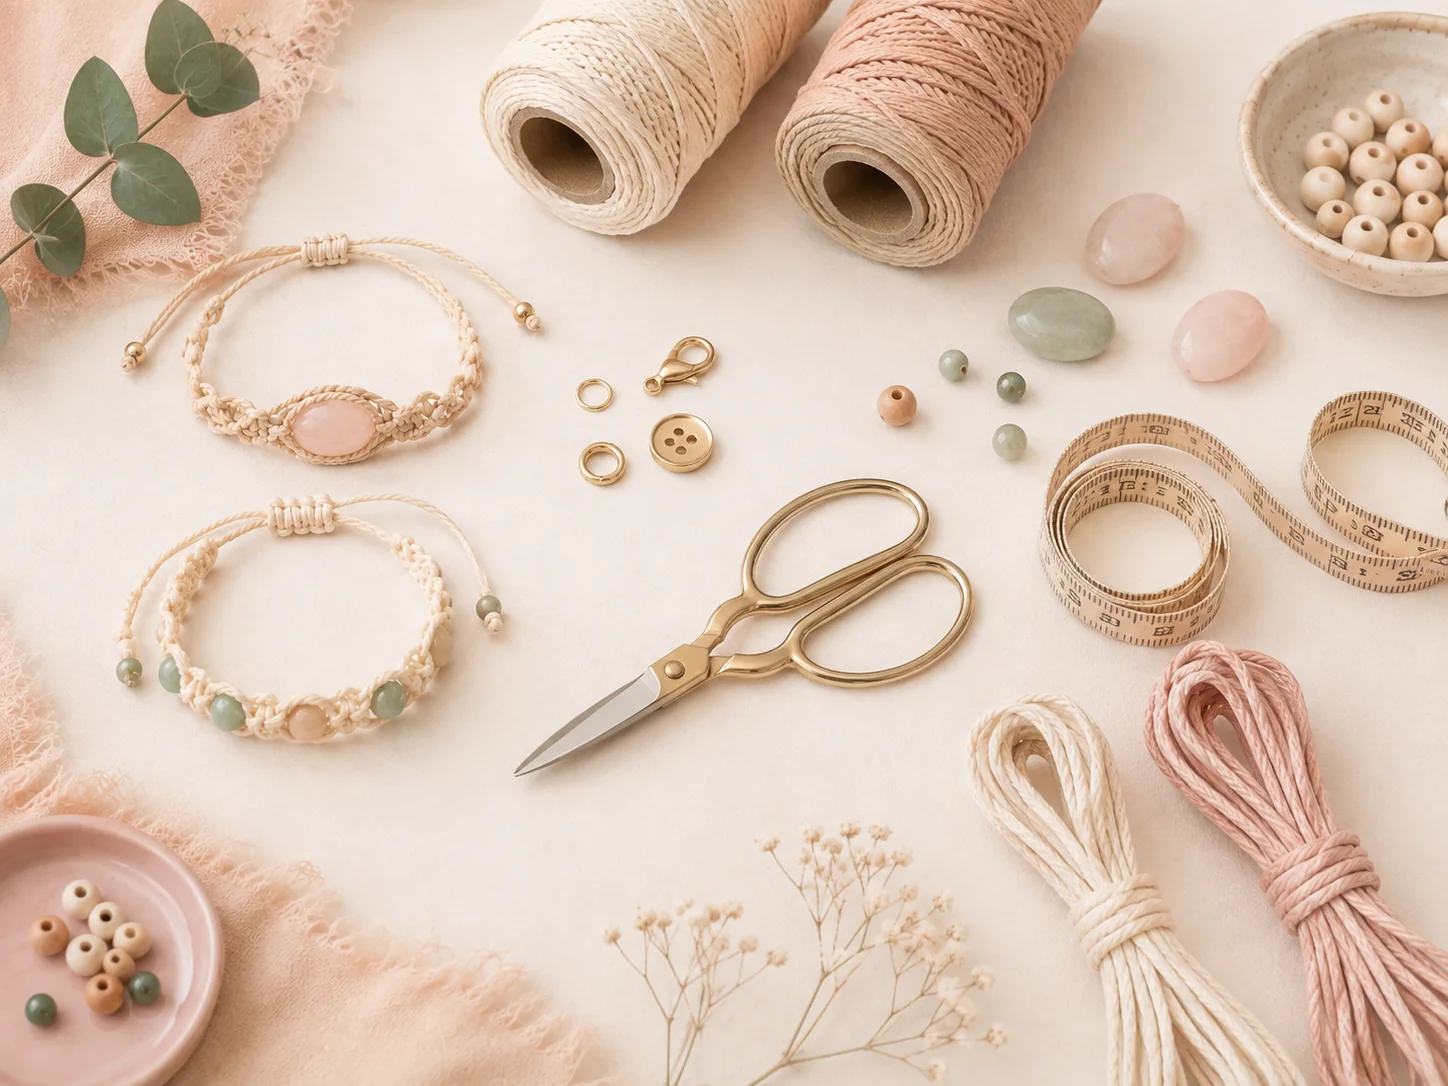
Macrame bracelet materials including cord beads scissors measuring tape clasps and findings
Before adding beads

Pass the actual cord through the bead hole before cutting all your strands. A bead that looks large enough
may still have a hole that is too small for doubled or multiple cords.

Fit Matters

How to Size a Macrame Bracelet

The wrist measurement is only the starting point. The closure, bead size and thickness of the finished
band all affect how the bracelet actually fits.

1. Measure the wrist
Wrap a flexible tape around the place where the bracelet will sit without pulling it too tightly.
2. Decide the fit
Choose whether the finished bracelet should feel fitted, slightly relaxed or fully adjustable.
3. Account for the closure
A button, clasp, toggle or sliding knot adds usable length. Include it before deciding where the knotted
section should end.
4. Test before finishing
Check the bracelet around the wrist before trimming, sealing or permanently securing the final cords.

Useful reference: finished bracelet length should be based on the wearer, the thickness of
the knotted band and the chosen closure rather than one standard measurement.

Finishing

Macrame Bracelet Closure Options

The closure changes both the appearance and the fit of the bracelet, so it is better to choose it before
you reach the final few rows.

Sliding Knot

A popular adjustable option for casual bracelets because the wearer can tighten or loosen the fit.

Button & Loop

Creates a handmade finish and can become part of the design. The loop needs to fit the button closely
enough to stay secure.

Toggle Clasp

Gives the bracelet a more traditional jewelry finish and works especially well with structured,
decorative bands.

Lobster Clasp & Jump Rings

Useful when you want a conventional jewelry closure or an extension chain for adjustable sizing.

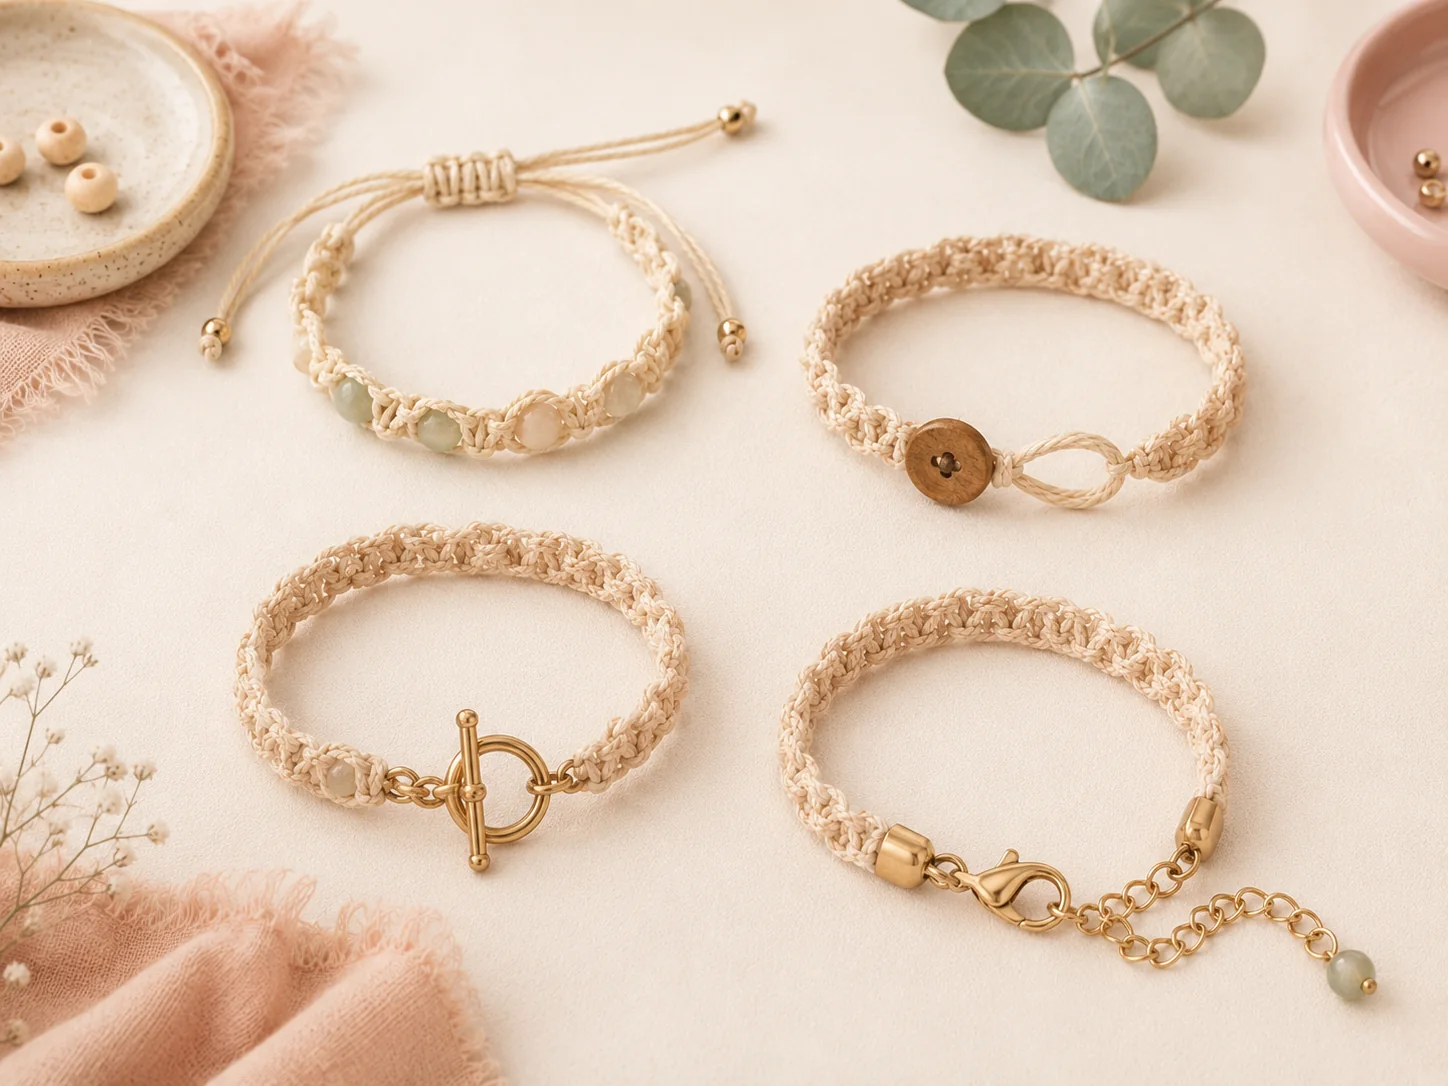
Macrame bracelet closure examples including sliding knot button loop toggle and lobster clasp

Decoration

Adding Beads Without Distorting the Bracelet

Beads should feel integrated into the knot pattern rather than pulling the band out of shape.

Keep focal beads centered

When a bracelet has one main stone or large bead, compare the knotting on both sides before finishing so
the focal point sits where you intended.

Watch the weight

Heavy beads can make a narrow band rotate around the wrist. A wider or more structured section can give
a heavier focal element more support.

Good design habit: lay out the beads beside the cords before knotting. It is much easier to
adjust spacing and color order before they are locked into the bracelet.

Beginner Workflow

How to Approach Your First Macrame Bracelet Pattern

A simple workflow makes the project easier to follow and reduces the chance of discovering a sizing or
closure problem at the very end.

Hands making a macrame bracelet with cotton cord and beads on a work board
Read the complete pattern first
Check the required knots, cord lengths, beads and closure before cutting anything.
Prepare and organize the cords
Separate filler cords and working cords if the design uses them differently.
Secure the starting point
Clip or pin the bracelet so the work does not move while you apply tension.
Build the first repeat slowly
Make sure the knot direction is correct before repeating the same sequence across the band.
Check width and tension
Flatten the bracelet every few rows and compare both edges.
Test the finished length
Include the closure before deciding that the bracelet is long enough.

Choose Your Next Bracelet

Find Beginner-Friendly and Detailed Jewelry Projects in One Collection

The full 200+ collection gives you many bracelet styles to choose from, plus necklaces, earrings,
pendants and beaded designs for when you want to try something different.

GET THE FULL 200+ PATTERNS BUNDLE →

200 plus macrame jewelry pattern collection

Troubleshooting

Common Macrame Bracelet Problems

The band curves

One side is often being pulled more tightly than the other. Flatten the bracelet and compare both edges
frequently while working.

The knots look uneven

Aim for repeatable tension instead of maximum tightness. Extremely tight knots are not automatically
neater knots.

The bracelet is too long

The closure may not have been included in the measurement. Always test the complete bracelet structure
before finishing the ends.

The beads pull sideways

Check bead placement and the tension immediately around each bead before continuing the next section.

Quick Answers

Macrame Bracelet FAQ

Are macrame bracelets good for beginners?

Yes. A simple bracelet is a manageable first project because it uses a relatively small work area while
still teaching knot repetition, sizing and finishing.

What knot is best for a beginner macrame bracelet?

Square knots are a practical starting point because they can form a flat band and are used in many other
macramé projects.

Why is my square-knot bracelet twisting?

You may be repeating the same half-knot. Alternating sides completes full square knots; repeating one
side naturally creates a spiral.

Can I use beads in a beginner bracelet?

Yes. Test the bead holes with the exact cord first and keep the first design simple so you can focus on
even tension and placement.

Which bracelet closure is easiest?

Sliding closures are convenient for adjustable casual bracelets, while button loops and metal clasps
create different looks and sizing requirements.

Continue Learning

More Macramé Guides

Build the skills around your bracelet project with these related Mano Patterns guides.

Posted on

Macrame for Beginners: 7 Essential Knots to Learn First

Macrame for beginners showing essential basic macrame knots

Macramé for Beginners

Learning macrame for beginners starts with a small set of essential knots that appear
again and again in real projects. Bracelets, necklaces, wall hangings, plant hangers and bags may look
completely different, but many of them are built from the same few knotting movements.

This guide covers seven useful knots and variations to learn first, plus simple setup and tension tips.
You do not need to memorize dozens of knots before starting a project. Once these basics feel natural,
many macramé patterns become much easier to read and understand.

Before you start

  • Practice with a cord that is thick enough to see clearly.
  • Use a stable board and pins when you need help controlling the cords.
  • Focus on even tension instead of pulling every knot as tightly as possible.
  • Practice the movement a few times before beginning a full project.

Getting Started

What You Need to Practice Macrame Knots

You can learn the basic movements with only a few supplies. The best setup depends on whether you are
practicing larger decorative macramé or fine micro-macramé jewelry.

Practice Cord

Choose a cord you can clearly see and control. Soft cotton is easy for beginners to handle.

Board or Stable Surface

Cork, foam or another pinnable board helps keep your work from moving while you knot.

Pins

Useful for holding cords, loops and components in place while you work.

Scissors & Tape Measure

Sharp scissors give cleaner cord ends, while a tape measure helps with project sizing.

Beginner tip: For jewelry and micro macramé, finer waxed or nylon cords are common.
But when you are first learning the knot movement, a slightly thicker practice cord is easier to see.
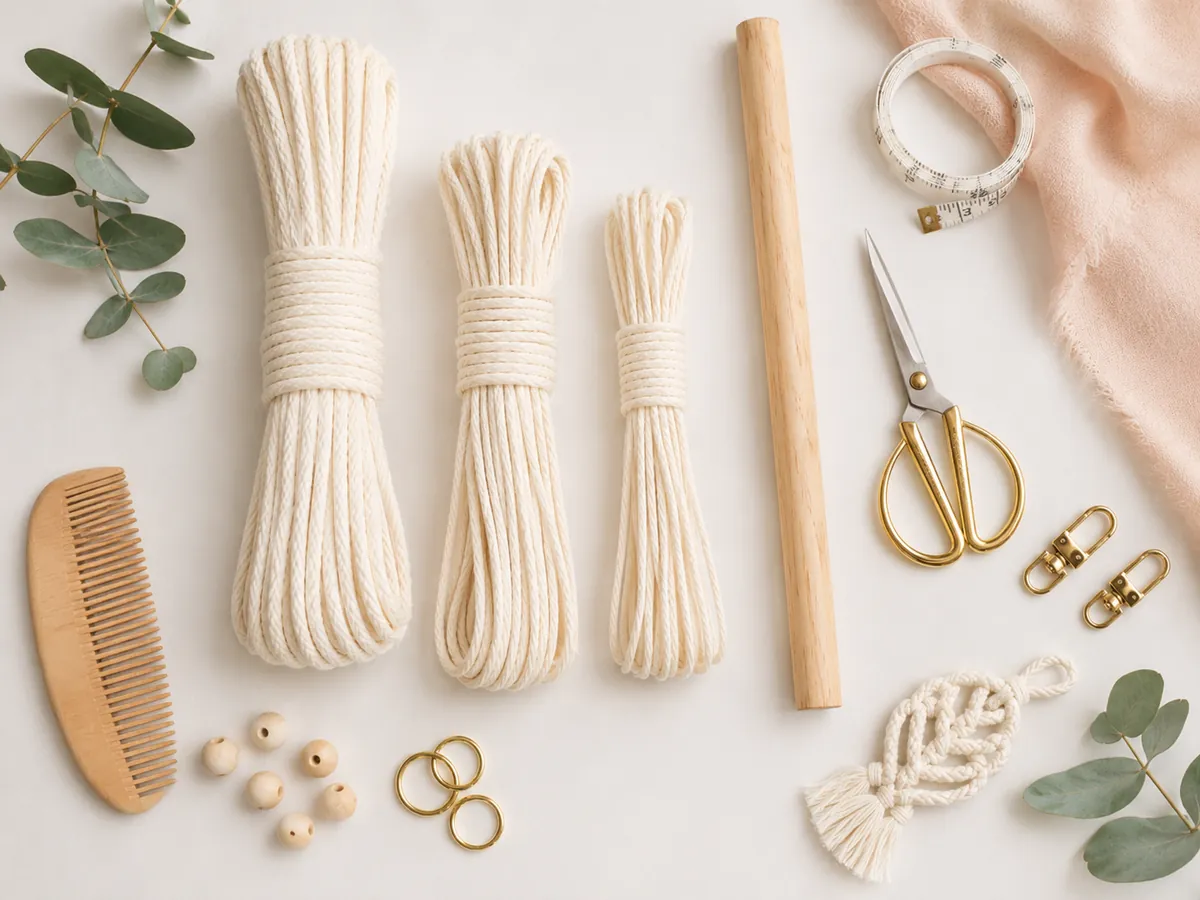
Macrame beginner supplies with cotton cord scissors dowel tape measure beads and tools

A simple beginner setup: visible cord, a stable support and a few basic tools are enough to start practicing.

Knot 01

Lark’s Head Knot

One of the most useful starting knots because it attaches a cord to a support.

How it works

Fold the cord in half to form a loop. Place the folded center around the support, bring the two loose
ends through the loop, then pull evenly until the knot sits neatly against the support.

The support might be a wooden dowel, ring, jump ring, key ring, bead component or another cord.
This is a good first knot to practice because it teaches you how folded cords are attached before the
main pattern begins.

Knot 02

Reverse Lark’s Head Knot

The same useful attachment idea, but worked in the opposite orientation for a different front appearance.

Reverse lark’s head knots are frequently used when cords are attached to dowels and other supports.
Learning both versions makes it easier to follow different patterns without wondering why an attachment
looks different from the one you already know.

Worth learning early: Lark’s head and reverse lark’s head appear so often at the beginning
of projects that recognizing both saves a lot of confusion later.
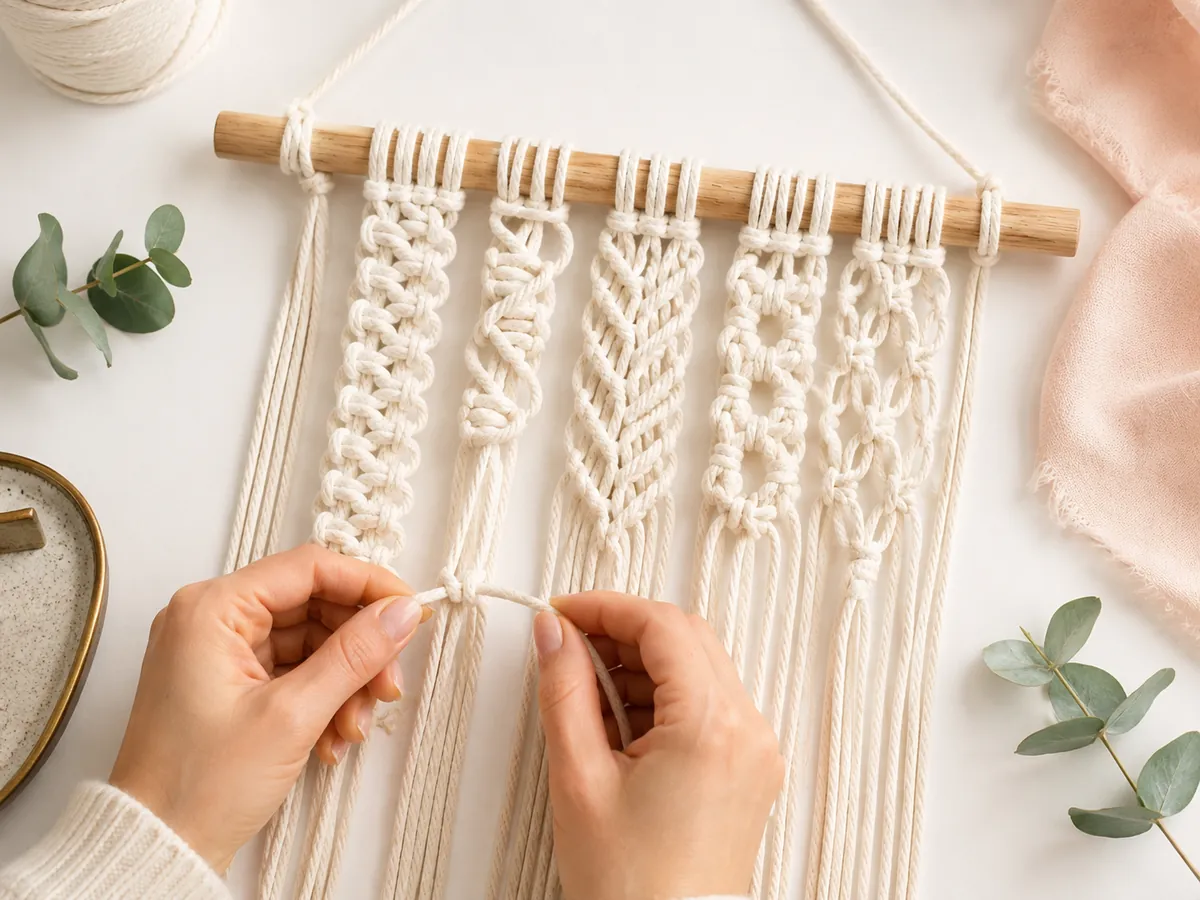
Hands practicing several beginner macrame knot patterns on cotton cord

Practicing several knot structures side by side makes their differences easier to see.

Three small macrame knot practice samples showing different textures

Small samples are useful for testing tension and learning how different knots build texture.

Knot 03

Square Knot

One of the core macramé knots, used in everything from straps and bands to decorative sections.

How it is built

A square knot usually uses two working cords on the outside with one or more filler cords in the center.
Make one half from one side, then work the second half from the opposite side.

What it creates

Rows of square knots can form straps, bands and solid sections. They can also be spaced apart or combined
with other knots for more open designs.

Common beginner mistake

If you keep beginning from the same side instead of alternating sides, the work starts to twist.
That is not necessarily a mistake—it creates the spiral technique below.

Knot 04

Half Knot Spiral

Repeat the same half of a square knot and the work naturally begins to twist.

A half knot spiral is a useful beginner technique because you are practicing part of the square knot while
learning how repetition and tension change the shape of the finished work.

Left or right spiral?

The direction depends on which side you repeatedly start from. Practice both directions so that a pattern
calling for a left- or right-turning spiral does not feel unfamiliar.

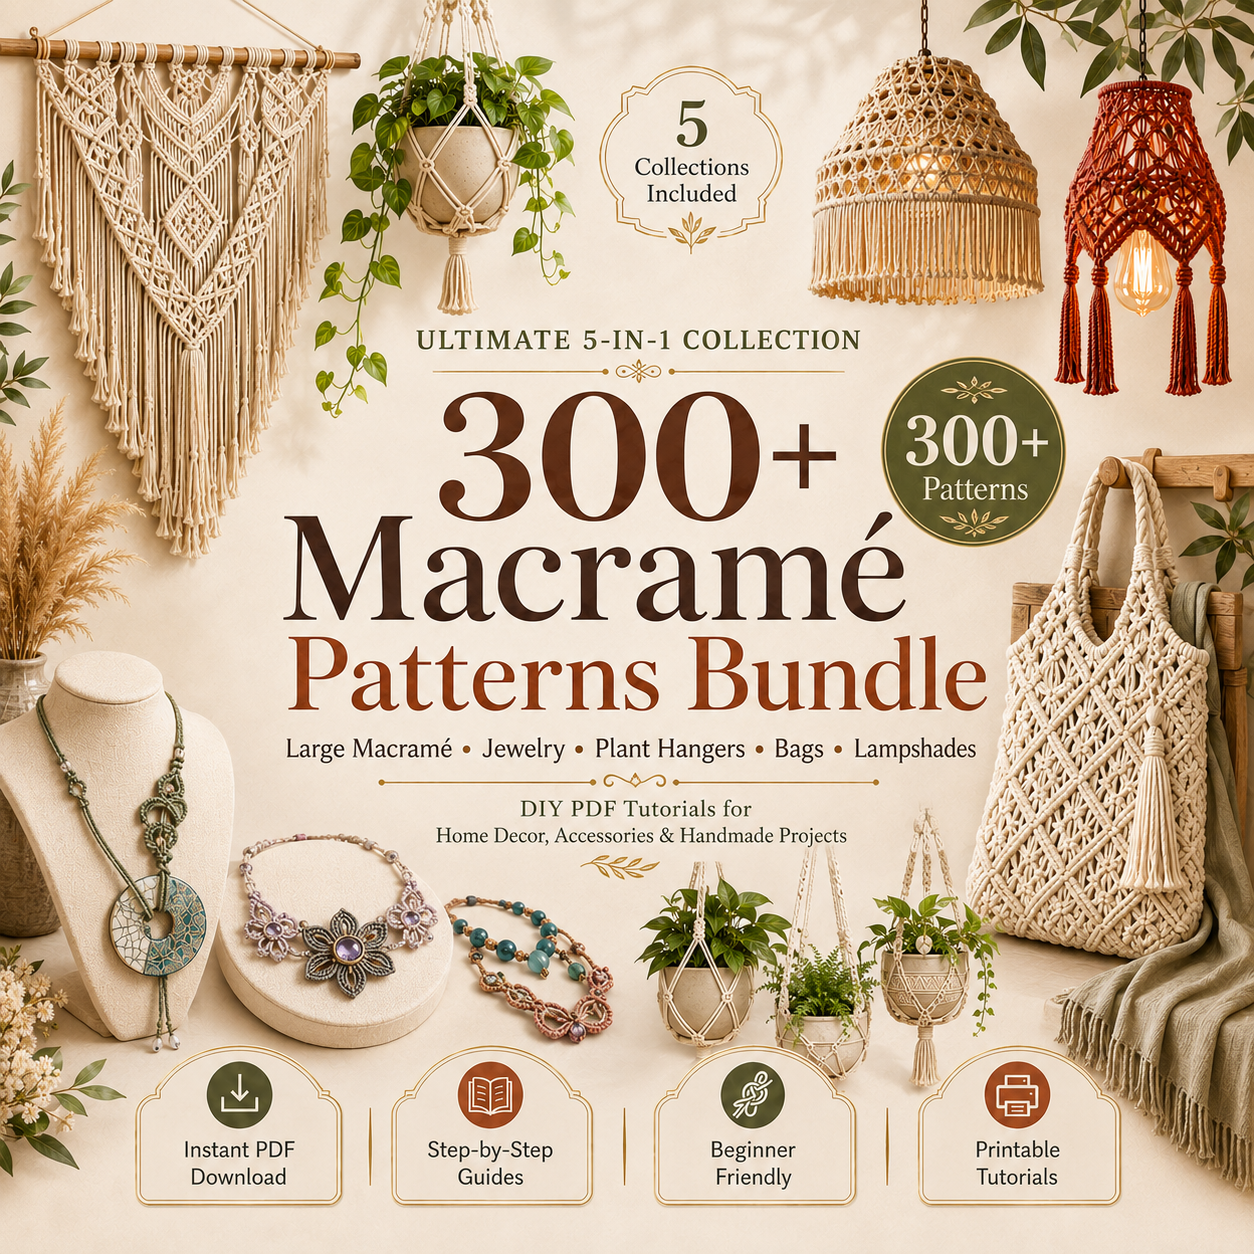
300+ Macramé Patterns

Get the Full 300+ Macramé Patterns Bundle

Get more than 300 macramé patterns in one complete collection, including wall hangings, plant hangers,
bags, jewelry, lampshades and many more projects.

300+ Patterns
Multiple Project Types
Digital PDF Collection


GET THE FULL 300+ PATTERNS BUNDLE →


300 plus macrame patterns bundle with wall hangings plant hangers bags jewelry and lampshades

Knot 05

Double Half Hitch Knot

An important knot for building lines, borders and structured shapes in macramé.

The double half hitch is formed by tying two half hitches around a holding cord. The holding cord controls
the direction of the line, while the working cords are tied around it.

Why it takes practice

The challenge is usually not the movement itself—it is keeping the same angle and tension from one knot to
the next. Keep the holding cord firm and tighten each knot into position before moving on.

Knot 06

Diagonal & Horizontal Clove Hitch Variations

Change the angle of the holding cord and the same knot family can create completely different lines.

Diagonal Rows

Hold the guide cord at an angle and work the knots along it. This creates sloping lines useful for
V-shapes, diamonds, chevrons and decorative borders.

Horizontal Rows

Keep the holding cord horizontal and knot the remaining cords along it. The result is a straight bar
that can divide sections of a design or create a strong visual line.

In macramé patterns you may see double half hitch and clove hitch
terminology used for closely related techniques. For a beginner, the important idea is understanding
how the holding cord controls the direction of the finished row.

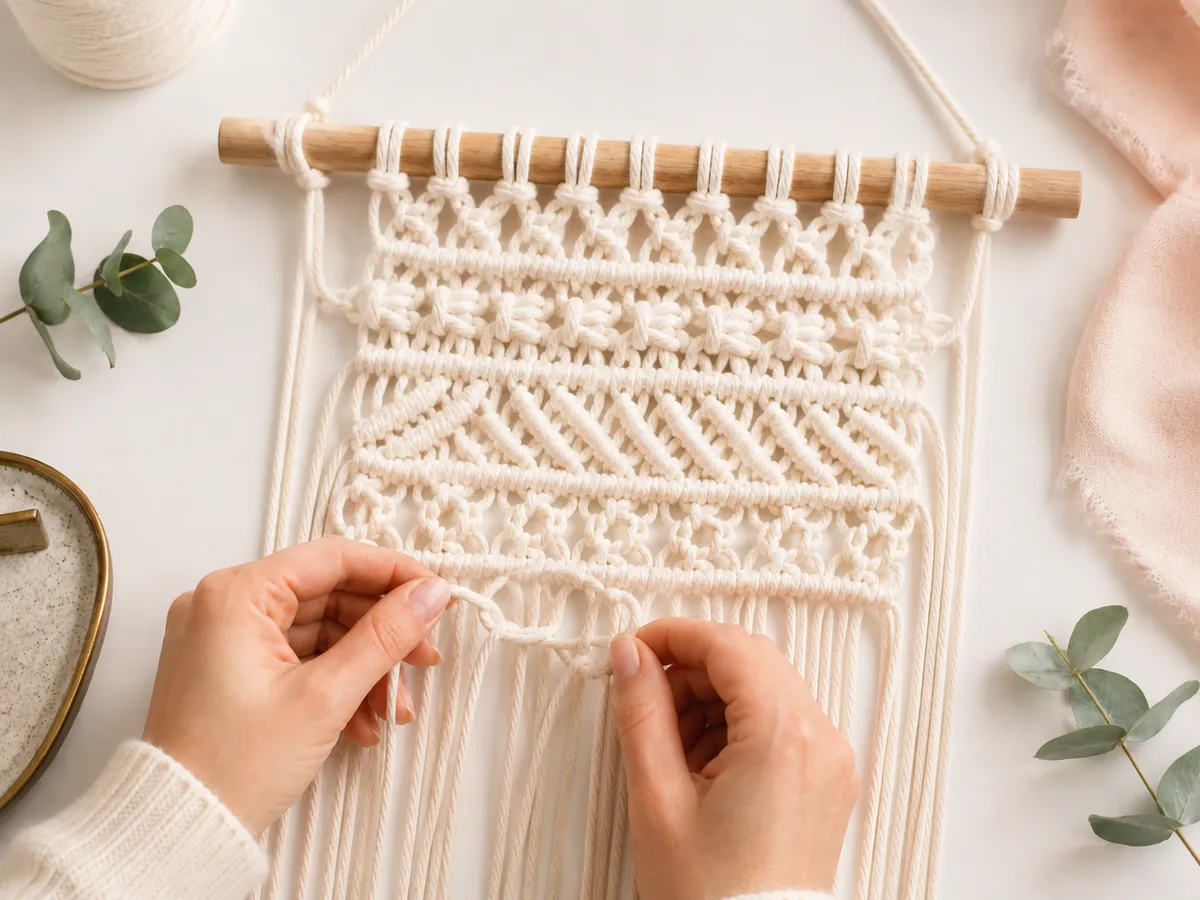
Hands making structured macrame rows with square and half hitch knot patterns

As the same basic knots are repeated in rows, they begin to create borders, diagonals and larger patterns.

Knot 07

Overhand Knot

Simple, small and useful when you need a stopper or a functional finishing knot.

Form a loop, pass the cord end through it and tighten. The overhand knot can act as a stopper, secure a loose
cord, separate sections of a design or help hold beads in position.

Next Step

Two Useful Variations to Learn Next

Once the seven techniques above feel comfortable, these variations help you create more decorative
and functional finishes.

Picot Square Knot

A picot square knot starts with square knots but leaves extra space between them. The lower knot is
pushed upward, creating small decorative loops at the sides.

Sliding Square-Knot Closure

Adjustable bracelets and necklaces often use a short section of square knots worked around opposing
cord ends to create a closure that opens and tightens without a traditional clasp.


Read Next
Macramé Jewelry Beginner Guide

Better Results

How to Keep Macrame Knots Neat and Even

The same knot can look completely different depending on tension and cord control.

Keep the holding cord firm

When working half-hitch rows, keep the holding cord steady while tightening the working cord.

Use pins when they help

Move pins as the project grows so they stay close to the area you are actively knotting.

Aim for consistent tension

Pulling one knot much harder than the next can distort a pattern just as much as leaving it too loose.

Practice before the project

A few practice repetitions are easier to undo than a mistake in the middle of a finished piece.

Cord Choice

Which Cord Is Best for Practicing?

Choose the cord according to the type of macramé you eventually want to make, but start with something
easy to see and control.

For larger projects, cotton, hemp, jute, yarn and other visible cords are easier to handle. For detailed
jewelry, finer waxed cord, nylon cord and similar materials allow much smaller knots.

If your goal is simply to learn the knot movement, do not start with the thinnest cord you can find.
A slightly larger cord makes it easier to see which strand is the working cord, which is the holding cord
and whether the knot is sitting correctly.

Ultimate Macramé Collection

Get 300+ Macramé Patterns in One Bundle

One large collection gives you hundreds of projects to choose from—from beginner-friendly ideas to
wall décor, plant hangers, bags, jewelry, lampshades and more.
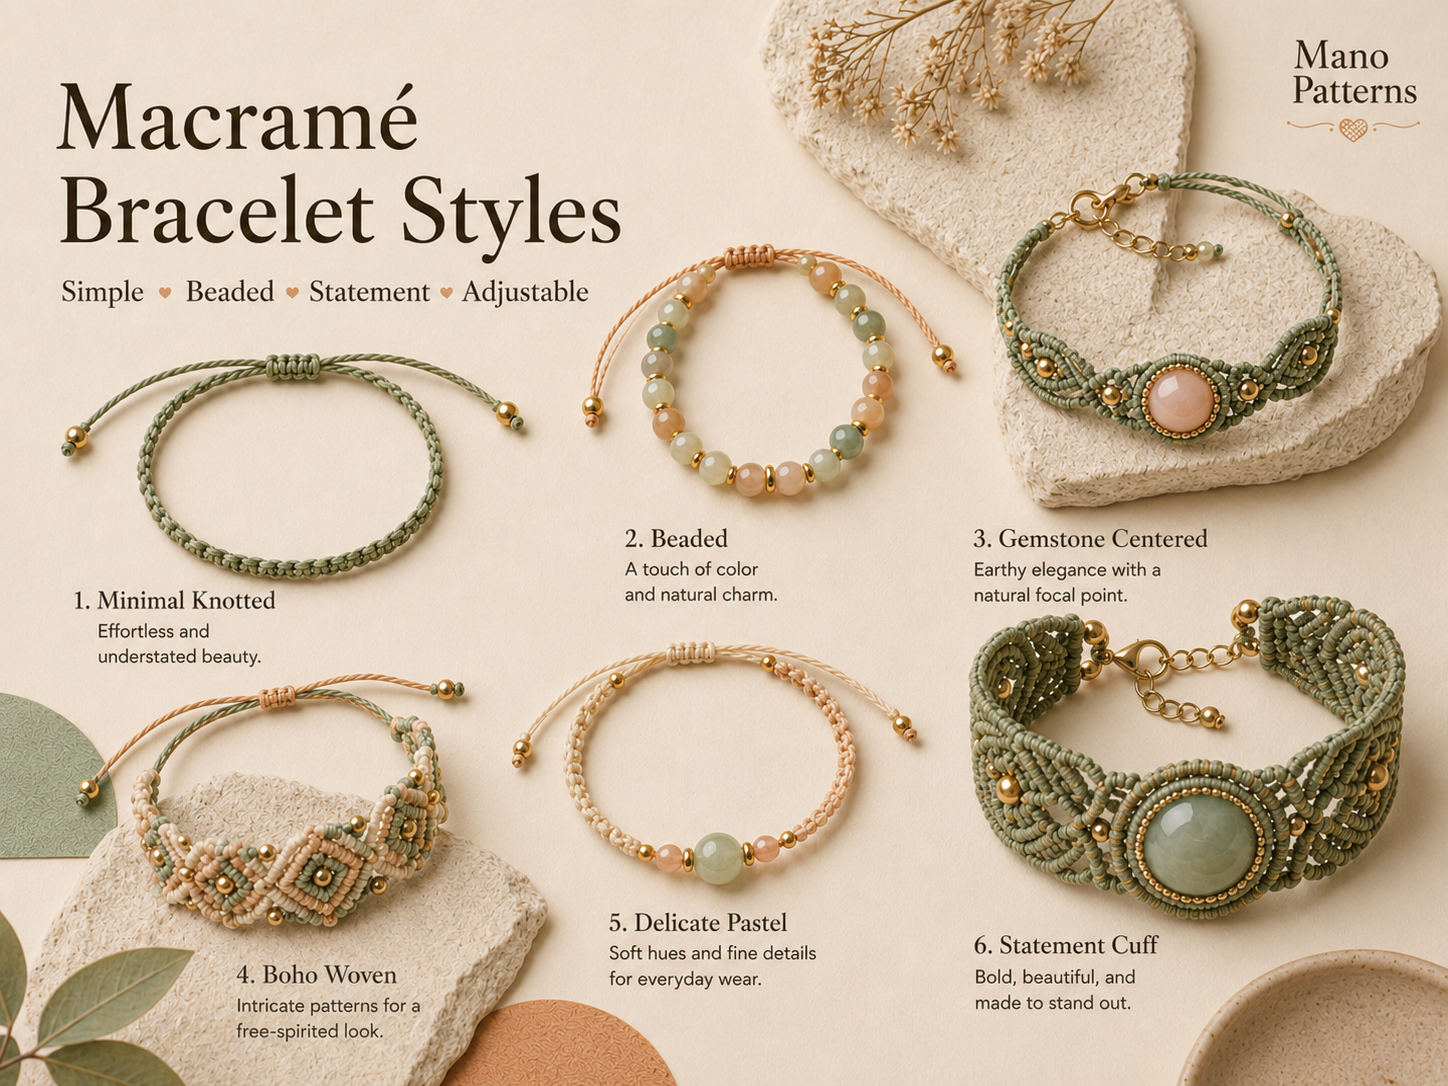
Wall Hangings
Plant Hangers
Bags & Jewelry
Lampshades & More


GET THE 300+ MACRAMÉ BUNDLE →


300 plus macrame patterns bundle with wall hangings plant hangers bags jewelry and lampshades

Beginner Order

What Should a Beginner Learn First?

If seven techniques feel like too much at once, start with four and build from there.

Lark’s Head
Learn how cords are attached to a support.
Square Knot
Build one of the most useful structures in macramé.
Half Knot Spiral
See how repetition changes the shape of your work.
Double Half Hitch
Start creating controlled lines, angles and borders.

Add reverse lark’s head when you encounter different attachment styles, use horizontal or diagonal
half-hitch variations when you want to create lines, and keep the overhand knot in mind for simple
stops and finishing details.

From Practice to Projects

What Can You Make With Basic Macrame Knots?

The same basic knot families can be used at very different scales, from small accessories to decorative wall pieces.

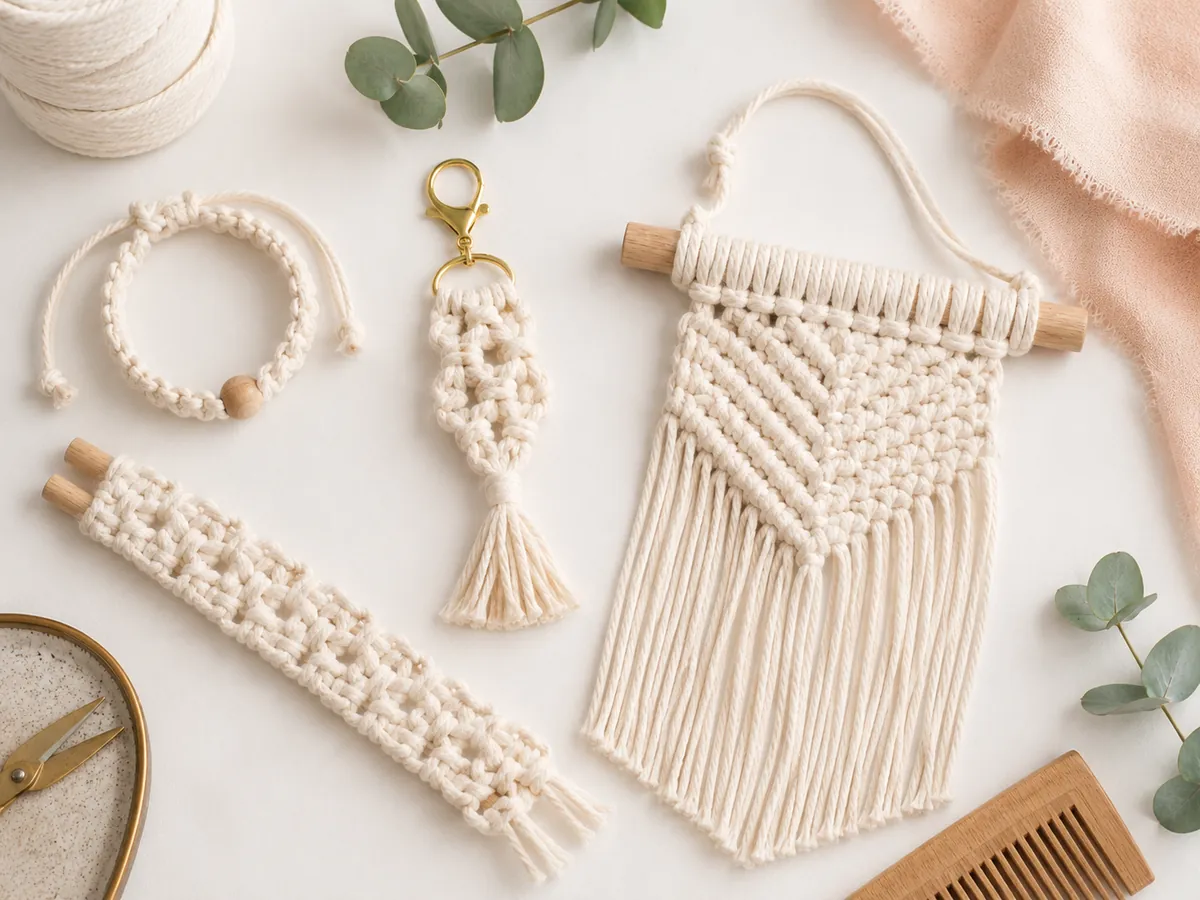
Small macrame projects made with basic knots including bracelet keychain wall hanging and woven band

Once the basic movements feel comfortable, the same knots can be adapted into many different project types.

Keep Learning

Macrame for Beginners: What to Learn Next

The goal is not to memorize knot names. It is to become comfortable enough with the movements that you
can recognize how they build a finished project.

Start with a small practice piece, then move into an actual project as soon as the basic movement feels
comfortable. That is where the knots begin to make sense—not as isolated techniques, but as building
blocks for jewelry, plant hangers, wall hangings, bags and many other macramé designs.


Next Project Guide
Macrame Bracelet Patterns: Styles, Knots, Cord & Closures


Jewelry Project Guide
Macrame Necklace Guide: Knots, Cord, Beads & Closures


More Macramé
Browse the Macramé Guides & Tutorials Library

Posted on

Macramé Jewelry: Beginner Guide to Knots, Materials, Patterns & Designs

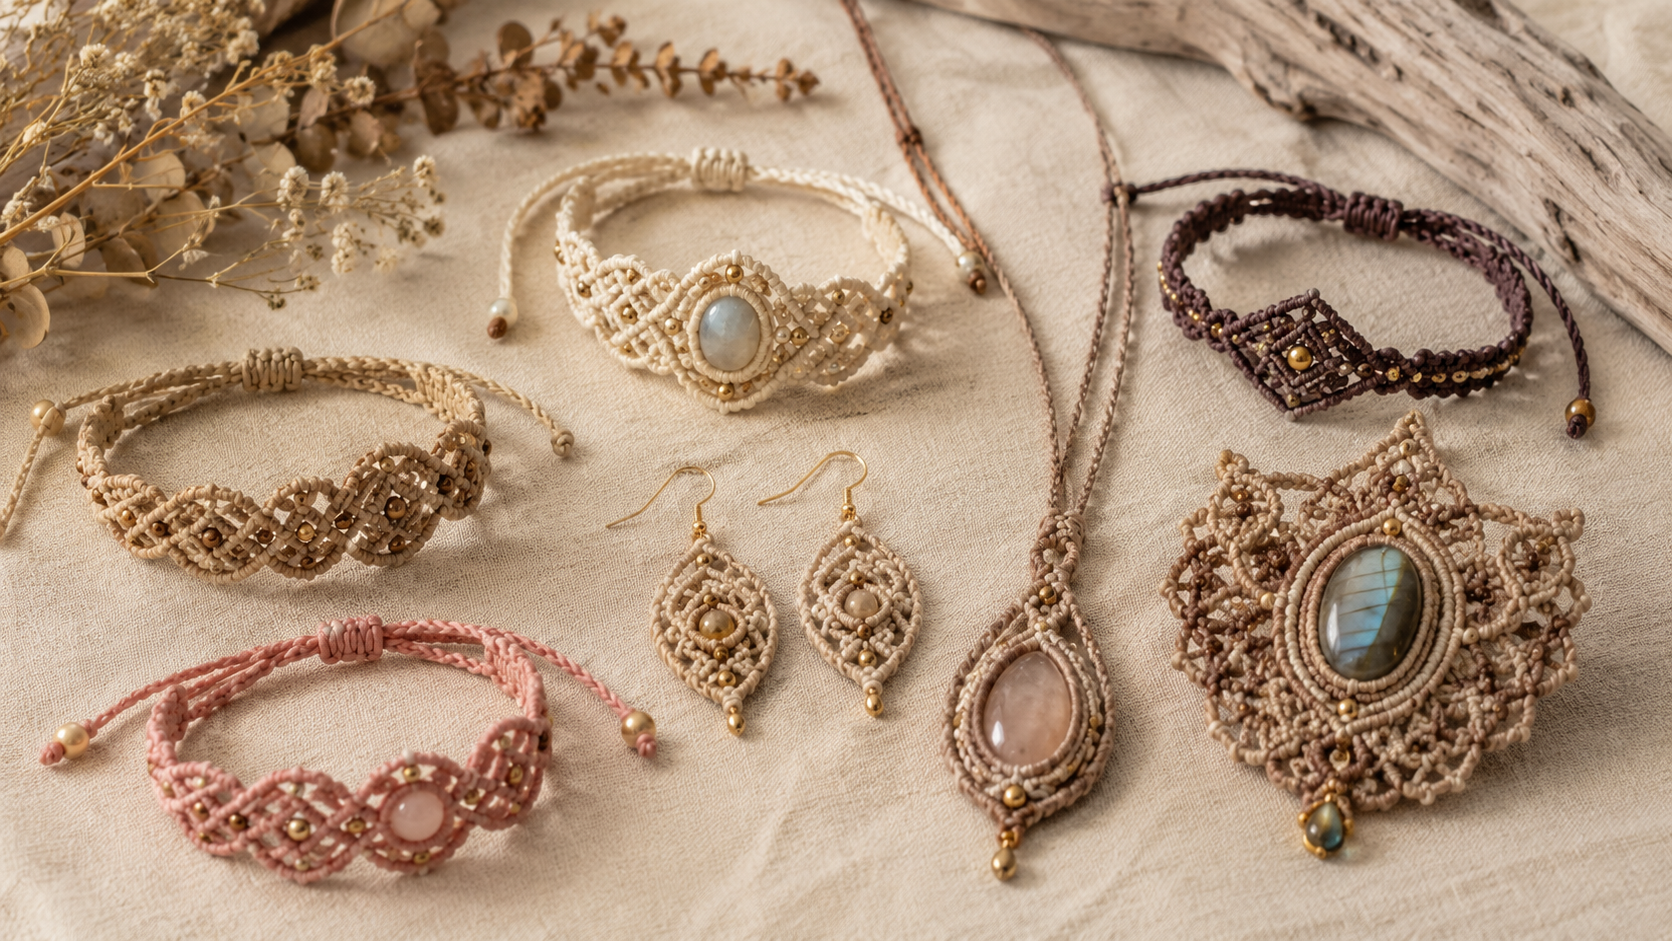
Handmade macrame jewelry including bracelets, necklace and earrings

Mano Patterns • Macramé Guide

Macrame jewelry is made by knotting fine cord into bracelets, necklaces, earrings,
pendants and other wearable pieces. For beginners, the most important things to learn
are not dozens of knots at once, but how to choose the right cord, keep tension even,
measure accurately, add beads or stones securely and finish the piece cleanly.

This guide walks through those practical details step by step, so you can understand
why a piece works — not just copy a finished design.

The Basics

How Macramé Jewelry Is Built

Macramé does not use stitches like knitting or crochet. The cords themselves become
the structure. Different knot directions, cord thicknesses and spacing create flat bands,
spirals, curves, openwork, gemstone frames and decorative edges.

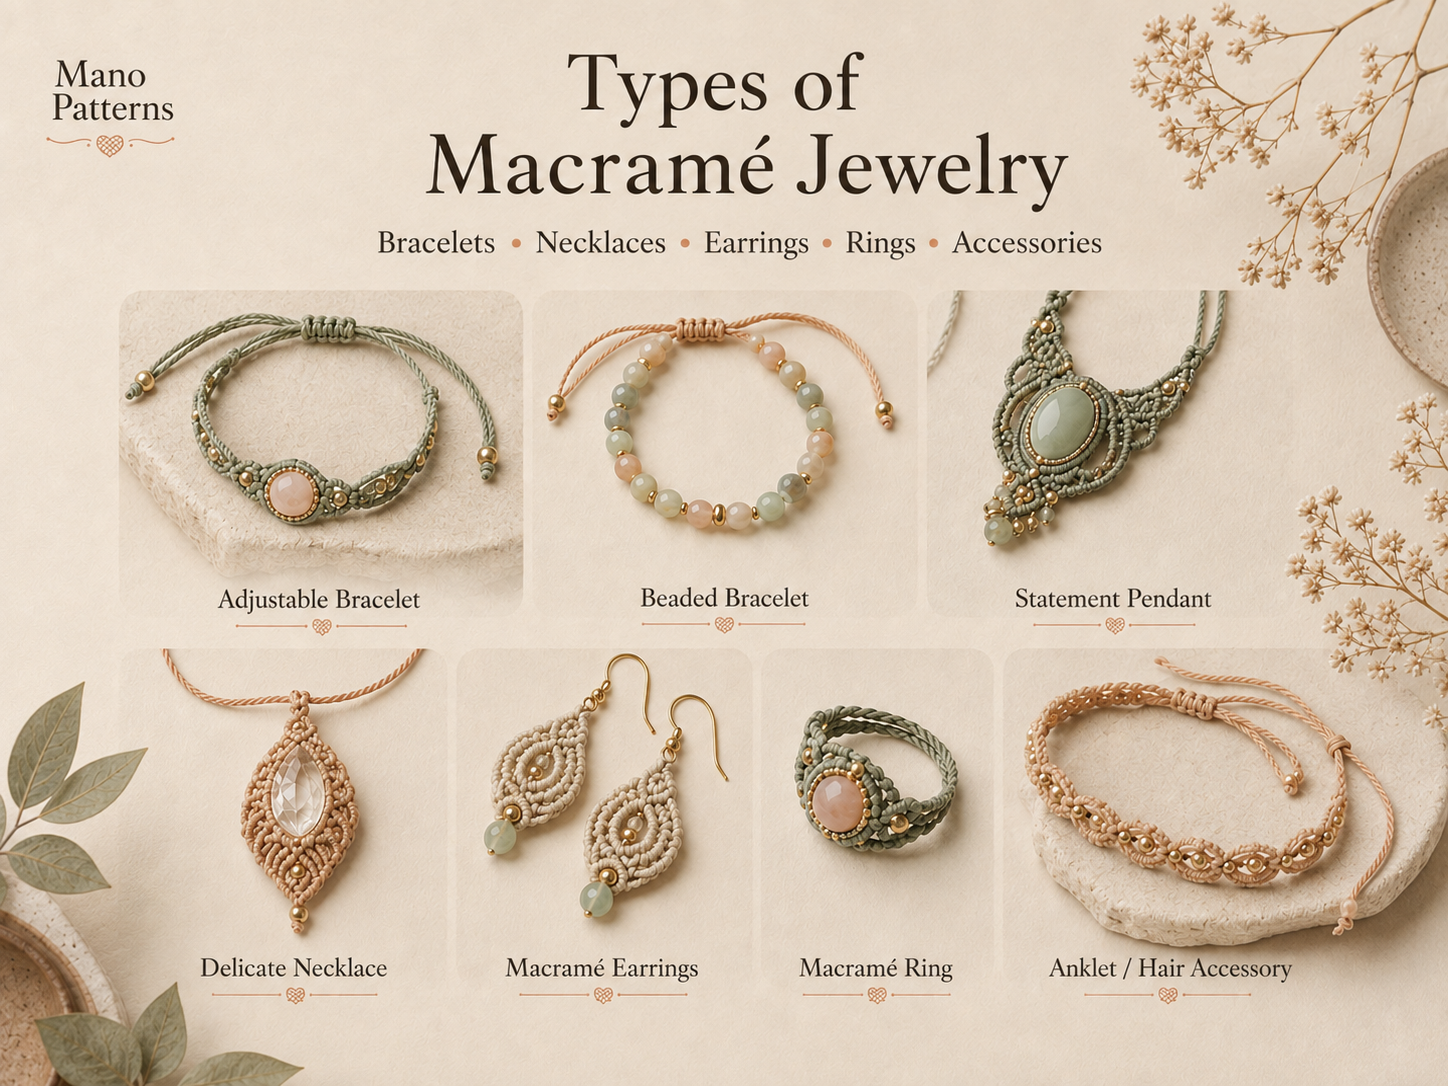
Macrame jewelry including bracelets necklaces earrings rings and accessories

The same basic knotting principles can be adapted to bracelets, necklaces, earrings,
rings and other small accessories.

Flat knotted bands

Square knots are often worked around one or more filler cords. This creates a flexible,
flat strip that works well for bracelets, anklets and narrow necklace sections.

Spirals

Repeating the same half of a square knot makes the work twist naturally.
This is useful when you want a decorative rope-like effect instead of a flat band.

Curves & shapes

Double half hitches can follow an angled guide cord, allowing you to create chevrons,
leaves, arcs and frames around beads or stones.

Stone-centered jewelry

Gemstones are held by a knotted frame or net. The frame must support the stone from
several directions so it cannot slide out when the jewelry moves.

Getting Started

Macrame Jewelry Tools & Materials

Jewelry-scale macramé uses fewer tools than many crafts, but small details matter more.
A stable work surface and compatible cord, beads and findings will save a lot of frustration.

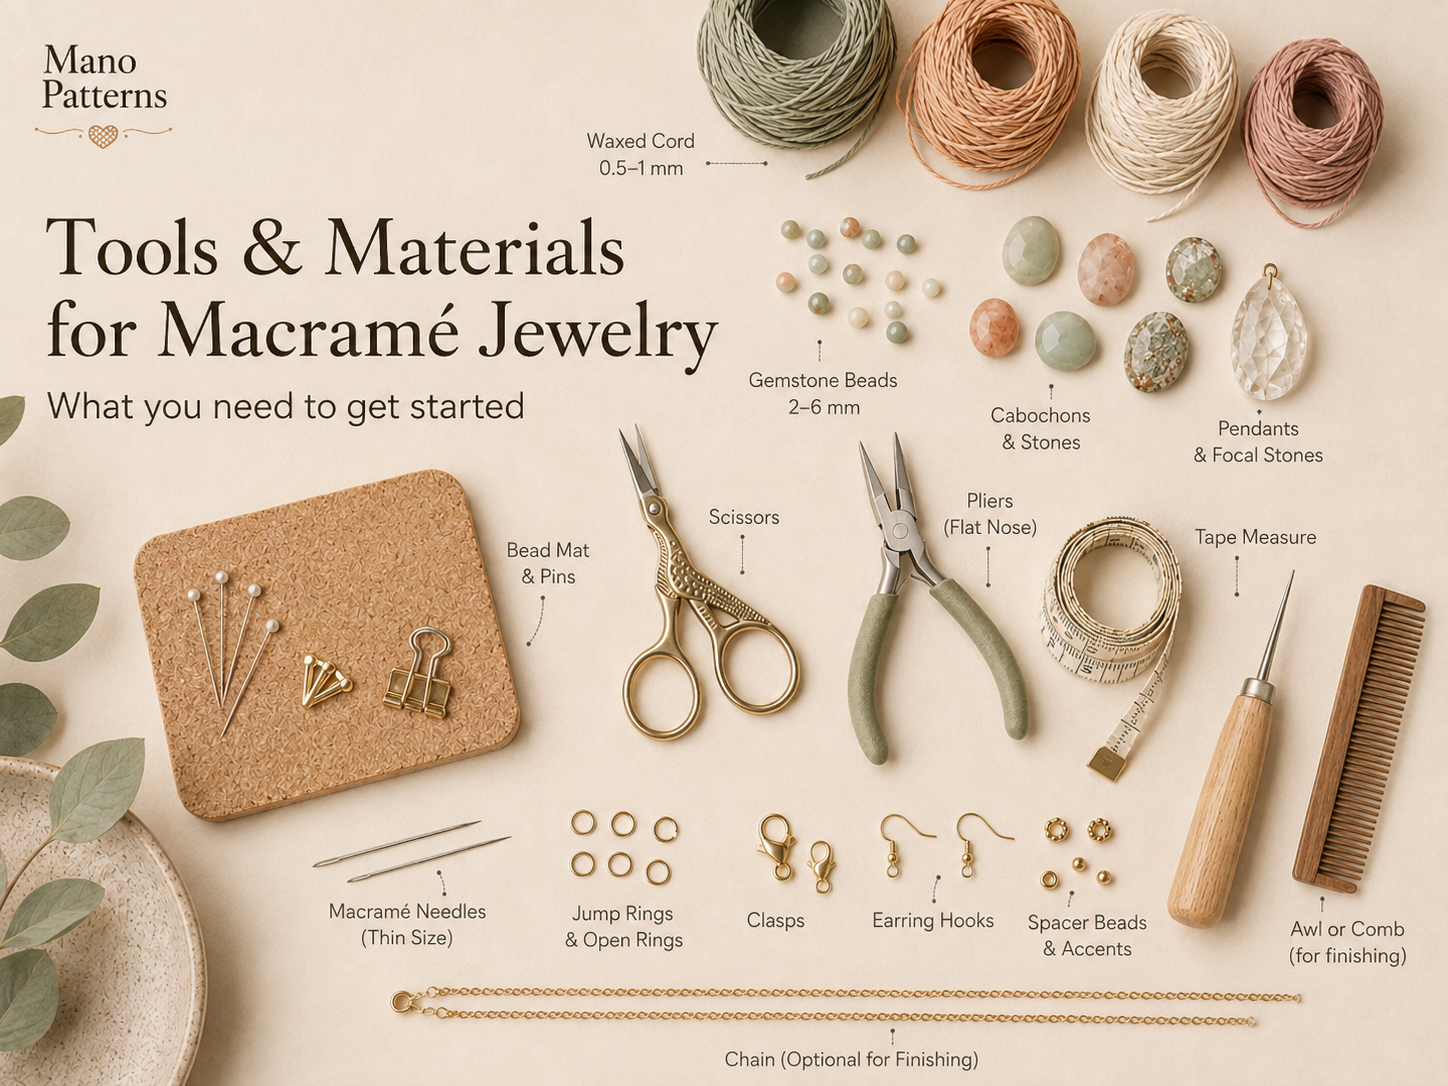
Fine cord beads scissors pliers findings and measuring tape on a craft surface

A useful beginner setup includes fine cord, scissors, measuring tools, pins,
jewelry findings, beads and a firm knotting surface.

Item Why you need it What to check
Macramé cord Creates the entire structure. Diameter, flexibility, surface texture and finishing method.
Knotting board Keeps the project from moving. It should hold pins or clips securely.
T-pins / clips Anchor loops, clasps and guide cords. Smooth edges prevent snagging fine cord.
Sharp scissors Create neat cord ends. Small pointed blades are easier around close knots.
Pliers Attach clasps and open jump rings. Two small jewelry pliers give better control.
Beads & stones Add decoration and focal points. The hole or setting must fit your actual cord.
Findings Clasps, rings, ear wires and connectors. Match their size and weight to the jewelry.
Before cutting all your cord:
thread one test piece through the smallest bead or finding. If it frays, jams or needs force,
change the cord or bead before you start the project.
New to the terminology?
For a quick background reference, see the

macramé overview on Wikipedia
.

Material Guide

Choosing the Right Cord

For macrame jewelry, cord diameter controls knot size, drape and detail. Cord material controls softness,
fraying, grip and how the ends can be finished.

0.4–0.6 mm

Best for very fine micro-macramé, seed beads, detailed earrings and intricate gemstone work.
It gives excellent detail but exposes uneven tension quickly.

0.7–0.8 mm

A versatile jewelry range for bracelets, pendants and beaded pieces.
The knots stay defined without becoming bulky.

0.9–1.2 mm

Easier for beginners to see and handle. Useful for simple bracelets,
chunkier pendants and casual necklaces.

Above 1.2 mm

Better for intentionally bold jewelry. Fine details become larger very quickly,
so this size is usually less suitable for delicate micro-macramé.

Cord material matters too

  • Waxed polyester: crisp, durable and popular for micro-macramé and gemstone jewelry.
  • Nylon: smooth, strong and useful for fine knotting and beadwork.
  • Cotton: soft and natural-looking but can fuzz or fray more at very small sizes.
  • Hemp / linen-style cord: firmer and more organic-looking, ideal for rustic designs.
Use the pattern size first

If a pattern recommends 0.8 mm cord, do not automatically replace it with 1.5 mm.
Larger cord changes the knot size, bead compatibility and finished dimensions.

Technique

Essential Macrame Jewelry Knots

These four techniques cover much of what a beginner needs for bracelets,
pendants and simple jewelry structures.

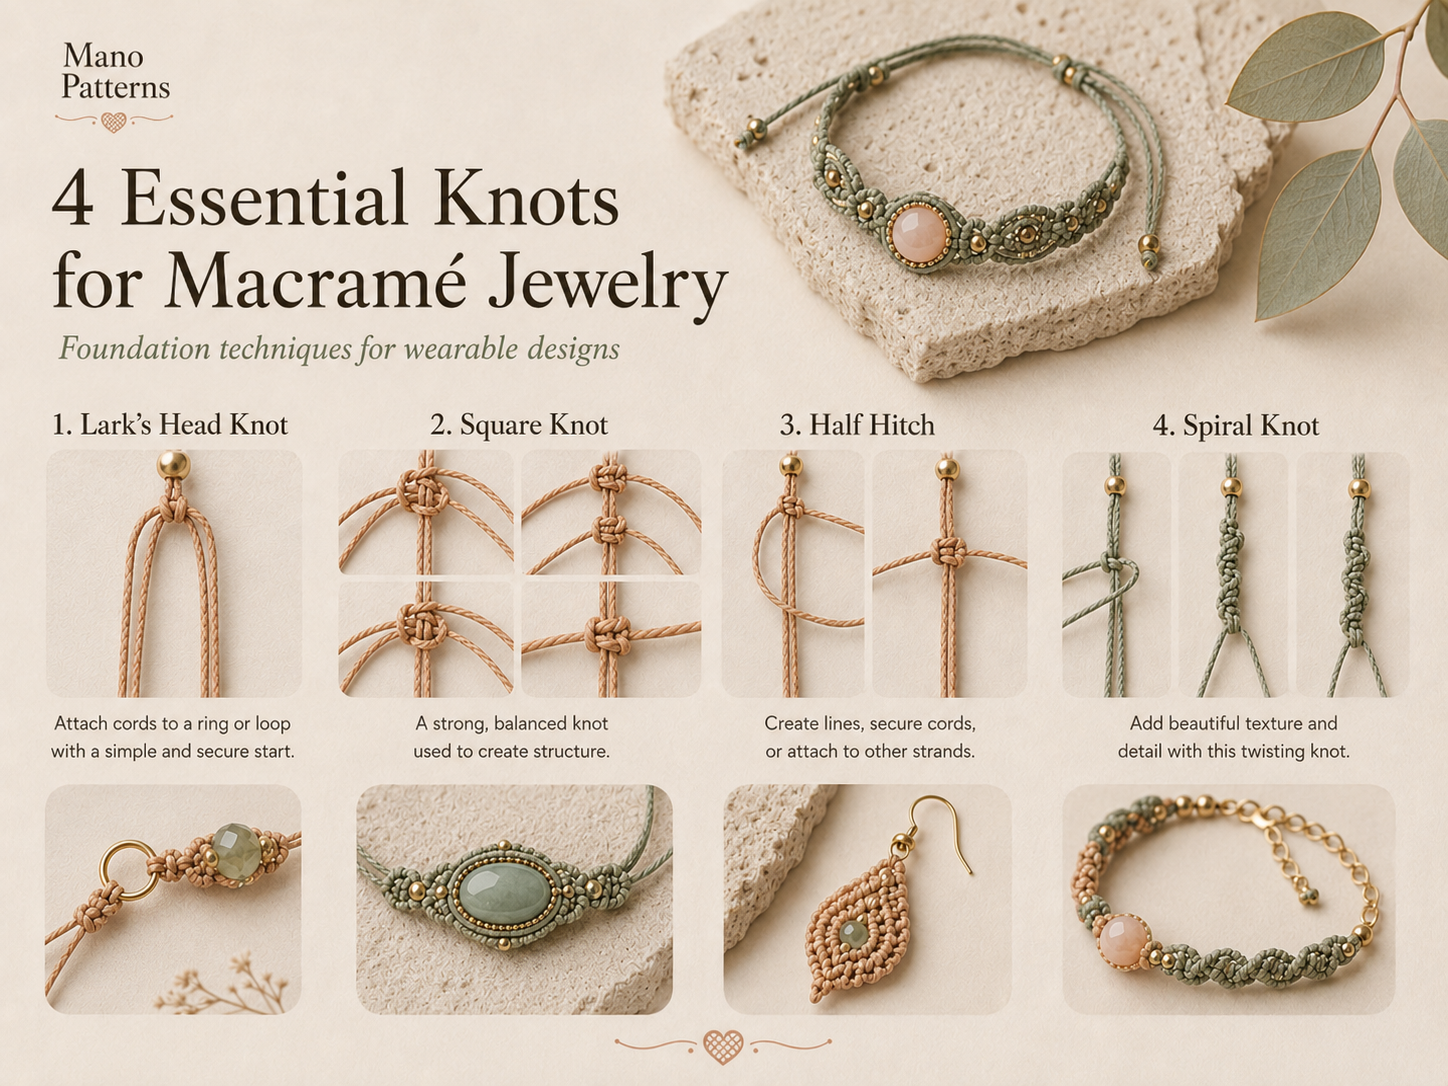
Square knot spiral knot larks head knot and double half hitch examples

Lark’s head knot

Used mainly to attach folded cords to a ring, bar, clasp or anchor cord.
It is often the starting point of a design.

Square knot

Made from two alternating half knots. It produces a stable, flat band and
is one of the easiest knots for bracelets.

Half-square / spiral knot

Repeating only one half of the square knot makes the cord twist into a spiral.
If your bracelet twists when it should be flat, this is often the reason.

Double half hitch

A working cord knots around a guide cord. Changing the guide cord’s direction
creates diagonals, curves, chevrons and gemstone frames.

Easy to Follow • Step by Step

Follow Clear Patterns From Start to Finish

Choose a project with easy-to-follow instructions and work through each step
from the first knot to the finished piece.

Step-by-Step Patterns
Easy Instructions
Practical Projects

See the Step-by-Step Patterns →

200 plus macrame jewelry patterns bundle with bracelets necklaces earrings and accessories

Project Focus

Macrame Jewelry Bracelets

Bracelets are excellent first projects because they teach sizing, repeated tension,
straight edges and closures without requiring a large amount of cord.

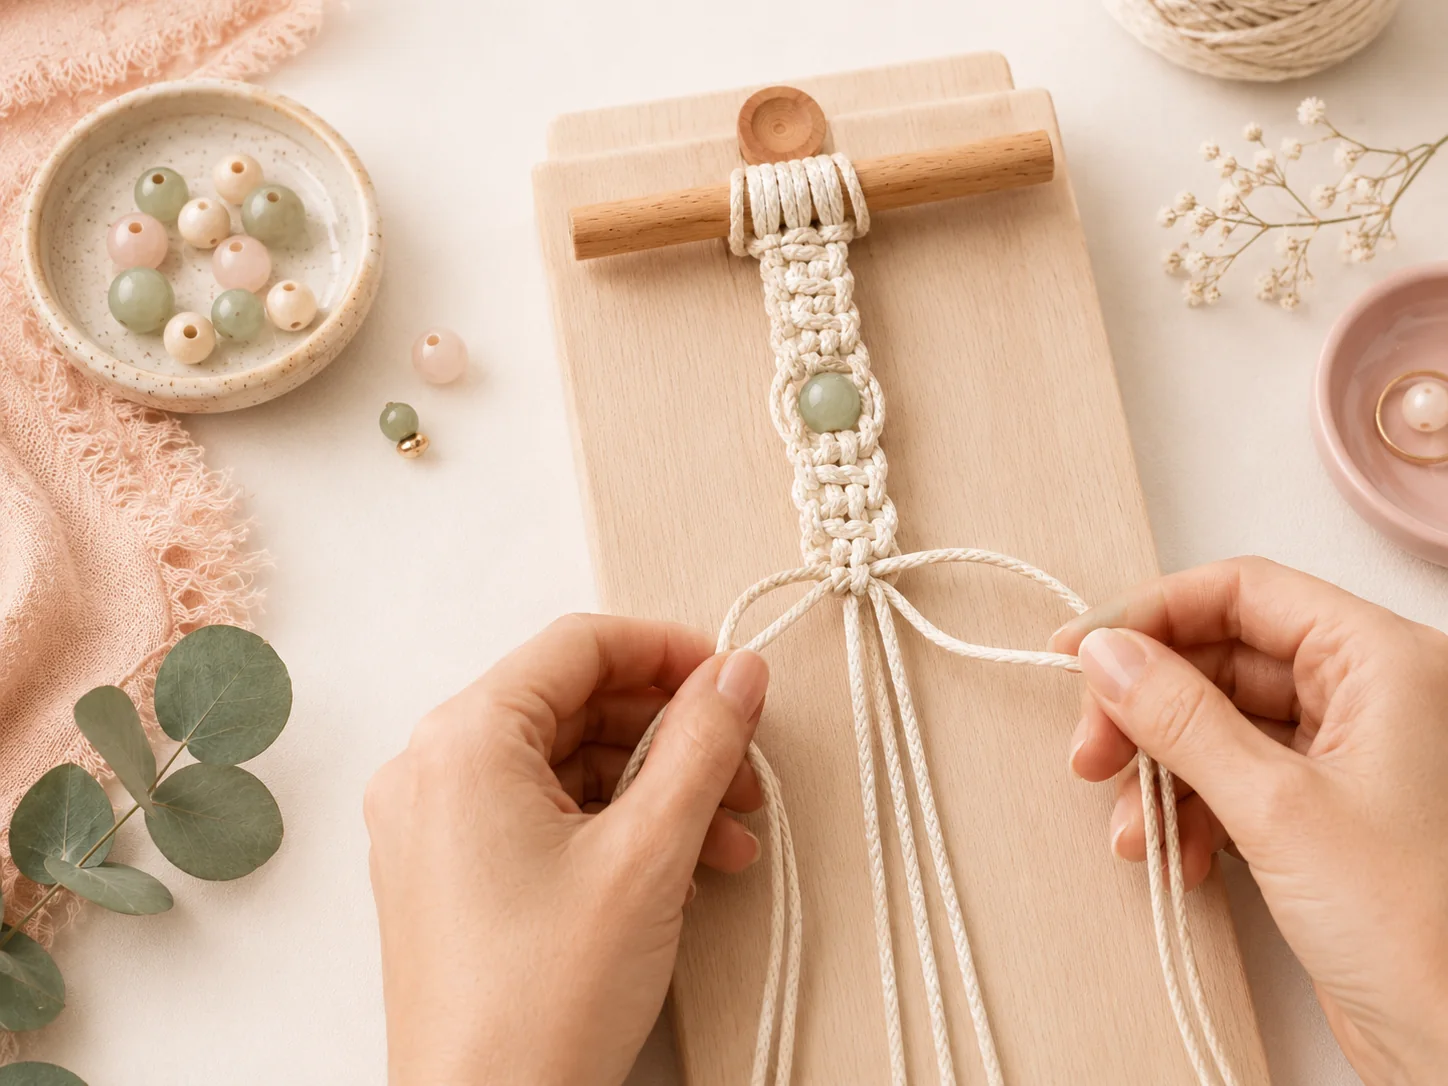
Adjustable beaded and gemstone bracelet styles

Measure correctly

Measure where the bracelet will sit, then include the length added by the clasp,
button loop or sliding closure. Measuring only the knotted center often makes the finished piece too long.

Keep the band straight

Uneven pulling causes one edge to shrink and the bracelet to curve.
Flatten the work every few rows and compare both sides.

Choose the closure early

Sliding knots are adjustable, button loops are simple and decorative,
and lobster clasps give a more traditional jewelry finish.

Add beads carefully

Thread beads onto the correct filler or working cord, center them before tightening,
and check that the surrounding knots do not pull the bead sideways.

Project Focus

Macramé Necklaces & Pendants

In macrame jewelry, necklace construction depends on the focal point, finished length and weight of the design.
A small pendant behaves very differently from a wide gemstone statement necklace.

Pendant gemstone and statement necklace styles

Pendant necklaces

The transition between pendant and neck cords should be secure without becoming bulky.
Test how the pendant hangs before trimming any structural cords.

Gemstone holders

The stone must be supported from several directions.
Gently move the finished frame before trimming to make sure the stone cannot slide out.

Statement pieces

Mark the center first and build mirrored sections outward.
Counting rows on both sides helps keep large designs symmetrical.

Comfort & weight

Heavy stones and metal beads add weight quickly.
Make sure the cord, clasp and attachment points can support the finished piece.

Small-Scale Projects

Macramé Earrings & Accessories

Small macrame jewelry projects use less material, but symmetry and finishing become more visible,
especially when two earrings need to match.

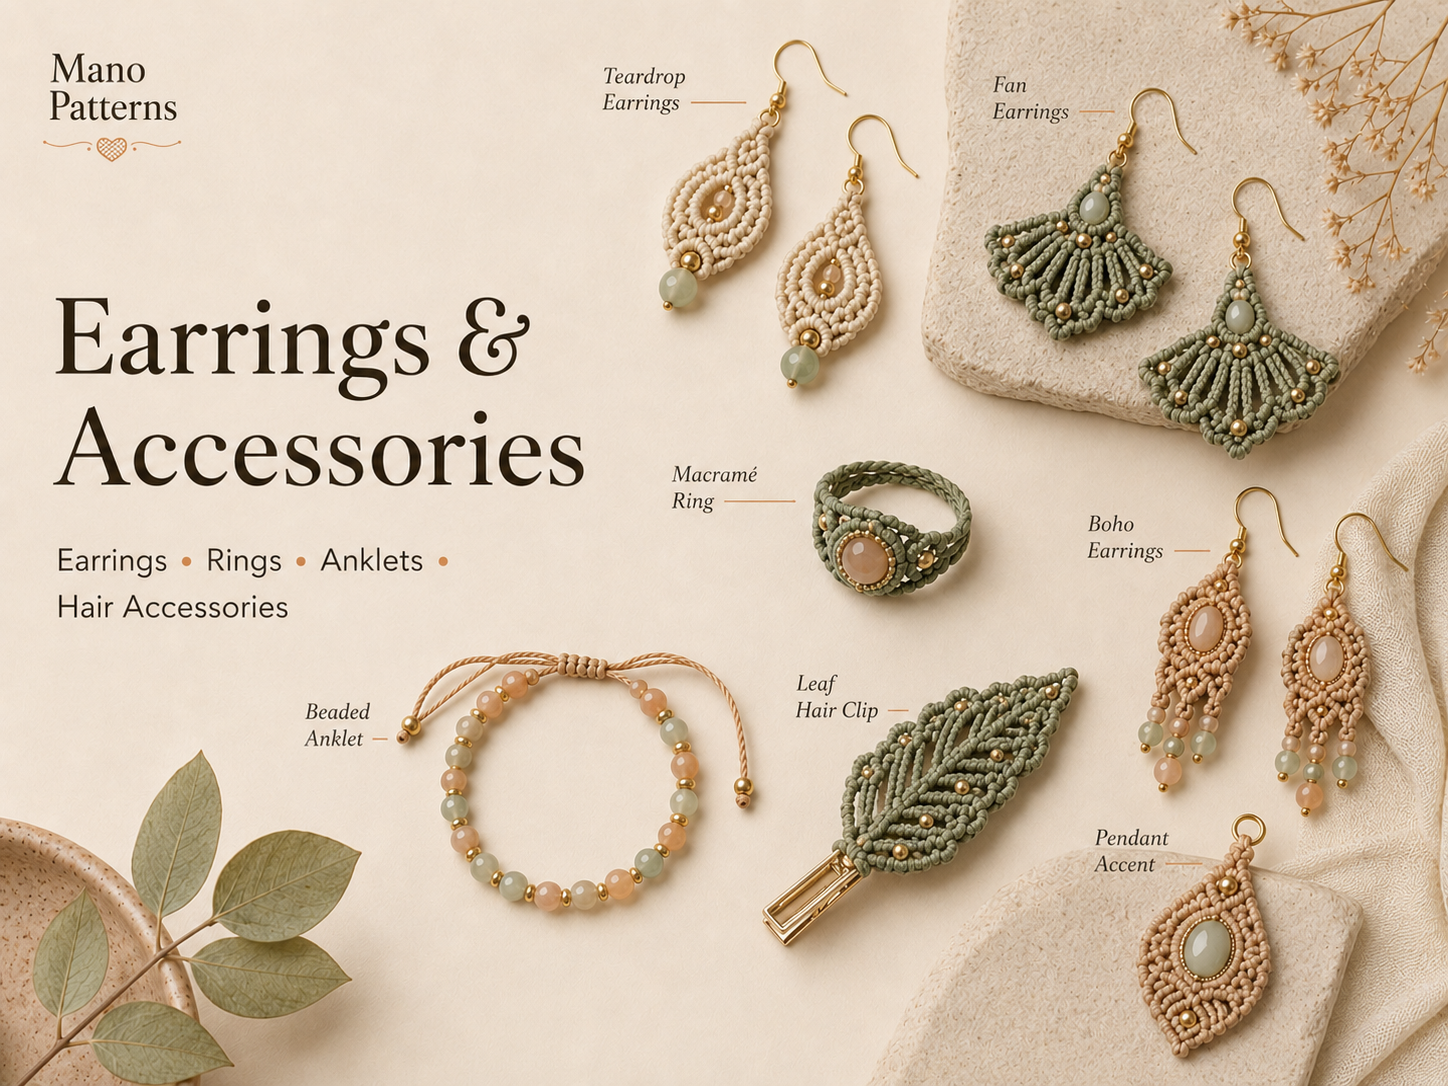
Earrings rings anklets hair accessories and small pendants

Make pairs together

Cut both sets of cords at the same time and compare the two earrings after every main row.
This makes matching tension easier.

Watch the weight

Ear wires, rings, beads and dense knotting can become heavy.
Fine cord and fewer heavy components usually make earrings more comfortable.

Trim fringe last

Let the finished piece hang naturally before cutting fringe.
Trimming while it is twisted or pinned can create an uneven edge.

Close jump rings correctly

Open jump rings sideways with pliers instead of stretching them apart.
This helps them return to their original shape and close without a gap.

Beginner-Friendly Projects

Start With an Easy Pattern

Find simple bracelets, necklaces and small jewelry projects that are easier
to follow while you build confidence with the basic knots.

Beginner Friendly
Simple Projects
Build Your Skills

Browse Beginner-Friendly Patterns →

Large macrame jewelry pattern collection with beginner friendly projects

Decorative Details

Adding Beads & Gemstones

In macrame jewelry, beads and stones change both the appearance and the construction of a piece.
Plan them before knotting so the cord diameter, bead holes and frame all work together.

Bead-hole size

Check how many cords must pass through each bead.
A hole that fits one 0.8 mm strand may not fit two strands together.

Center focal beads

Position the bead before tightening the next row.
Pulling one side first can move the focal bead away from the center.

Irregular stones

Natural stones are not always perfectly symmetrical.
Build the frame around the real stone instead of forcing identical spacing on both sides.

Check security

Before trimming, gently rotate and move the stone.
If it shifts toward an opening, tighten or rebuild the nearest knots.

Fine Detail

Understanding Micro Macramé

Micro macramé uses much finer cord and smaller knots.
The technique allows detailed curves, gemstone settings and beadwork,
but it requires more consistent tension.

Why the detail increases

Finer cord lets you fit more knots into the same space,
creating smoother curves and more intricate motifs.

Why mistakes show more

A small change in knot size is easier to notice when the entire design is miniature.
Work slowly and seat each knot before tightening it.

Useful setup

A firm board, fine pins, strong lighting and sharp scissors make tiny knots much easier to control.

When to try it

Move into micro macramé after you can make even square knots and double half hitches
without constantly adjusting their size.

Beginner Workflow

Macrame Jewelry for Beginners: From Cord to a Finished Bracelet

The exact cord lengths and knot counts depend on the pattern,
but this workflow applies to most beginner bracelet projects.

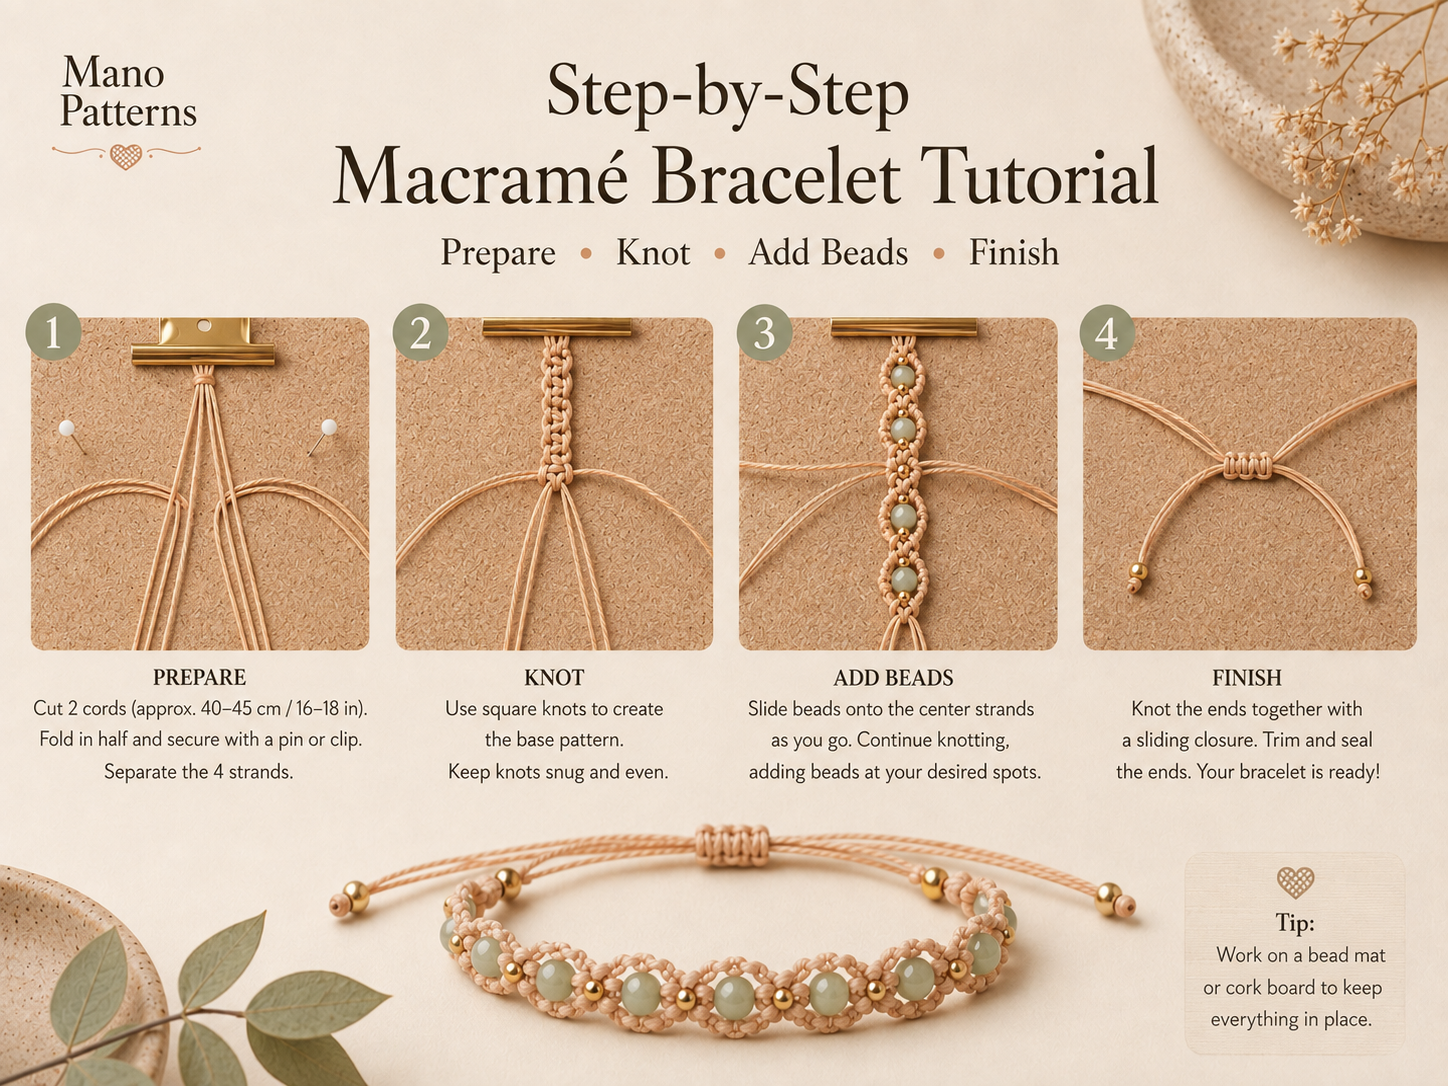
Bracelet making steps from measuring cord to finishing the closure
Measure the wrist
Decide the finished size and whether the bracelet will be fitted or adjustable.
Read the whole pattern
Identify cord lengths, bead placement, knot sequence and closure before cutting.
Cut and organize
Separate working cords from filler cords so you always know which strand should move.
Anchor the work
Pin or clip the top securely so the piece does not slide when you apply tension.
Build the first repeat slowly
Make sure the knot direction is correct before repeating it across the bracelet.
Add beads or stones
Center each focal element before tightening the next row.
Test the final length
Include the closure in the measurement before you finish the last knots.
Finish and inspect
Secure the ends and check every connection before wearing or gifting the piece.

Finishing

Closures, Ends & Final Details

Good finishing makes macrame jewelry look intentional and helps prevent the knots from loosening.

Sliding closure

Two bracelet ends overlap and are wrapped with a small knotted section.
It should hold its position but still move when intentionally pulled.

Button-and-loop

Test the loop before trimming. Too large and it may slip open;
too small and the button will be difficult to push through.

Clasps & jump rings

Make sure the jump ring is fully closed and that the knotted attachment
cannot slide through a small gap.

Cord ends

Synthetic and natural fibers require different finishing methods.
Follow the cord manufacturer’s guidance rather than using the same method on every material.

Common Problems

Beginner Troubleshooting

Problem Likely cause Fix
Bracelet curves One side is tighter. Flatten the work frequently and compare both edges.
Band twists The same half-square knot is being repeated. Alternate the two halves to make full square knots.
Bead will not thread Hole is too small or the cord end is frayed. Trim the end cleanly and use a compatible bead if needed.
Stone feels loose The frame is too open. Rework the nearest rows before trimming any cord.
Bracelet is too long Closure length was not included. Measure the complete piece including clasp or sliding section.
Knots look uneven Tension changes from row to row. Seat each knot against the previous one before tightening.

Quick Answers

Macramé Jewelry FAQ

Is macrame jewelry suitable for beginners?

Yes. A simple bracelet or pendant using one or two repeated knots is a practical place to start.

What cord size is easiest for a beginner?

Many beginners find approximately 0.8–1.2 mm easier to see and control,
but always follow the size recommended by the pattern when possible.

Which knots should I learn first?

Lark’s head, square knot, half-square knot and double half hitch give you a strong basic foundation.

Can I add beads to macramé jewelry?

Yes. Check that the hole fits the required number of cords and test placement before tightening the next row.

Why does my bracelet twist?

If you intended a flat square-knot band, you may be repeating the same half knot instead of alternating sides.

Full Macramé Jewelry Collection

Get the Complete 200+ Pattern Bundle

Keep the full collection in one place with 200+ bracelets, necklaces,
earrings, pendants and more to choose from.

200+ Patterns
Full Collection
Many Jewelry Styles

Get the Full 200+ Collection →

Complete 200 plus macrame jewelry patterns collection

Read More

More Macramé Guides

Choose the topic you want to explore in more detail next.