Posted on

Macrame Bracelet Patterns: Styles, Knots, Cord & Closures

Macrame bracelet patterns with handmade knotted bracelets, cords, beads and closures

Macramé Bracelets

Macrame Bracelet Patterns: Styles, Knots, Cord & Closures

Macrame bracelet patterns are a practical way to move from practicing individual knots
to making a finished piece you can actually wear. A bracelet is small enough for beginners to manage,
but it still teaches important skills such as measuring, keeping tension even, placing beads and choosing
a secure closure.

This guide explains the main bracelet styles, useful knots, cord choices, sizing and finishing options.
It is designed to help you understand what makes one bracelet pattern different from another so you can
choose projects that match your current skill level.

Quick bracelet checklist

  • Choose the closure before deciding the final bracelet length.
  • Keep repeated knots the same size so the band stays straight.
  • Check that beads fit the actual cord before you start knotting.
  • Test the bracelet around the wrist before trimming or sealing the ends.

Start With the Style

Common Macrame Bracelet Styles

Bracelet patterns can use the same basic knots and still look completely different depending on width,
cord, beads and the way the piece closes.
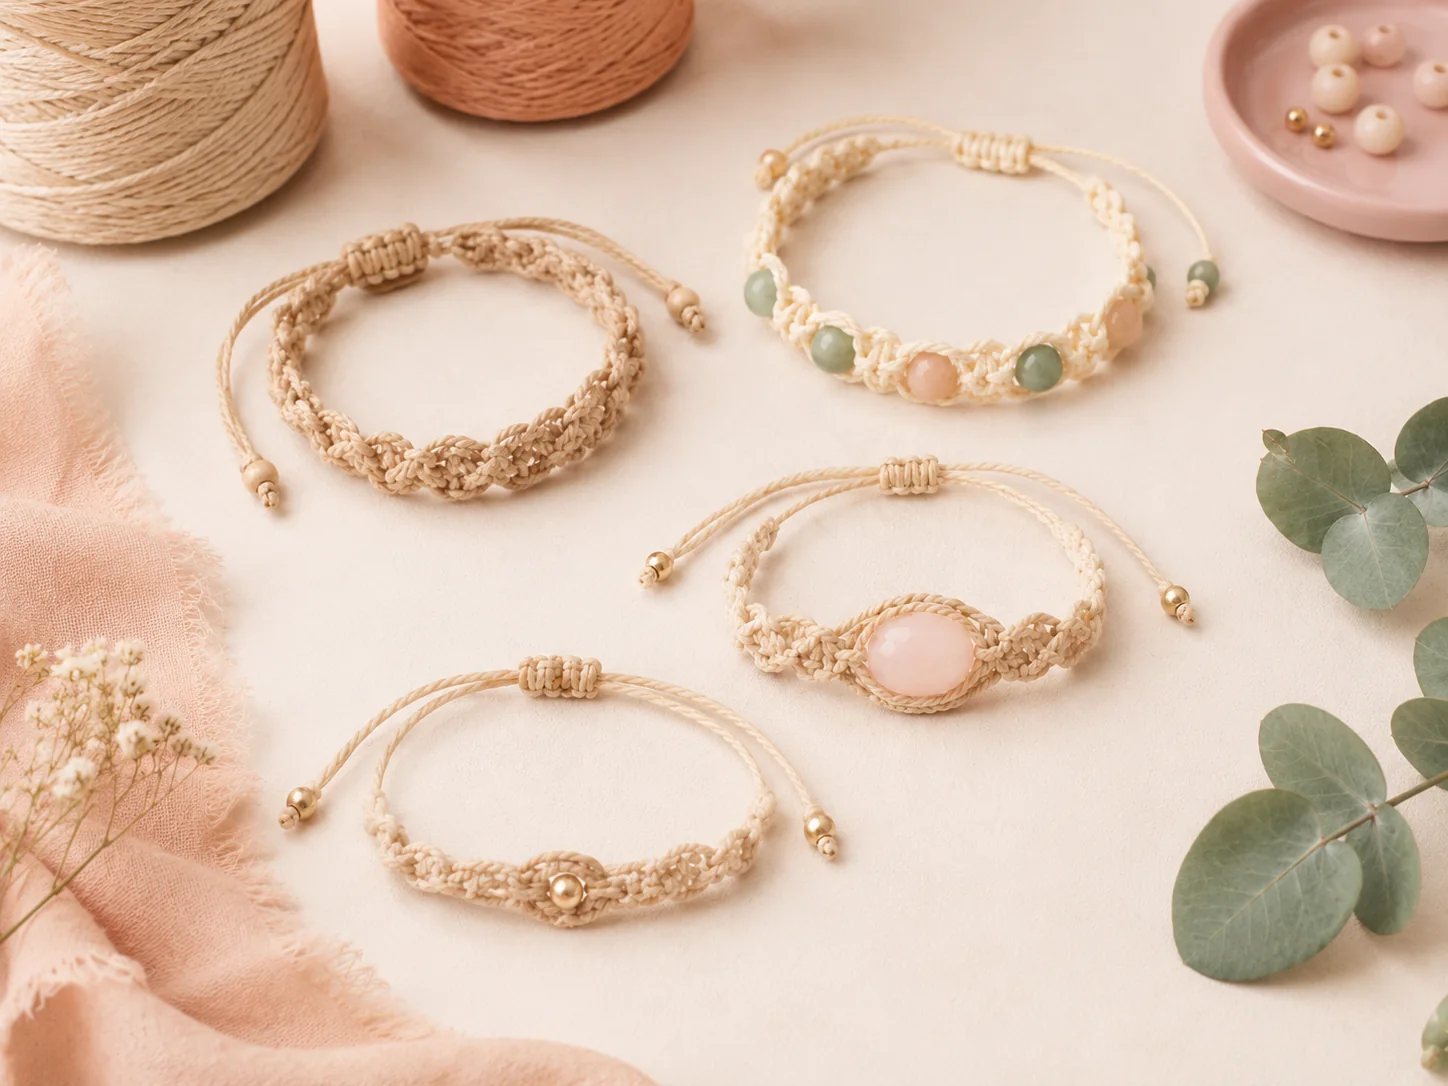
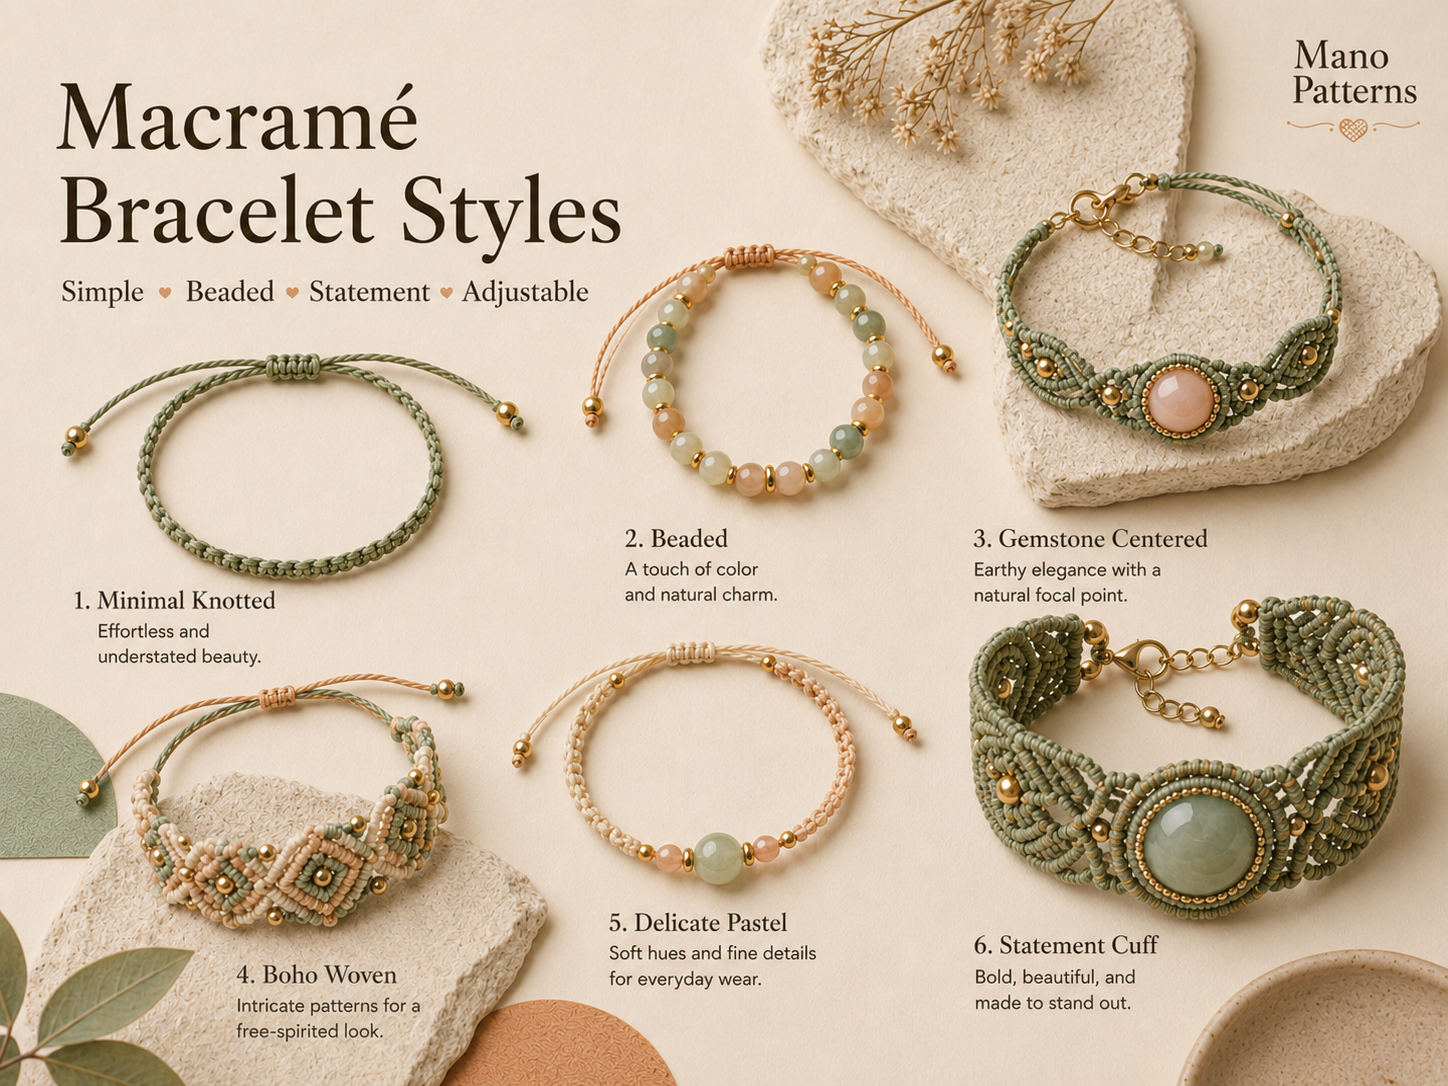
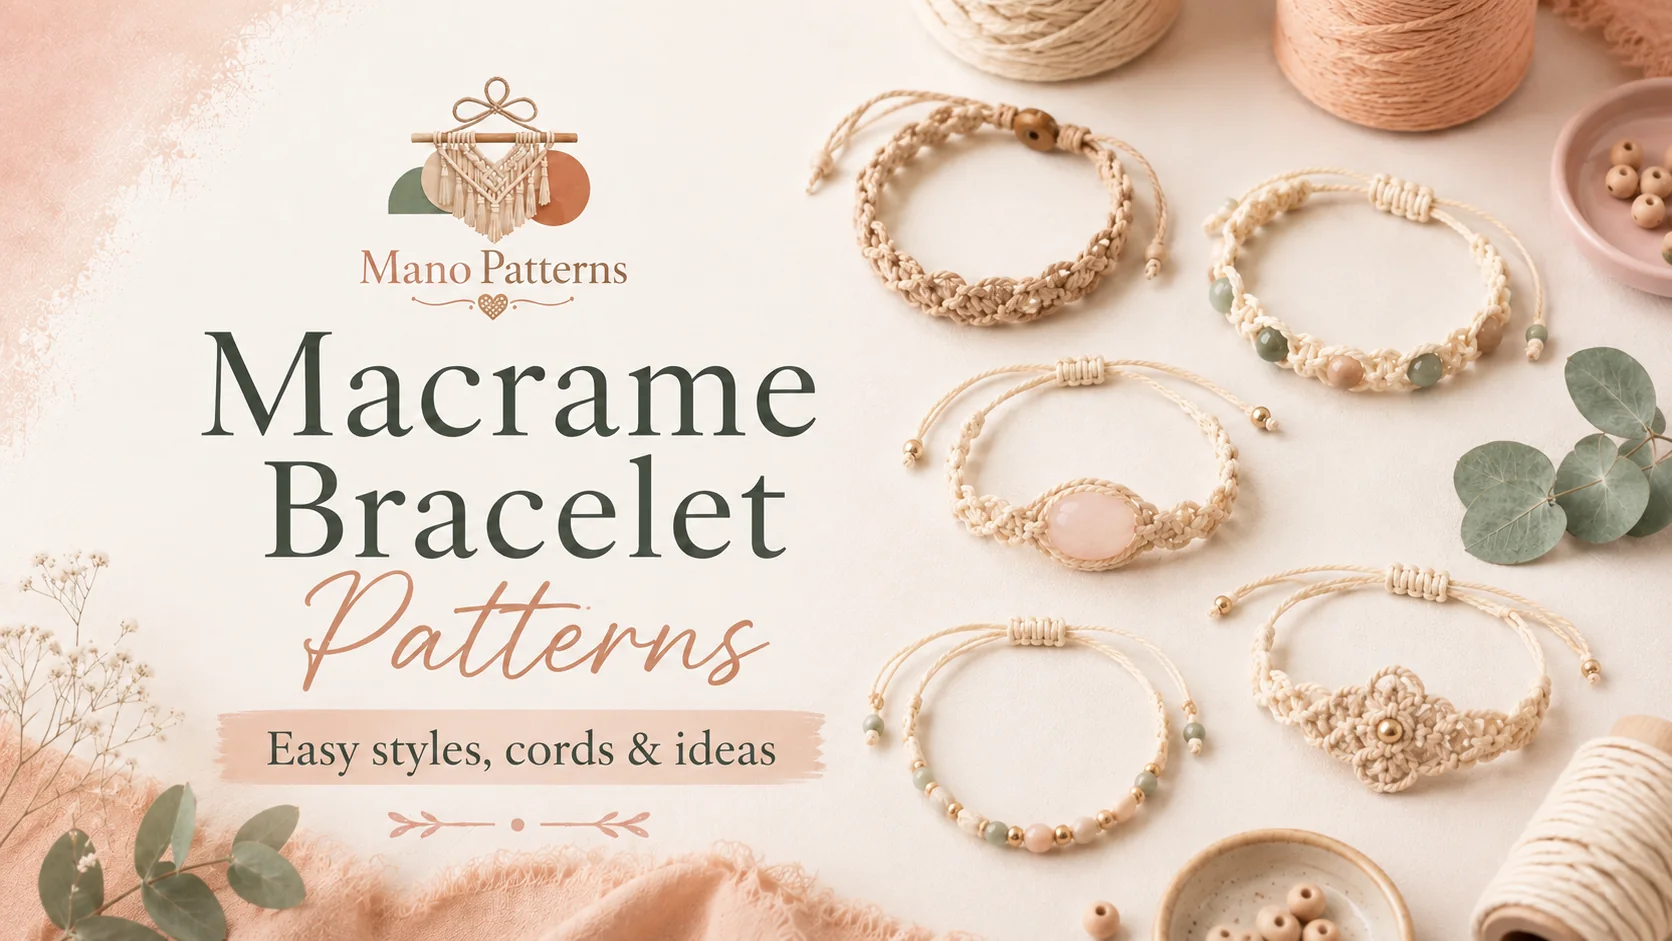
Macrame bracelet patterns showing adjustable knotted beaded and gemstone bracelet styles

Simple Knotted Bands

Narrow bands built from repeated square knots or half-knot spirals are among the easiest bracelet
structures to understand and customize.

Beaded Bracelets

Beads can be placed between knot sections, threaded onto filler cords or used as the central focal
point of the bracelet.

Gemstone & Focal Bracelets

Larger stones, decorative links or focal beads need balanced knotting on both sides so the centerpiece
stays centered on the wrist.

Micro-Macramé Bracelets

Fine cord allows more detailed motifs and curves, but small knots make uneven tension much easier to see.

Bracelets + Necklaces + Earrings

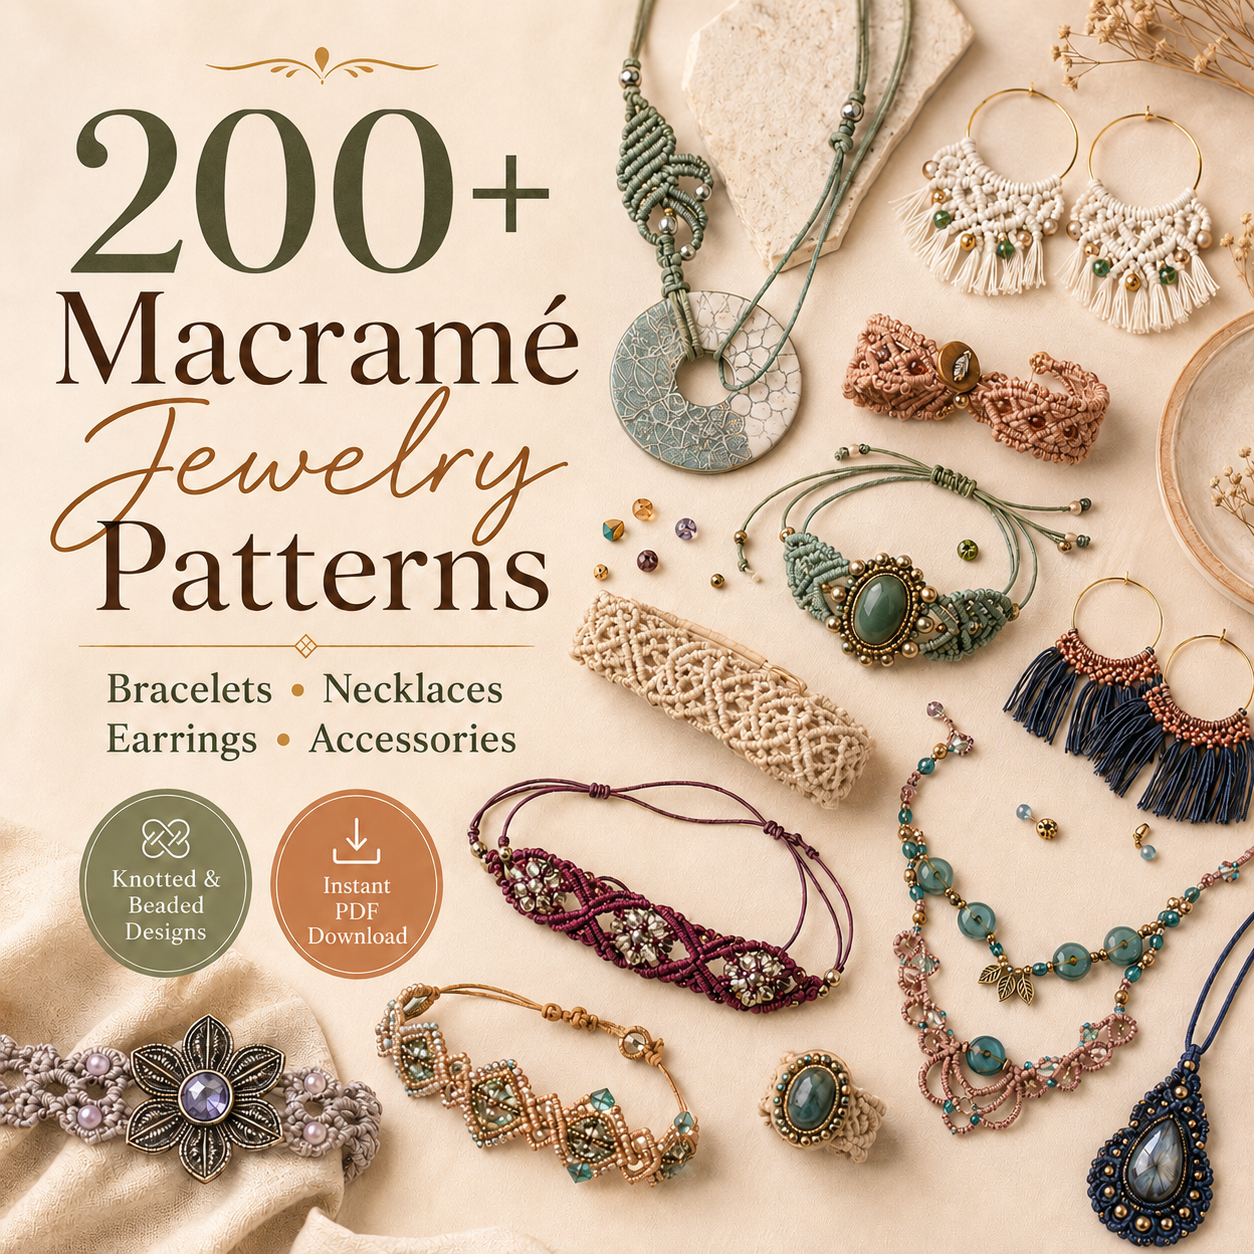
Get the Full 200+ Macramé Jewelry Patterns Bundle

Explore a large collection of bracelet, necklace, earring, pendant and beaded jewelry projects.
Start with a simpler bracelet and keep the more detailed designs for later.

200+ Patterns
Many Bracelet Styles
Beginner to Detailed
GET THE FULL 200+ PATTERNS BUNDLE →

200 plus macrame jewelry patterns bundle with bracelets necklaces earrings and accessories

Technique

Best Knots for Macrame Bracelets

You do not need dozens of knots. A small group of reliable techniques can create many different bracelet
textures and structures.

Square Knot

Useful for flat bracelet bands. Repeating complete square knots produces a balanced, relatively straight
structure when tension stays even.

Half-Knot Spiral

Repeating the same half of a square knot creates a natural twist, making it useful when you want a
spiral bracelet rather than a flat band.

Half Hitch & Double Half Hitch

Hitch-based knots are useful for diagonal lines, curves, borders and more detailed micro-macramé motifs.

Overhand & Finishing Knots

Simple knots are often used near beads, cord ends and closures where you need a compact way to secure
part of the bracelet.

If your bracelet is twisting unexpectedly: check whether you are repeating the same half-knot
instead of alternating sides to complete full square knots.


Beginner Technique Guide
Macrame for Beginners: 7 Essential Knots to Learn First

Materials

Choosing Cord for a Macrame Bracelet

Bracelet cord needs to be comfortable against the skin, strong enough for repeated wear and suitable for
the size of your knots and beads.

Fine synthetic jewelry cord

C-Lon and similar nylon cords are commonly used for detailed micro-macramé jewelry because they allow
small, precise knots and work well with many beads.

Cotton, hemp & other fibers

Softer natural cords can work well for casual bracelets and larger knot structures. The exact diameter
changes how bulky the finished band feels.
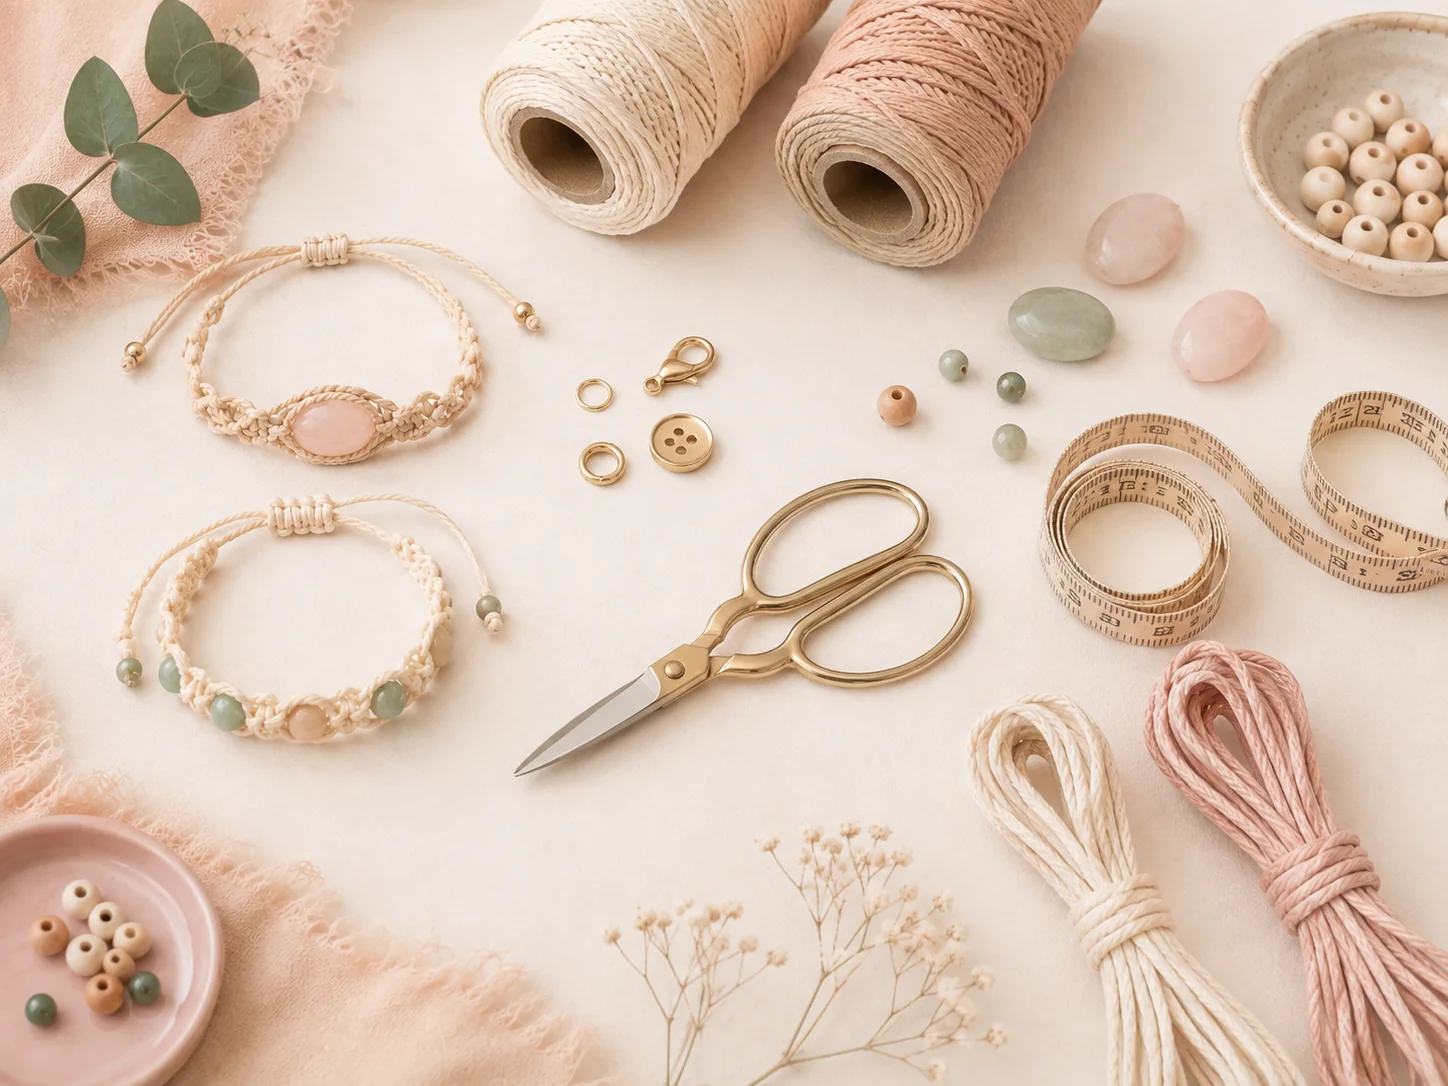
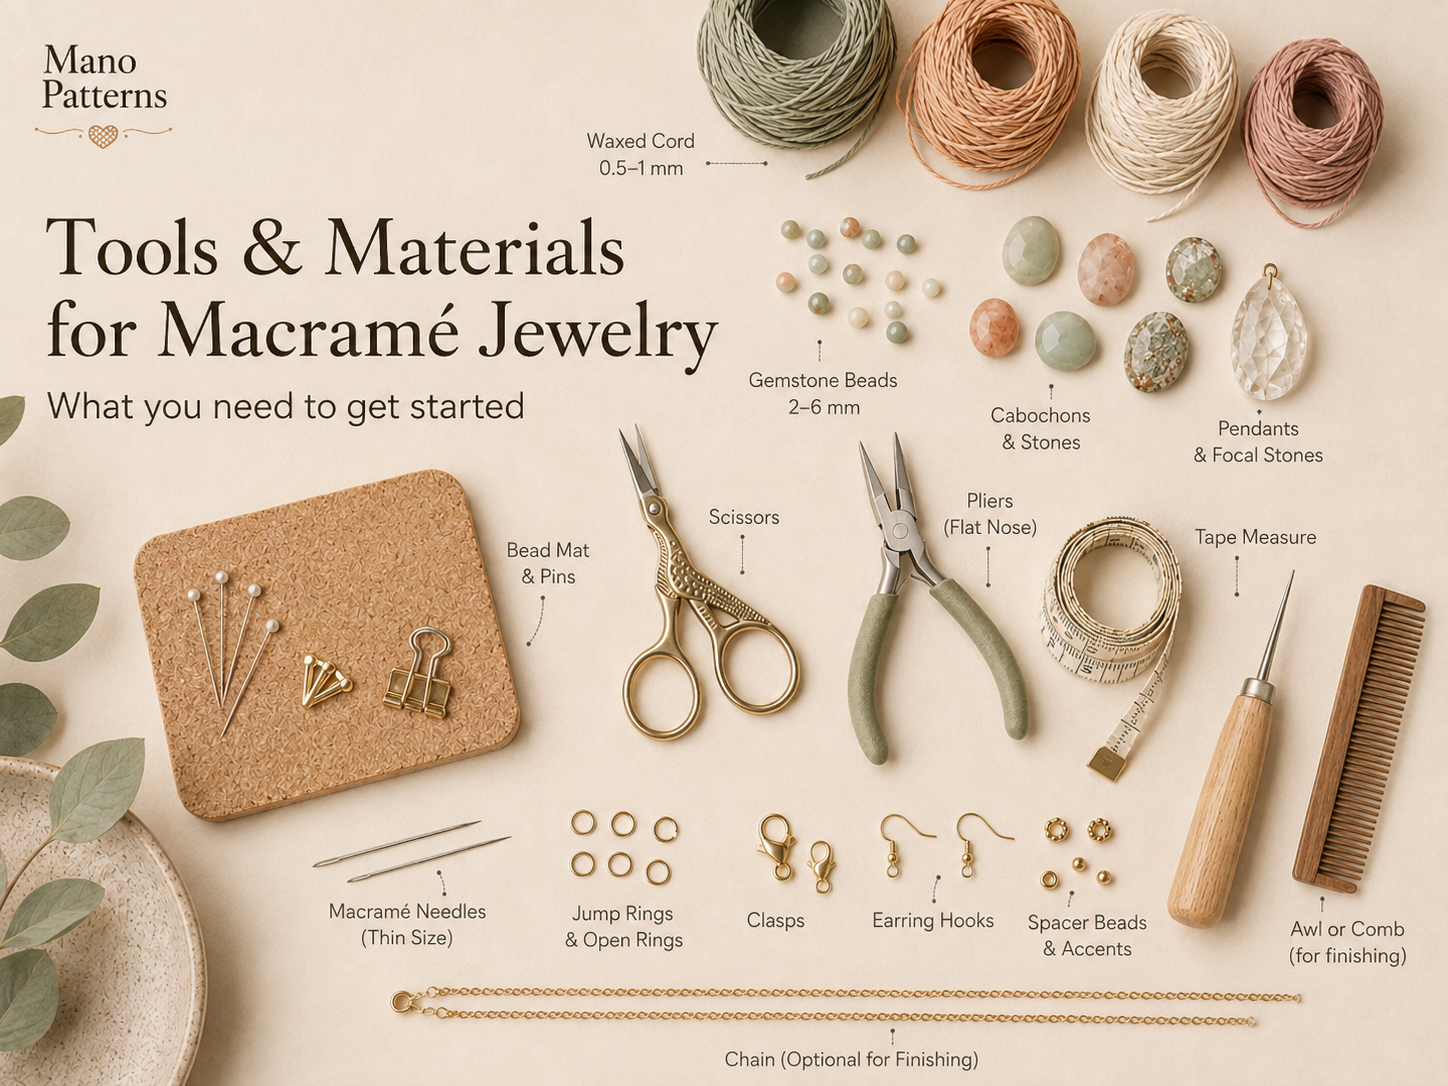
Macrame bracelet materials including cord beads scissors measuring tape clasps and findings
Before adding beads

Pass the actual cord through the bead hole before cutting all your strands. A bead that looks large enough
may still have a hole that is too small for doubled or multiple cords.

Fit Matters

How to Size a Macrame Bracelet

The wrist measurement is only the starting point. The closure, bead size and thickness of the finished
band all affect how the bracelet actually fits.

1. Measure the wrist
Wrap a flexible tape around the place where the bracelet will sit without pulling it too tightly.
2. Decide the fit
Choose whether the finished bracelet should feel fitted, slightly relaxed or fully adjustable.
3. Account for the closure
A button, clasp, toggle or sliding knot adds usable length. Include it before deciding where the knotted
section should end.
4. Test before finishing
Check the bracelet around the wrist before trimming, sealing or permanently securing the final cords.

Useful reference: finished bracelet length should be based on the wearer, the thickness of
the knotted band and the chosen closure rather than one standard measurement.

Finishing

Macrame Bracelet Closure Options

The closure changes both the appearance and the fit of the bracelet, so it is better to choose it before
you reach the final few rows.

Sliding Knot

A popular adjustable option for casual bracelets because the wearer can tighten or loosen the fit.

Button & Loop

Creates a handmade finish and can become part of the design. The loop needs to fit the button closely
enough to stay secure.

Toggle Clasp

Gives the bracelet a more traditional jewelry finish and works especially well with structured,
decorative bands.

Lobster Clasp & Jump Rings

Useful when you want a conventional jewelry closure or an extension chain for adjustable sizing.
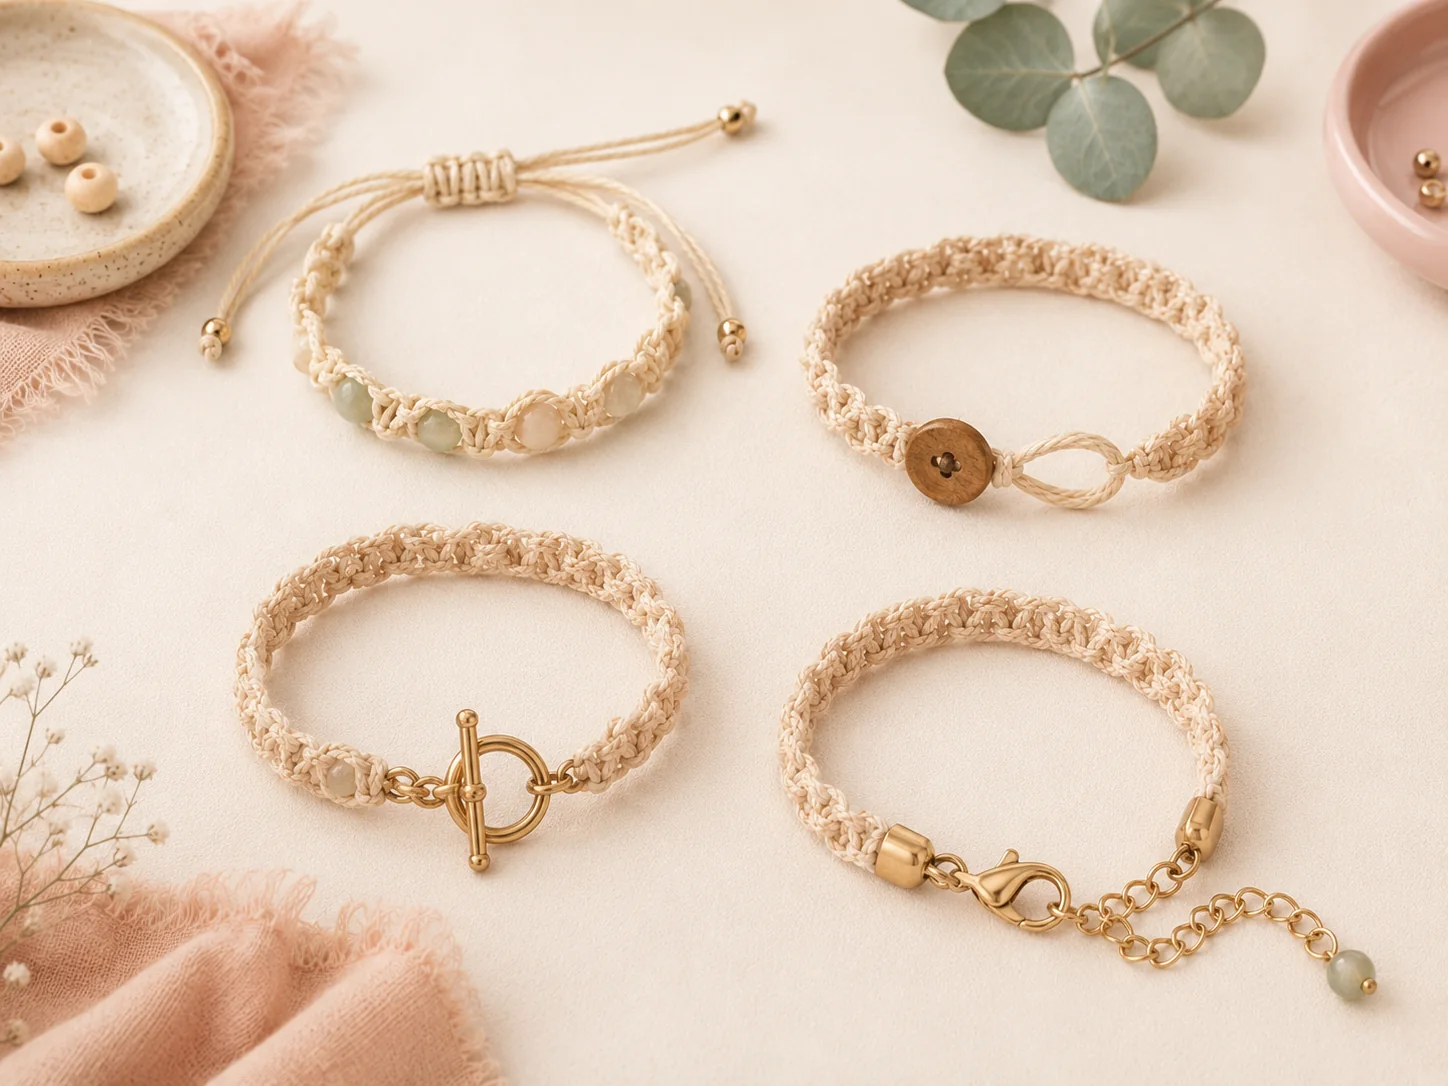
Macrame bracelet closure examples including sliding knot button loop toggle and lobster clasp

Decoration

Adding Beads Without Distorting the Bracelet

Beads should feel integrated into the knot pattern rather than pulling the band out of shape.

Keep focal beads centered

When a bracelet has one main stone or large bead, compare the knotting on both sides before finishing so
the focal point sits where you intended.

Watch the weight

Heavy beads can make a narrow band rotate around the wrist. A wider or more structured section can give
a heavier focal element more support.

Good design habit: lay out the beads beside the cords before knotting. It is much easier to
adjust spacing and color order before they are locked into the bracelet.

Beginner Workflow

How to Approach Your First Macrame Bracelet Pattern

A simple workflow makes the project easier to follow and reduces the chance of discovering a sizing or
closure problem at the very end.
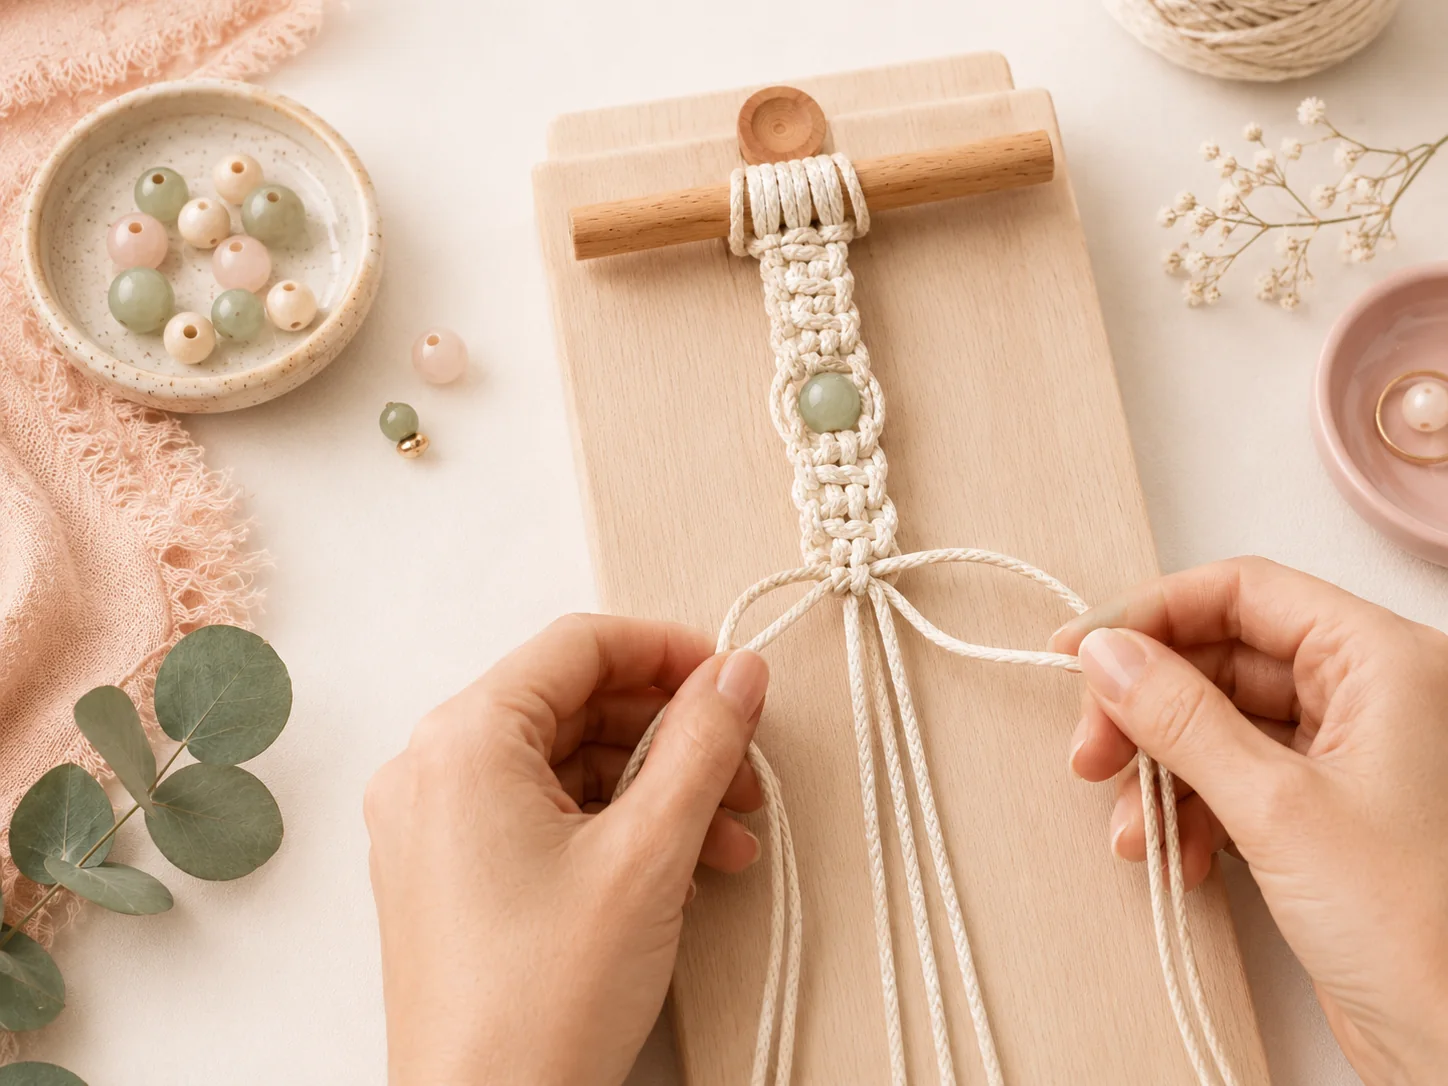
Hands making a macrame bracelet with cotton cord and beads on a work board
Read the complete pattern first
Check the required knots, cord lengths, beads and closure before cutting anything.
Prepare and organize the cords
Separate filler cords and working cords if the design uses them differently.
Secure the starting point
Clip or pin the bracelet so the work does not move while you apply tension.
Build the first repeat slowly
Make sure the knot direction is correct before repeating the same sequence across the band.
Check width and tension
Flatten the bracelet every few rows and compare both edges.
Test the finished length
Include the closure before deciding that the bracelet is long enough.

Choose Your Next Bracelet

Find Beginner-Friendly and Detailed Jewelry Projects in One Collection

The full 200+ collection gives you many bracelet styles to choose from, plus necklaces, earrings,
pendants and beaded designs for when you want to try something different.

GET THE FULL 200+ PATTERNS BUNDLE →

200 plus macrame jewelry pattern collection

Troubleshooting

Common Macrame Bracelet Problems

The band curves

One side is often being pulled more tightly than the other. Flatten the bracelet and compare both edges
frequently while working.

The knots look uneven

Aim for repeatable tension instead of maximum tightness. Extremely tight knots are not automatically
neater knots.

The bracelet is too long

The closure may not have been included in the measurement. Always test the complete bracelet structure
before finishing the ends.

The beads pull sideways

Check bead placement and the tension immediately around each bead before continuing the next section.

Quick Answers

Macrame Bracelet FAQ

Are macrame bracelets good for beginners?

Yes. A simple bracelet is a manageable first project because it uses a relatively small work area while
still teaching knot repetition, sizing and finishing.

What knot is best for a beginner macrame bracelet?

Square knots are a practical starting point because they can form a flat band and are used in many other
macramé projects.

Why is my square-knot bracelet twisting?

You may be repeating the same half-knot. Alternating sides completes full square knots; repeating one
side naturally creates a spiral.

Can I use beads in a beginner bracelet?

Yes. Test the bead holes with the exact cord first and keep the first design simple so you can focus on
even tension and placement.

Which bracelet closure is easiest?

Sliding closures are convenient for adjustable casual bracelets, while button loops and metal clasps
create different looks and sizing requirements.

Continue Learning

More Macramé Guides

Build the skills around your bracelet project with these related Mano Patterns guides.
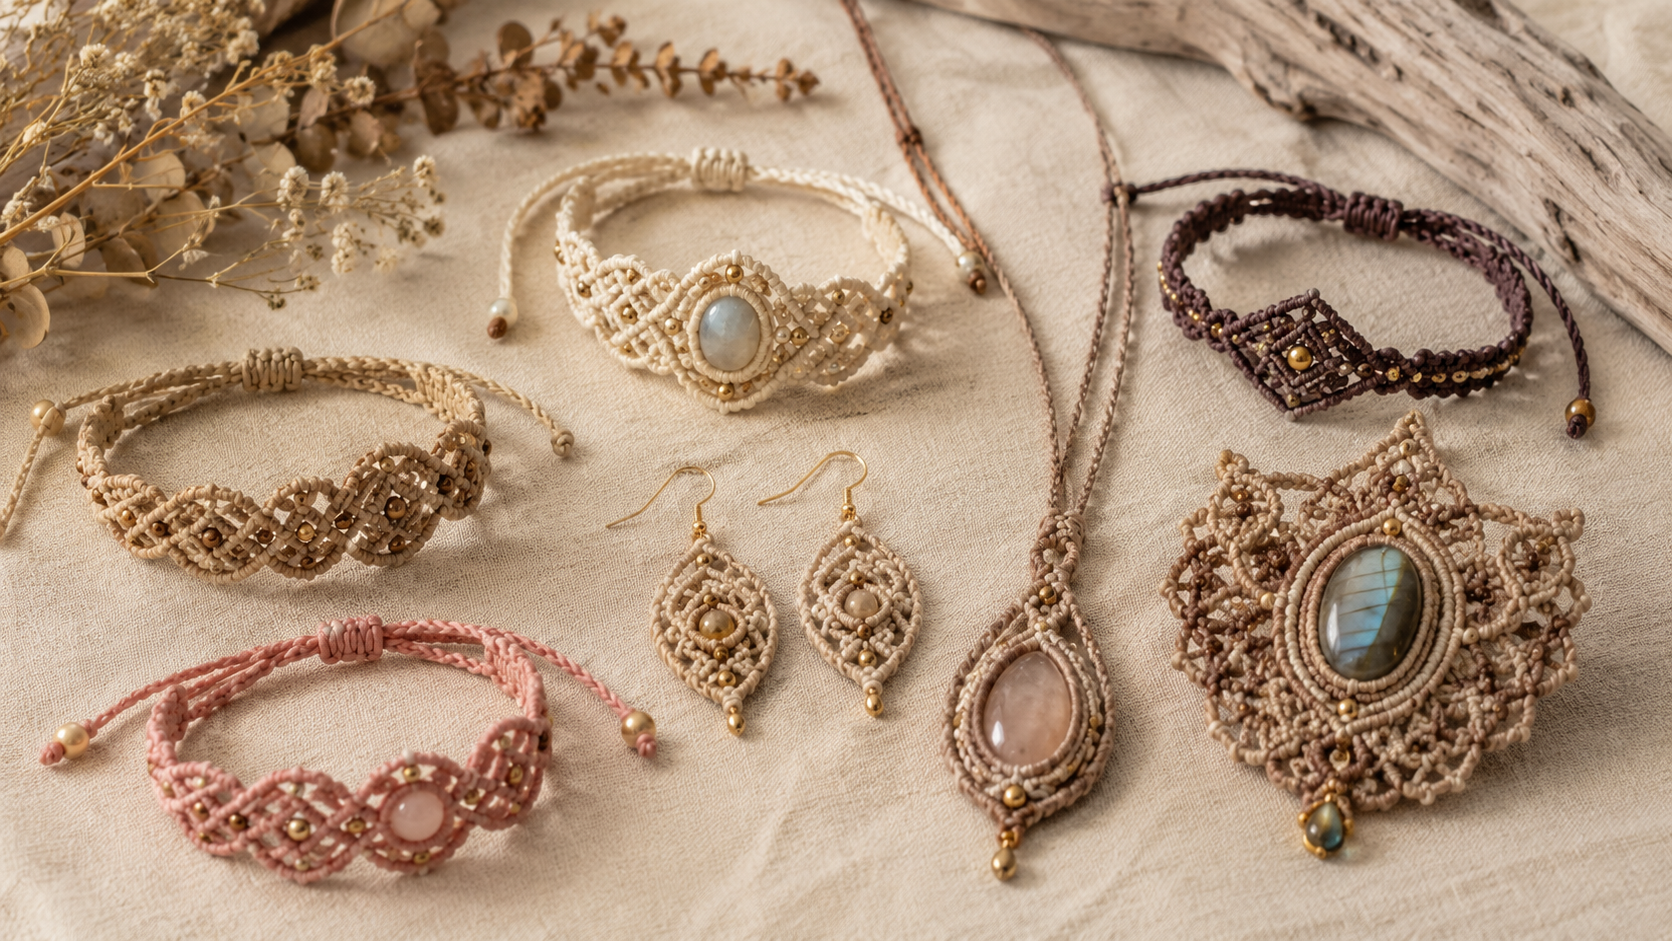
Posted on

Macramé Jewelry: Beginner Guide to Knots, Materials, Patterns & Designs

Handmade macrame jewelry including bracelets, necklace and earrings

Mano Patterns • Macramé Guide

Macrame jewelry is made by knotting fine cord into bracelets, necklaces, earrings,
pendants and other wearable pieces. For beginners, the most important things to learn
are not dozens of knots at once, but how to choose the right cord, keep tension even,
measure accurately, add beads or stones securely and finish the piece cleanly.

This guide walks through those practical details step by step, so you can understand
why a piece works — not just copy a finished design.

The Basics

How Macramé Jewelry Is Built

Macramé does not use stitches like knitting or crochet. The cords themselves become
the structure. Different knot directions, cord thicknesses and spacing create flat bands,
spirals, curves, openwork, gemstone frames and decorative edges.

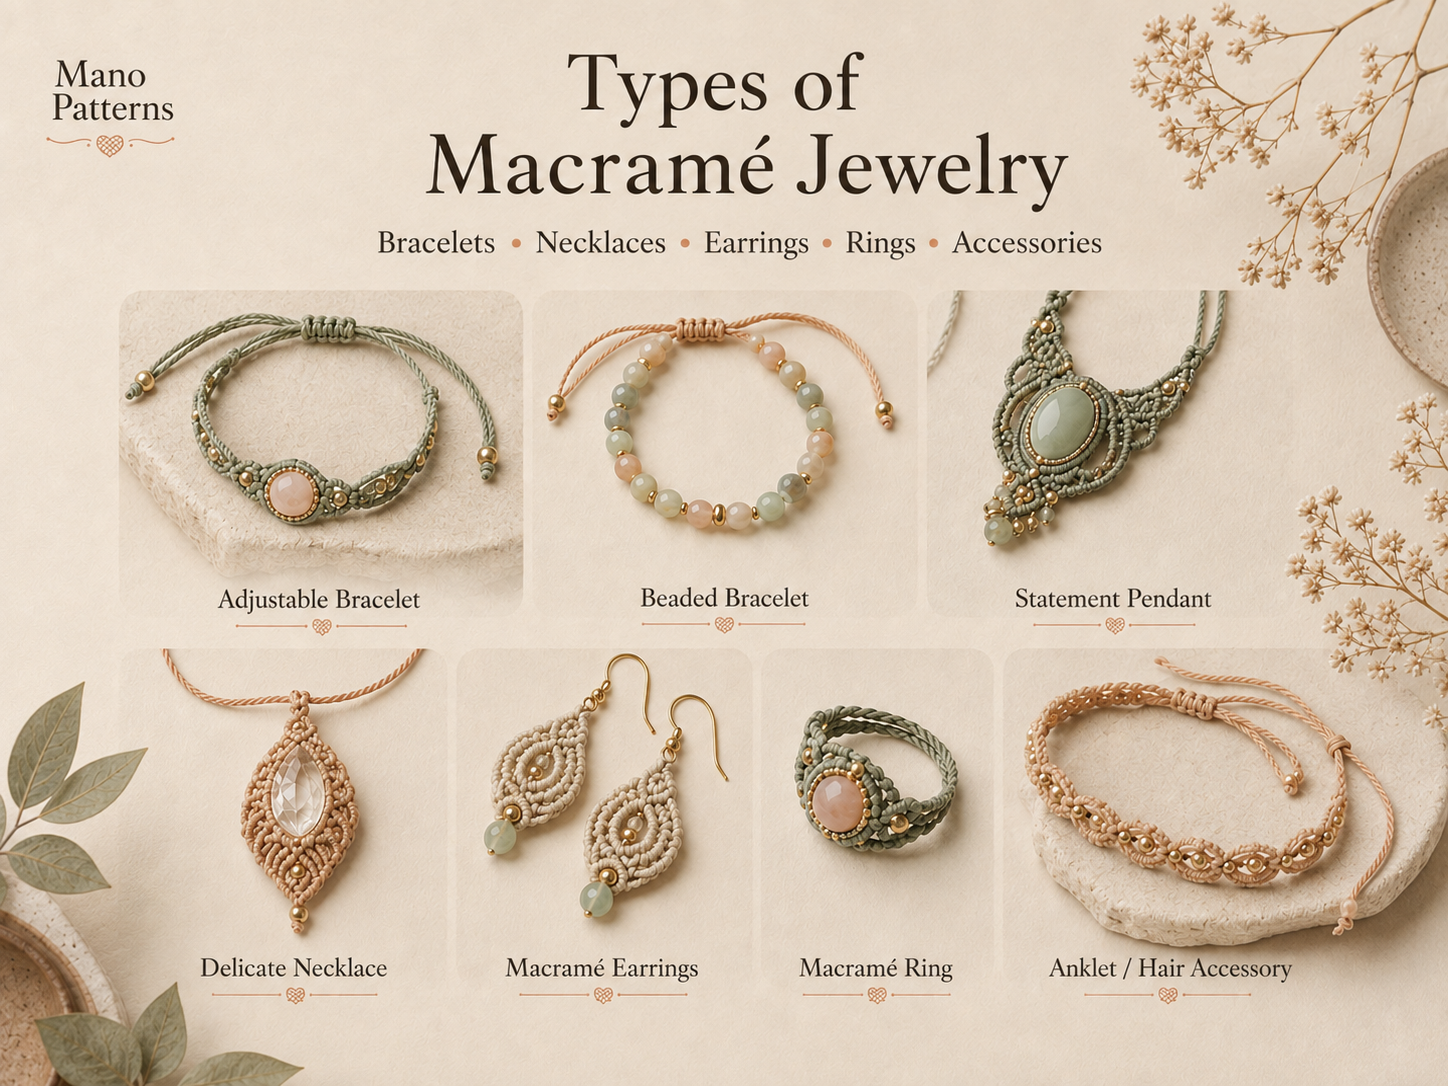
Macrame jewelry including bracelets necklaces earrings rings and accessories

The same basic knotting principles can be adapted to bracelets, necklaces, earrings,
rings and other small accessories.

Flat knotted bands

Square knots are often worked around one or more filler cords. This creates a flexible,
flat strip that works well for bracelets, anklets and narrow necklace sections.

Spirals

Repeating the same half of a square knot makes the work twist naturally.
This is useful when you want a decorative rope-like effect instead of a flat band.

Curves & shapes

Double half hitches can follow an angled guide cord, allowing you to create chevrons,
leaves, arcs and frames around beads or stones.

Stone-centered jewelry

Gemstones are held by a knotted frame or net. The frame must support the stone from
several directions so it cannot slide out when the jewelry moves.

Getting Started

Macrame Jewelry Tools & Materials

Jewelry-scale macramé uses fewer tools than many crafts, but small details matter more.
A stable work surface and compatible cord, beads and findings will save a lot of frustration.

Fine cord beads scissors pliers findings and measuring tape on a craft surface

A useful beginner setup includes fine cord, scissors, measuring tools, pins,
jewelry findings, beads and a firm knotting surface.

Item Why you need it What to check
Macramé cord Creates the entire structure. Diameter, flexibility, surface texture and finishing method.
Knotting board Keeps the project from moving. It should hold pins or clips securely.
T-pins / clips Anchor loops, clasps and guide cords. Smooth edges prevent snagging fine cord.
Sharp scissors Create neat cord ends. Small pointed blades are easier around close knots.
Pliers Attach clasps and open jump rings. Two small jewelry pliers give better control.
Beads & stones Add decoration and focal points. The hole or setting must fit your actual cord.
Findings Clasps, rings, ear wires and connectors. Match their size and weight to the jewelry.
Before cutting all your cord:
thread one test piece through the smallest bead or finding. If it frays, jams or needs force,
change the cord or bead before you start the project.
New to the terminology?
For a quick background reference, see the

macramé overview on Wikipedia
.

Material Guide

Choosing the Right Cord

For macrame jewelry, cord diameter controls knot size, drape and detail. Cord material controls softness,
fraying, grip and how the ends can be finished.

0.4–0.6 mm

Best for very fine micro-macramé, seed beads, detailed earrings and intricate gemstone work.
It gives excellent detail but exposes uneven tension quickly.

0.7–0.8 mm

A versatile jewelry range for bracelets, pendants and beaded pieces.
The knots stay defined without becoming bulky.

0.9–1.2 mm

Easier for beginners to see and handle. Useful for simple bracelets,
chunkier pendants and casual necklaces.

Above 1.2 mm

Better for intentionally bold jewelry. Fine details become larger very quickly,
so this size is usually less suitable for delicate micro-macramé.

Cord material matters too

  • Waxed polyester: crisp, durable and popular for micro-macramé and gemstone jewelry.
  • Nylon: smooth, strong and useful for fine knotting and beadwork.
  • Cotton: soft and natural-looking but can fuzz or fray more at very small sizes.
  • Hemp / linen-style cord: firmer and more organic-looking, ideal for rustic designs.
Use the pattern size first

If a pattern recommends 0.8 mm cord, do not automatically replace it with 1.5 mm.
Larger cord changes the knot size, bead compatibility and finished dimensions.

Technique

Essential Macrame Jewelry Knots

These four techniques cover much of what a beginner needs for bracelets,
pendants and simple jewelry structures.

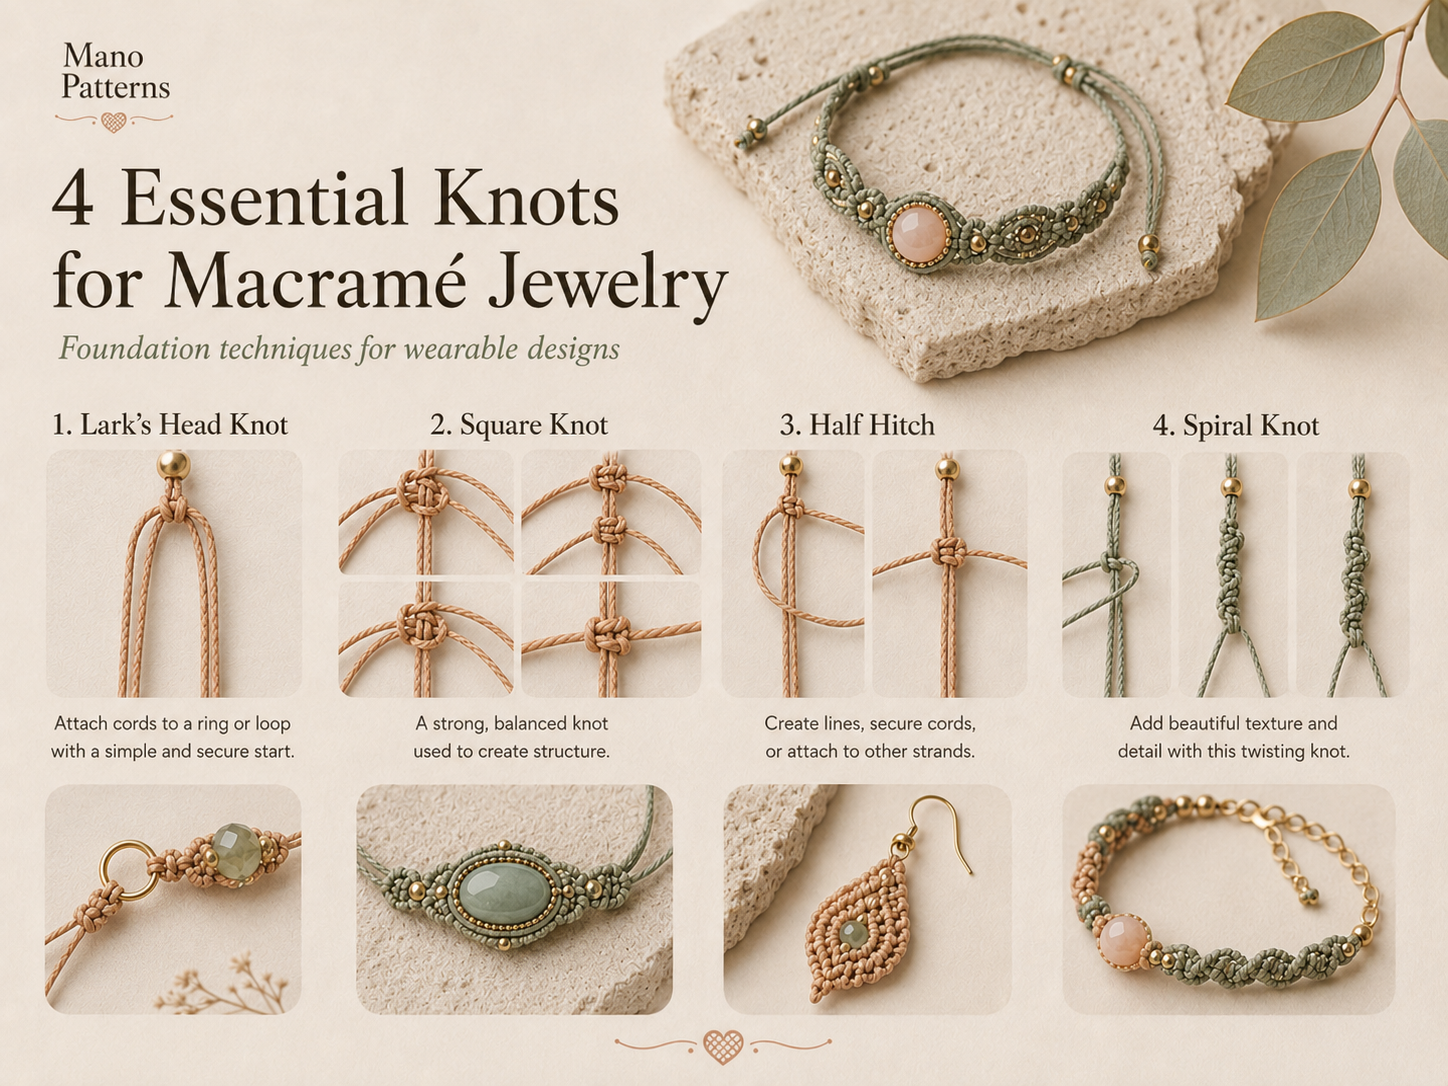
Square knot spiral knot larks head knot and double half hitch examples

Lark’s head knot

Used mainly to attach folded cords to a ring, bar, clasp or anchor cord.
It is often the starting point of a design.

Square knot

Made from two alternating half knots. It produces a stable, flat band and
is one of the easiest knots for bracelets.

Half-square / spiral knot

Repeating only one half of the square knot makes the cord twist into a spiral.
If your bracelet twists when it should be flat, this is often the reason.

Double half hitch

A working cord knots around a guide cord. Changing the guide cord’s direction
creates diagonals, curves, chevrons and gemstone frames.

Easy to Follow • Step by Step

Follow Clear Patterns From Start to Finish

Choose a project with easy-to-follow instructions and work through each step
from the first knot to the finished piece.

Step-by-Step Patterns
Easy Instructions
Practical Projects

See the Step-by-Step Patterns →

200 plus macrame jewelry patterns bundle with bracelets necklaces earrings and accessories

Project Focus

Macrame Jewelry Bracelets

Bracelets are excellent first projects because they teach sizing, repeated tension,
straight edges and closures without requiring a large amount of cord.

Adjustable beaded and gemstone bracelet styles

Measure correctly

Measure where the bracelet will sit, then include the length added by the clasp,
button loop or sliding closure. Measuring only the knotted center often makes the finished piece too long.

Keep the band straight

Uneven pulling causes one edge to shrink and the bracelet to curve.
Flatten the work every few rows and compare both sides.

Choose the closure early

Sliding knots are adjustable, button loops are simple and decorative,
and lobster clasps give a more traditional jewelry finish.

Add beads carefully

Thread beads onto the correct filler or working cord, center them before tightening,
and check that the surrounding knots do not pull the bead sideways.

Project Focus

Macramé Necklaces & Pendants

In macrame jewelry, necklace construction depends on the focal point, finished length and weight of the design.
A small pendant behaves very differently from a wide gemstone statement necklace.

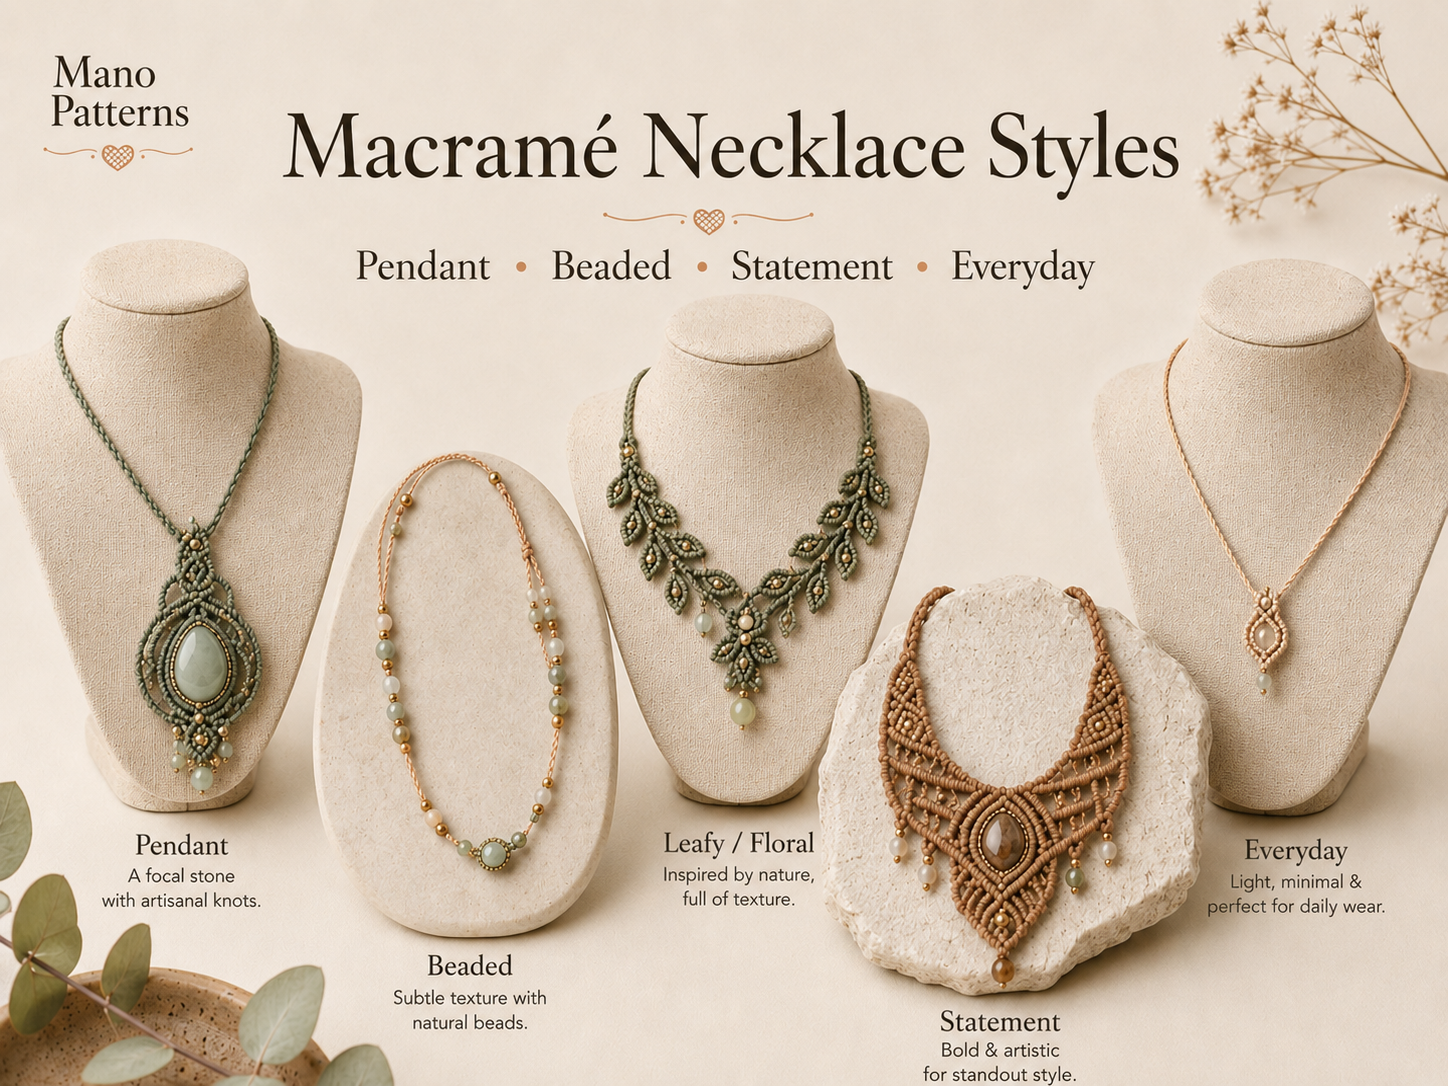
Pendant gemstone and statement necklace styles

Pendant necklaces

The transition between pendant and neck cords should be secure without becoming bulky.
Test how the pendant hangs before trimming any structural cords.

Gemstone holders

The stone must be supported from several directions.
Gently move the finished frame before trimming to make sure the stone cannot slide out.

Statement pieces

Mark the center first and build mirrored sections outward.
Counting rows on both sides helps keep large designs symmetrical.

Comfort & weight

Heavy stones and metal beads add weight quickly.
Make sure the cord, clasp and attachment points can support the finished piece.

Small-Scale Projects

Macramé Earrings & Accessories

Small macrame jewelry projects use less material, but symmetry and finishing become more visible,
especially when two earrings need to match.

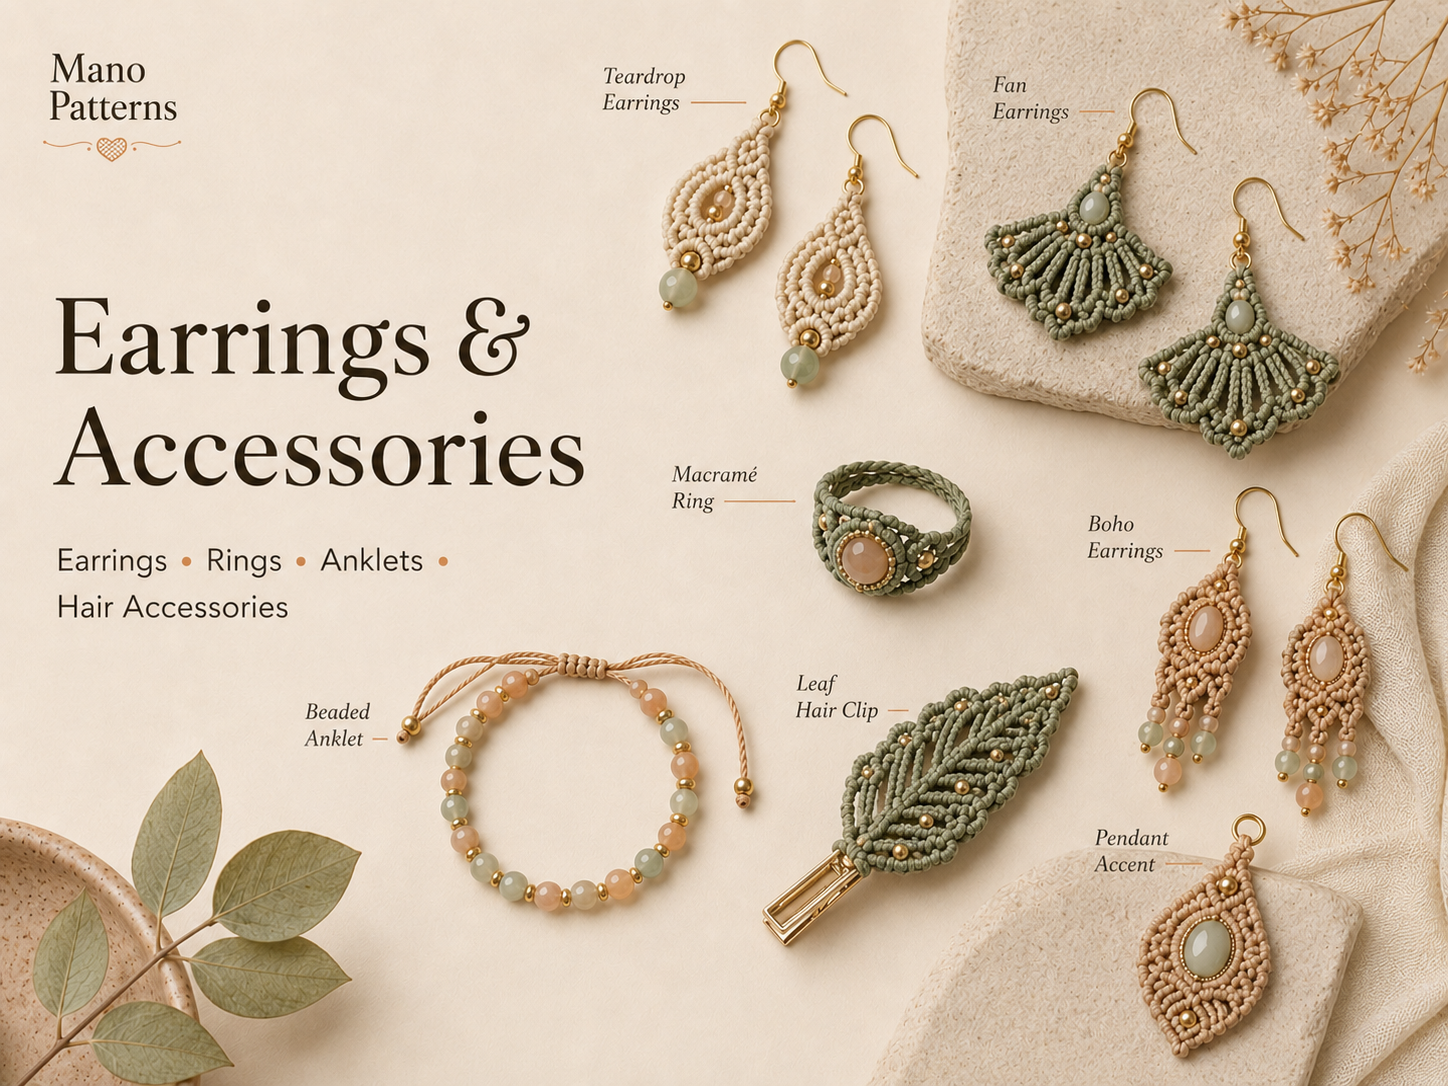
Earrings rings anklets hair accessories and small pendants

Make pairs together

Cut both sets of cords at the same time and compare the two earrings after every main row.
This makes matching tension easier.

Watch the weight

Ear wires, rings, beads and dense knotting can become heavy.
Fine cord and fewer heavy components usually make earrings more comfortable.

Trim fringe last

Let the finished piece hang naturally before cutting fringe.
Trimming while it is twisted or pinned can create an uneven edge.

Close jump rings correctly

Open jump rings sideways with pliers instead of stretching them apart.
This helps them return to their original shape and close without a gap.

Beginner-Friendly Projects

Start With an Easy Pattern

Find simple bracelets, necklaces and small jewelry projects that are easier
to follow while you build confidence with the basic knots.

Beginner Friendly
Simple Projects
Build Your Skills

Browse Beginner-Friendly Patterns →

Large macrame jewelry pattern collection with beginner friendly projects

Decorative Details

Adding Beads & Gemstones

In macrame jewelry, beads and stones change both the appearance and the construction of a piece.
Plan them before knotting so the cord diameter, bead holes and frame all work together.

Bead-hole size

Check how many cords must pass through each bead.
A hole that fits one 0.8 mm strand may not fit two strands together.

Center focal beads

Position the bead before tightening the next row.
Pulling one side first can move the focal bead away from the center.

Irregular stones

Natural stones are not always perfectly symmetrical.
Build the frame around the real stone instead of forcing identical spacing on both sides.

Check security

Before trimming, gently rotate and move the stone.
If it shifts toward an opening, tighten or rebuild the nearest knots.

Fine Detail

Understanding Micro Macramé

Micro macramé uses much finer cord and smaller knots.
The technique allows detailed curves, gemstone settings and beadwork,
but it requires more consistent tension.

Why the detail increases

Finer cord lets you fit more knots into the same space,
creating smoother curves and more intricate motifs.

Why mistakes show more

A small change in knot size is easier to notice when the entire design is miniature.
Work slowly and seat each knot before tightening it.

Useful setup

A firm board, fine pins, strong lighting and sharp scissors make tiny knots much easier to control.

When to try it

Move into micro macramé after you can make even square knots and double half hitches
without constantly adjusting their size.

Beginner Workflow

Macrame Jewelry for Beginners: From Cord to a Finished Bracelet

The exact cord lengths and knot counts depend on the pattern,
but this workflow applies to most beginner bracelet projects.

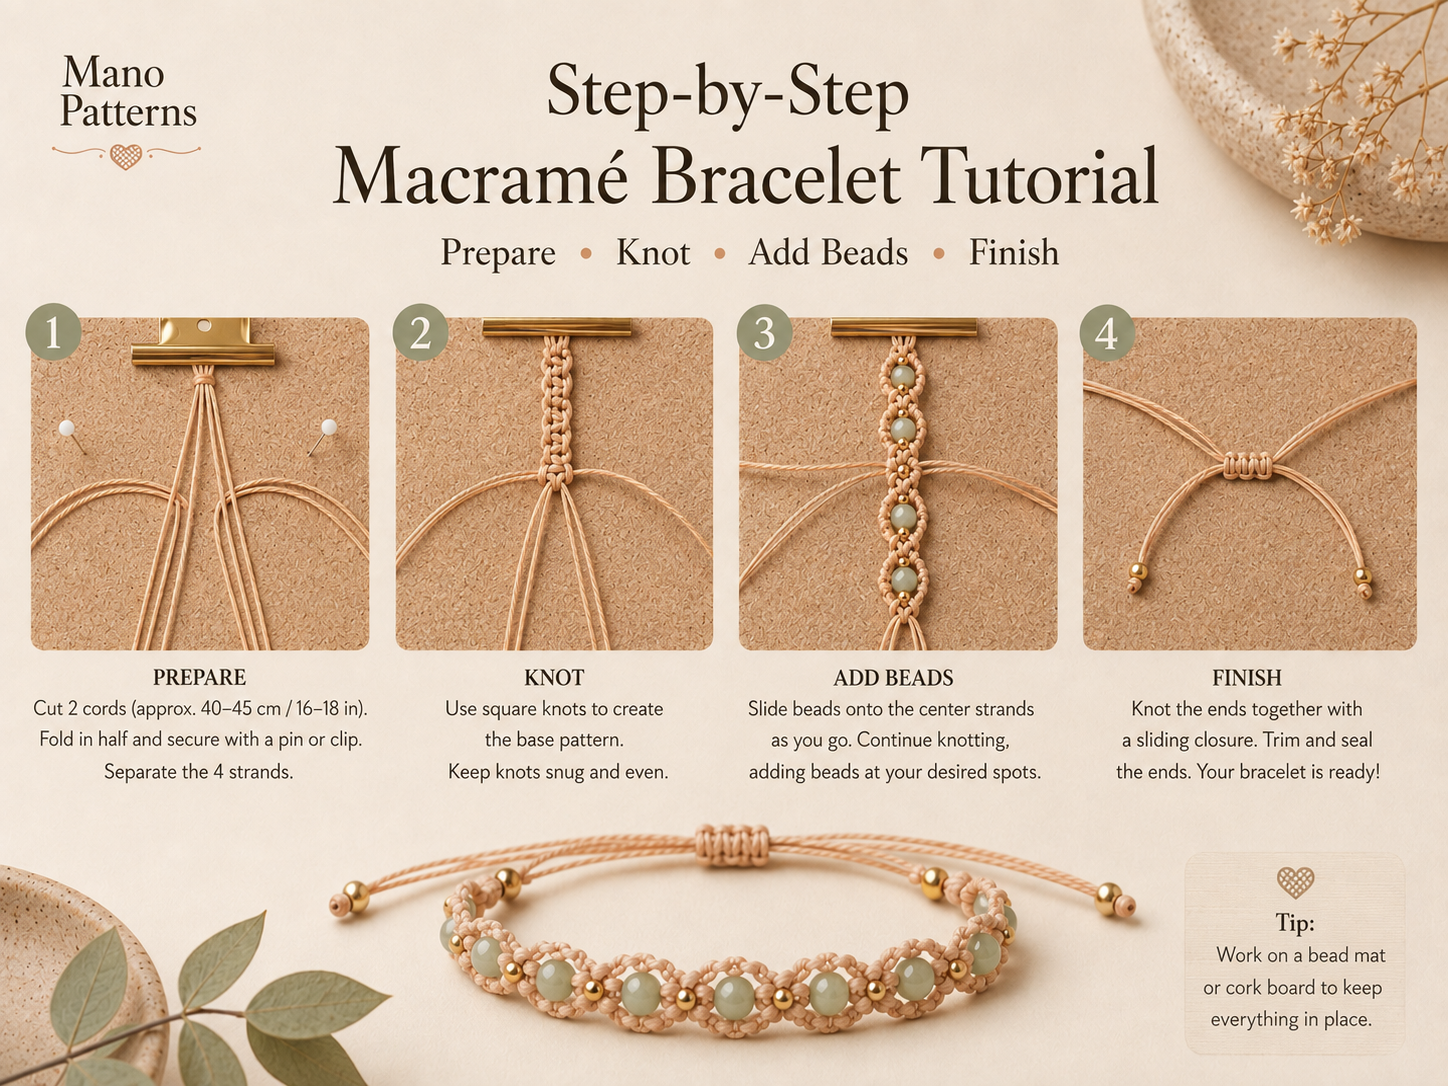
Bracelet making steps from measuring cord to finishing the closure
Measure the wrist
Decide the finished size and whether the bracelet will be fitted or adjustable.
Read the whole pattern
Identify cord lengths, bead placement, knot sequence and closure before cutting.
Cut and organize
Separate working cords from filler cords so you always know which strand should move.
Anchor the work
Pin or clip the top securely so the piece does not slide when you apply tension.
Build the first repeat slowly
Make sure the knot direction is correct before repeating it across the bracelet.
Add beads or stones
Center each focal element before tightening the next row.
Test the final length
Include the closure in the measurement before you finish the last knots.
Finish and inspect
Secure the ends and check every connection before wearing or gifting the piece.

Finishing

Closures, Ends & Final Details

Good finishing makes macrame jewelry look intentional and helps prevent the knots from loosening.

Sliding closure

Two bracelet ends overlap and are wrapped with a small knotted section.
It should hold its position but still move when intentionally pulled.

Button-and-loop

Test the loop before trimming. Too large and it may slip open;
too small and the button will be difficult to push through.

Clasps & jump rings

Make sure the jump ring is fully closed and that the knotted attachment
cannot slide through a small gap.

Cord ends

Synthetic and natural fibers require different finishing methods.
Follow the cord manufacturer’s guidance rather than using the same method on every material.

Common Problems

Beginner Troubleshooting

Problem Likely cause Fix
Bracelet curves One side is tighter. Flatten the work frequently and compare both edges.
Band twists The same half-square knot is being repeated. Alternate the two halves to make full square knots.
Bead will not thread Hole is too small or the cord end is frayed. Trim the end cleanly and use a compatible bead if needed.
Stone feels loose The frame is too open. Rework the nearest rows before trimming any cord.
Bracelet is too long Closure length was not included. Measure the complete piece including clasp or sliding section.
Knots look uneven Tension changes from row to row. Seat each knot against the previous one before tightening.

Quick Answers

Macramé Jewelry FAQ

Is macrame jewelry suitable for beginners?

Yes. A simple bracelet or pendant using one or two repeated knots is a practical place to start.

What cord size is easiest for a beginner?

Many beginners find approximately 0.8–1.2 mm easier to see and control,
but always follow the size recommended by the pattern when possible.

Which knots should I learn first?

Lark’s head, square knot, half-square knot and double half hitch give you a strong basic foundation.

Can I add beads to macramé jewelry?

Yes. Check that the hole fits the required number of cords and test placement before tightening the next row.

Why does my bracelet twist?

If you intended a flat square-knot band, you may be repeating the same half knot instead of alternating sides.

Full Macramé Jewelry Collection

Get the Complete 200+ Pattern Bundle

Keep the full collection in one place with 200+ bracelets, necklaces,
earrings, pendants and more to choose from.

200+ Patterns
Full Collection
Many Jewelry Styles

Get the Full 200+ Collection →

Complete 200 plus macrame jewelry patterns collection

Read More

More Macramé Guides

Choose the topic you want to explore in more detail next.